National Park Entrance Reservations Required for 2026
Carlsbad Caverns, congestion, entrance, Glacier, Mount Rainier, peak season, reservations, Rocky Mountain, summer, Yosemite
Because of increased visitation to many popular US National Parks, advance entrance reservations are now required during peak visitation periods. These reservations must be purchased in advance at www.recreation.gov, or by using the mobile app (https://www.recreation.gov/mobile-app) or calling (877) 444-6777. They will not be available for purchase at the parks; and visitors who arrive without national park entrance reservations will be turned away. It’s a good idea to print or save a digital copy of your reservation on your phone, as cell service is not available at many national park entrance stations. A photo ID is also required, and it must match the name on the reservation.
Entrance reservations are not required if you have lodging, camping or tour reservations; however you must show confirmation of those reservations at the park entrance. Entrance reservations are required even if you have a national park pass. And if you don’t have a national park pass, you will still need to pay the entrance fee even if you have an entrance reservation. Questions about the entrance reservations can be directed to the specific national park you intend to visit.
Here’s what you need to know about the 2026 national park entrance reservations. More information will be posted as soon as it becomes available from the National Parks Service.
Mount Rainier National Park
No entrance reservations will be required for any part of Mount Rainier National Park in 2026.
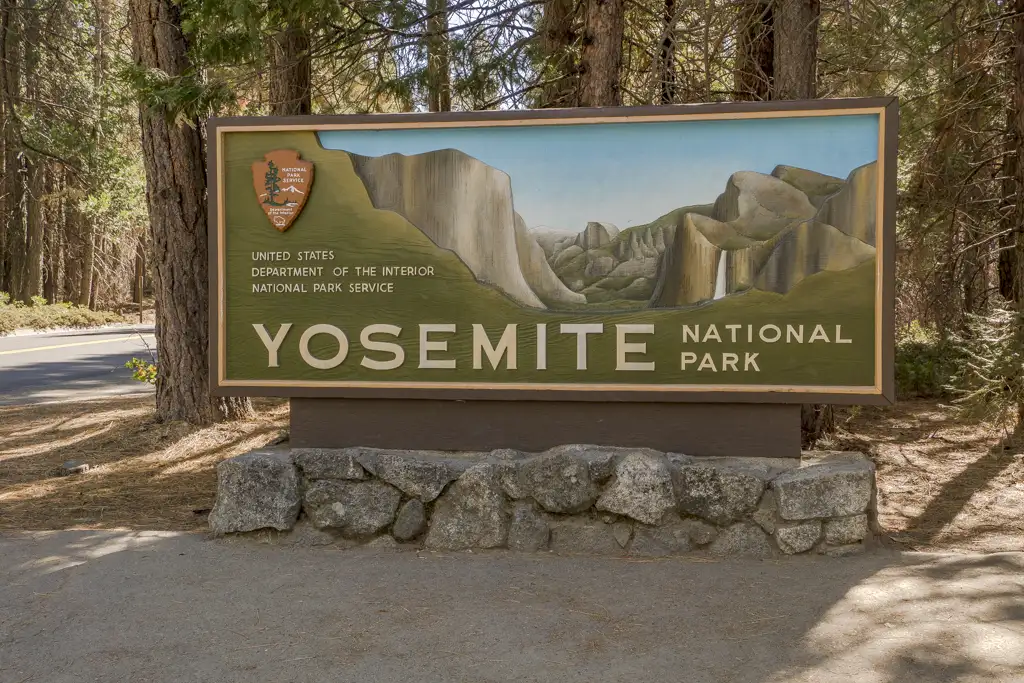
Yosemite National Park
After a comprehensive review of the 2025 traffic patterns, Yosemite National Park officials announced that there will be no vehicle or day-use reservations required in Yosemite in 2026.
That said, advance planning is still necessary as they also announced that “While a season-long reservation system will not be implemented, the park will continue to utilize strong traffic management strategies to support visitor safety, access, and resource protection. If Yosemite Valley reaches capacity, vehicles will be redirected to other areas of the park, including Wawona, the Mariposa Grove, Tuolumne Meadows, and Glacier Point Road.”
In short, just because you get past the entrance gate, doesn’t mean you will be able to access Yosemite Valley. It should be noted that Yosemite Valley is home to the bulk of the popular visitor attractions like Yosemite Falls and the miles of bicycle paths that wind through the valley. So plan to get to Yosemite Valley early to avoid disappointment. Here are some suggestions to beat the crowds and make the most of your Yosemite visit in 2026 (www.emerginghorizons.com/wheelchair-accessible-yosemite-what-you-need-to-know-for-a-2026-visit/).
And for suggestions on wheelchair-accessible things to do in the park, visit https://emerginghorizons.com/barrier-free-travelyosemite-sequoia-and-kings-canyon-national-parksfor-wheelers-and-slow-walkers/#itins.
Visitors with camping or hotel reservations will be allowed access to their accommodations.
For real-time parking updates, text YOSEMITE to 333111. Plan ahead to avoid disappointment!
Acadia National Park
Vehicle reservations are required for Cadillac Summit Road in Acadia National Park from May 20, 2026 to October 25, 2026. This scenic three-mile drive leads up to highest peak in the park. The Island Explorer Bus does not run along this road, so they only way to access it during peak visitation times is by a personal vehicle with the appropriate vehicle reservation. Recreational vehicles, trailers and vehicles over 21 feet long are prohibited along this road.
There are two type of vehicle reservations available – Daytime Reservations and Sunrise Reservations.
Daytime Reservations have a 30-minute entry window, while Sunrise Reservations have a 90-minute entry window. Sunrise times range from from 4:45 AM in mid-June to 6:15 AM in mid-October.
Thirty percent of the Daytime Reservations and Sunrise Reservations will be available for purchase at 10 AM (ET) 90 days prior to the reservation date. The remaining 70 percent of the Daytime Reservations and Sunrise Reservations will be available for purchase at 10 AM (ET) two days prior to the reservation date.
One Daytime Reservation is allowed per day, and one Sunrise Reservation is allowed per seven days.
Daytime Reservations and Sunrise Reservations are priced at $6 each. A park entrance pass is required along with the vehicle reservation. It’s also important to note that vehicle reservations do not guarantee a parking space, and parking is prohibited outside of designated spaces.
Arches National Park
Arches National Park has lifted the timed entry reservation requirement for 2026. That said, when the parking lots fill, they will close their gates for 3-5 hours. Official advice is to arrive before 8 AM or after 4 PM for the best shot at snagging a parking space.
Glacier National Park
Vehicle reservations will not be required anywhere in Glacier National Park in 2026. That said, new parking restrictions are in place for Logan Pass, and the Going-to-the-Sun Road Shuttle will require advance tickets.
Logan Pass Parking
All private vehicles will only be allowed to park at Logan Pass for a maximum of three hours. Overnight parking will not be permitted, except for visitors with a backcountry permit or for guests of Granite Park Chalet.
Going-to-the-Sun-Road Shuttles
Shuttles to Logan pass are no longer free, and they will not pick up passengers who do not have tickets. Tickets are not available in the park and they must be purchased in advance at www.recreation.gov. All passengers aged two and up will need a ticket in order to board the shuttle. There will be a $1 processing fee for each ticket.
Starting on May 2, 2026 at 8 AM MDT Going-to-the-Sun Road Shuttle tickets will be available for purchase 60 days in advance at www.recreation.gov. The remaining tickets will be available at 7 PM MDT, for next day entry beginning on June 30, 2026.
West side routes will provide express service to Logan Pass, departing from Apgar Visitor Center and Lake McDonald Lodge with stops at the Loop (in the afternoon) and Logan Pass only. West side shuttles will not make stops at Avalanche in 2026. If you wish to explore the Trail of the Cedars or Avalanche Lake you must have a private vehicle.
The East side routes will provide express service to Logan Pass, departing from St. Mary Visitor Center and Rising Sun.
And as in previous years, shuttle riders will be able to transfer between routes at Logan Pass.
Rocky Mountain National Park
Visitors to Rocky Mountain National Park are required to have a timed entry permit to enter the park beginning May 22, 2026. There are two Rocky Mountain Entry Permits.
The Timed Entry Permit will allow access to all areas of the park, except the Bear Lake Corridor. It will be valid from 9 AM to 2 PM. It is required until October 12, 2026. All permits will be timed, and will require the permit holder to enter the park within a 2 hour window.
The Timed Entry+ Bear Lake Road Permit will allow entry to the Bear Lake Corridor, as well as the rest of the park. It will be valid from 5 AM to 6 PM. It is required until October 18, 2026. Once you enter the park, you can stay as long as you like; however if you try to enter the park outside of your two-hour designated entry time (ie: you arrive late), you will be told to turn around and return after 2 PM.
Both entry reservations can be purchased at www.recreation.gov. There is a $2 charge for each reservation. If you plan to visit the park for more than one day, you will need an entry permit for each day.
Reservations for the majority of the permits will be released on 8 AM MDT on the following dates.
- May 1, 2026 for permits from May 22 to June 30
- June 1, 2026 for permits for the month of July
- July 1, 2026 for permits for the month of August
- August 1, 2026 for permits for the month of September
- September 1, 2026 for permits for the month of October
The remaining entry permits will be available for purchase at 7 p.m. the day before the planned visit.
Carlsbad Caverns
Last but not least on the list of national park entrance reservations is Carlsbad Caverns. Although technically you don’t need a reservation to get in to the park, you do need one if you actually want to see the famous caverns.
Every person — even children — needs a timed ticket to enter the caves. Tickets are good for entrance from the entrance time to the closing time of the caverns (2:30 PM). So for example, if you have an 11:00 reservation, it is good from 11:00 to 2:30.
These tickets are priced at $1 each, and they are available at www.recreation.gov. And again, make sure you print out your tickets or save a screen shot of them, as cell service is spotty in the park. Walk-up tickets are usually available; however they do sell out on busy days, so it’s best to purchase them in advance.
Plan ahead to avoid disappointment, and get your national park entrance reservations as soon as you make your travel plans.

Barrier-Free Travel
Glacier, Yellowstone
and Grand Teton National Parks
for Wheelchair-Users and Slow Walkers

 Under the Air Carrier Access Act (ACAA), US airlines are required to accept service animals on all their flights. Additionally, foreign air carriers are required to accept service animals on all flights to and from the US. Psychiatric service animals are treated the same as service animals under the ACAA. And, after the ACAA update in 2021, airlines are no longer required to accommodate emotional support animals. They are now treated as pets and are subject to pet rules and additional charges. So here’s what you need to know about flying with a service animal.


 Have you ever arrived at a hotel, reservation in hand, only to discover that the hotel gave away your accessible room? Or worse yet, been told by a reservation agent that they cannot reserve a specific accessible room for you? It’s not only frustrating, but it’s also illegal in the US under the Americans with Disabilities Act (ADA). But unfortunately it does happen. With that in mind, here’s what you need to know about the law, so you can be a more effective-self advocate.


 Travel by its very nature requires a good amount of preparation, especially when it includes air travel. Factor a disability into that equation and the complexity increases. With that in mind, here are some helpful tips for flying with a wheelchair.
 Nearly a year ago, on July 26, 2023, the Department of Transportation (DOT) announced a new accessible airline lavatory rule. Unfortunately it will still be many years before single aisle aircraft with more than 125 seat have accessible lavatories, but at least it’s a start. The rulemaking process has been going on for quite some time and the DOT took into consideration comments from consumers, airlines and disability organizations.