As a travel writer since 1977, Candy Harrington has been writing about accessible travel exclusively since 1996. She’s the founding editor of Emerging Horizons, and the author of the popular Barrier-Free Travel national park series. With thousands of bylines to her credit, Candy hits the road often, in search of new accessible travel finds. Candy and her travel photographer husband Charles Pannell reside in NE Washington, where they tend to their chicken flock and enjoy a rural lifestyle.
Thanks to a generous donation from the Sam Schneider Legacy Foundation, the Rocky Mountain Conservancy now has a GRIT Freedom Wheelchair to loan visitors to Rocky Mountain National Park. Initially the Foundation offered this all-terrain wheelchair to former Conservancy employee Quinn Brett, who sustained a spinal cord injury while climbing in Yosemite. Brett told the foundation that she would rather let as many people as possible have access to the all terrain wheelchair, and suggested that it be donated to the Conservancy. So now more people can use this all terrain wheelchair in Rocky Mountain National Park.
GRIT Freedom Chair
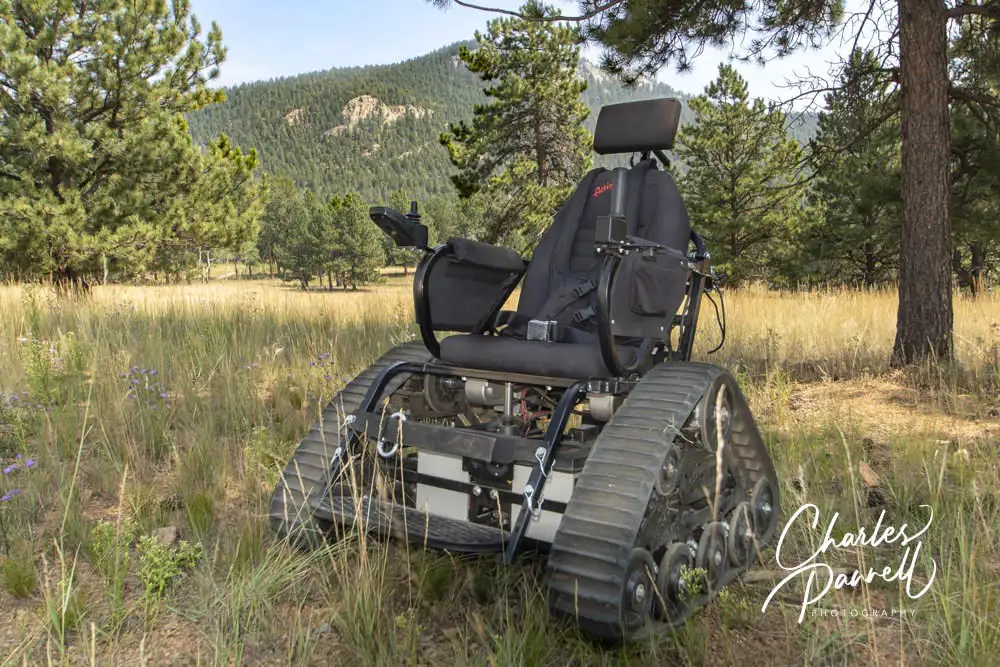
The donated GRIT Freedom Chair has two standard wheels on the sides of the seat, and a smaller wheel in front of the chair. It can be operated independently with the lever handles on each side of the seat. Alternatively, a companion can use the push handles on the back to propel the chair. Not only will the GRIT Freedom Chair navigate the accessible trails in Rocky Mountain National Park, but it’s also built to tackle rugged backcountry trails.
The all terrain wheelchair in Rocky Mountain National Park is housed at the Estes Park Mountain Shop at 2050 Big Thompson Avenue in Estes Park. There is no charge to use the wheelchair, which can be reserved by calling (970) 586-6548. For safety purposes it’s recommended that all terrain wheelchair-users hike with a companion, and that folks bring along plenty of water, sunscreen, insect repellent and snacks. And don’t forget extra medication, in case there is a delay returning to Estes Park. Additionally, users must be able to transfer to the all terrain wheelchair independently, or with assistance from a companion.
And thanks to the generosity of Estes Park resident Brian Keapplinger, more all terrain wheelchairs will be available in the future. Says Zach Zehr of Estes Park Mountain Shop, “He’s reached out to us to extend the inventory of mobility chairs, for when people come to us and say, ‘Hey, we’d love to use this but it’s already on reservation.’”
For more information about the all terrain wheelchair in Rocky Mountain National Park, visit www.estesparkmountainshop.com/summer-rentals
Barrier-Free Travel 22 Accessible Road Trips for Wheelers and Slow Walkers
Located about 240 miles north of Anchorage and 120 miles south of Fairbanks, Denali National Park (www.nps.gov/dena/index.htm) is one of the crown jewels of the 49th State. One of Alaska’s eight national parks, Denali occupies just over six million acres of wild land bisected by a seasonal road. And if all that sounds a bit rugged for your taste, rest assured it is possible to plan a wheelchair-accessible Denali visit. Granted, scaling the 20,310 namesake mountain may not be on your to-do list; however the park also offers a nice selection of wheelchair-accessible trails, attractions and tours suitable for non-mountaineering visitors.
Getting There
A top concern about a wheelchair-accessible Denali National Park visit is actually getting to the park. Although there’s no airport there, Denali is easily accessible by rail and car. The peak visit time is from late May through early September, but that’s primarily because of the train schedules and the unpredictable weather. Still if you have a vehicle, and a bit of a sense of adventure, late spring and fall can also be beautiful times to enjoy Mother Nature’s majesty in Denali.
Alaska Railroad
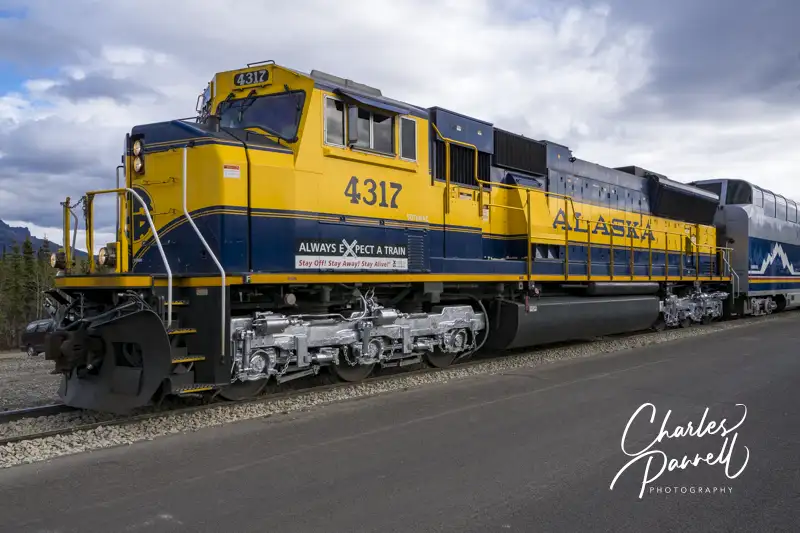
Daily train service is available from Anchorage and Fairbanks on Alaska Railroad’s (www.alaskarailroad.com) Denali Star during the summer months. The northbound train departs from Anchorage, and takes three hours to get to Denali. It stops in Wasilla and Talkeetna along the way. The southbound Fairbanks to Denali nonstop route takes four hours to get to Denali. And the good news is, all the stations include lift boarding, and the GoldStar Dome Cars feature elevator access, accessible seating and accessible lavatories downstairs. Additionally, most of the major cruise lines also offer cruise tour packages that include a Denali stop, on their own accessible railcars.
If you’d prefer to drive, accessible rental vans are available in Anchorage from Alaska Mobility (www.alaskamobility.com). After you pick up your van, just hop on The George Parks Highway (Highway 3). Also designated as a National Scenic Byway, this well traveled route runs between Fairbanks and Anchorage, and offers access to the park. The drive on this well maintained paved road is doable in a day from Anchorage; but plan for extra time as there’s no shortage of viewpoints and roadside stops along the way. And for information on places to stop en route, visit themilepost.com, an excellent Alaska road trip resource.
Wheelchair-Accessible Denali Shuttles
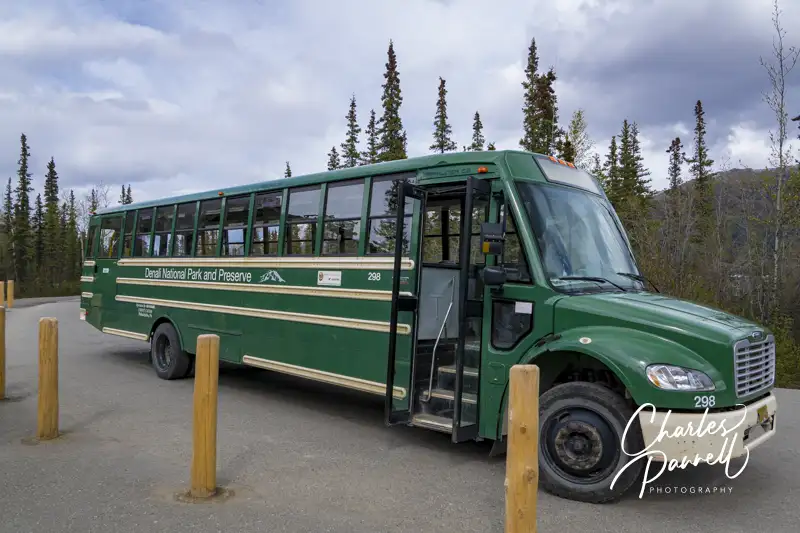
Accessible shuttle bus
Another wheelchair-accessible Denali feature is the free accessible shuttle bus system. After the winter snow is cleared in late spring, the road into Denali National Park is open to private vehicles to the Savage River area. Transportation further into the park is only available from concessionaires, and it’s largely dependent on road conditions.
That said, the free shuttle bus system operates in the Riley River area near the park entrance, and in the Savage River area 15 miles down the road. And all of the shuttle buses and shuttle bus stops wheelchair-accessible. The Savage River Loop and the Riley Creek Loop shuttles run all day and stop at a number of trails and attractions along the way. The Sled Dog Demonstration Shuttle, which runs from the Denali Visitor Center to the sled dog kennels, departs 40 minutes prior to the demonstrations, and returns shortly after they are completed.
The shuttle bus schedule is available at www.nps.gov/dena/planyourvisit/courtesy-shuttle-buses.htm, and it’s also posted at all the shuttle stops. Printed schedules are not available in the park, and cell phone service is limited, so it’s best to save a screen shot of the schedule for planning purposes.
Riley Creek Hikes
McKinley Station Trail
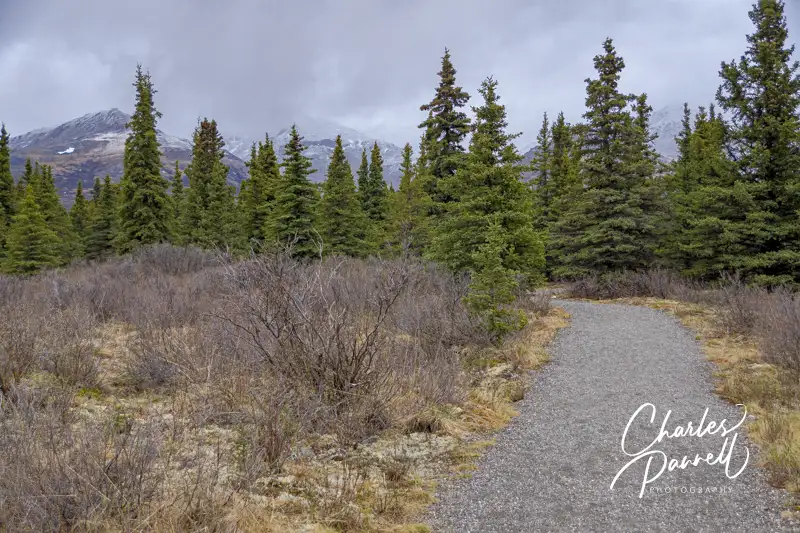
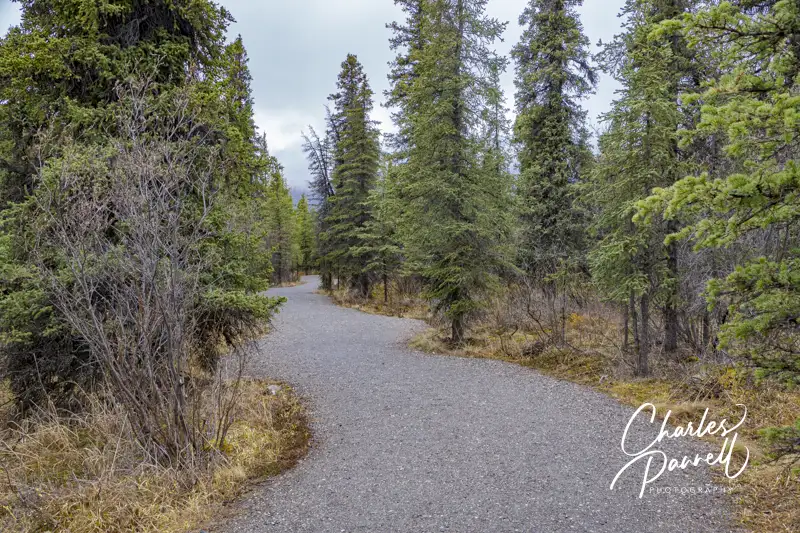
If you’d like to try a hike in the Riley Creek area, then hop on the shuttle, get off at the Riley Creek Campground and explore the McKinley Station Trail. This 1.6-mile hard-packed dirt trail runs from the campground to the visitor center. Although it’s not completely level, it offers an undulating — and accessible — route through the forest. There are also a few accessible boardwalk sections along the way. Be forewarned though — there’s a short cut to the visitor center about half-way along the route, but it goes straight uphill. Stick to the original trail for a gradual accessible path to the visitor center.
If you’d prefer a shorter walk, check out the Spruce Forest Loop, which is located right behind the visitor center. This .15-mile trail meanders through the forest, and offers visitors a good introduction to the vegetation and wildlife found in the park. It’s also very convenient, as you can just take the shuttle to the visitor center and hop on the trail from there.
Sled Dog Demonstration
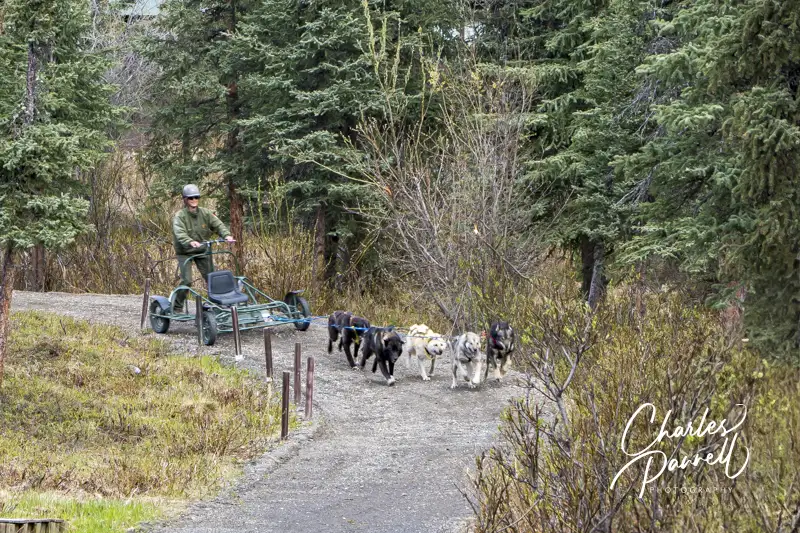
Sled dog demonstration
The Sled Dog Demonstration is another wheelchair-accessible Denali must-do. Although accessible shuttle service is available from the visitor center, you can also drive over to the kennels. There’s plenty of accessible parking available at the kennels; however it’s a longer jaunt from the parking lot than it is from the bus stop, so slow walkers might want to opt for the shuttle. It should also be noted that the Roadside Trail that runs from the visitor center to the kennels has a steep grade and numerous obstructions, and it’s definitely not an accessible option to get to the kennels.
The sled dog demonstration is fun to watch, as the team is hitched to a wheeled sled that speeds around a dirt track. Accessible seating for wheelchair-users and slow walkers is available in the front, so everyone is guaranteed a good view. A ranger is on hand to answer questions about the sled dogs — which are still used in the winter in the park — and folks can walk though the sled shed and around the kennels after the demonstration. Best of all, there’s no charge for this educational demonstration.
Savage River Hikes
Mountain Vista Trail
Last but not least, save some time to explore the Savage River area of the park, which offers a few accessible trails, and some great scenery. The shuttle stops at the Mountain Vista and Savage trailheads; and if Mount Denali is “out” (not obscured by cloud cover), you’ll get a great view from several vantage points along the way.
The Mountain Vista Trail is the most accessible trail in the area. This .6-mile hard-packed dirt trail begins near the shuttle stop, behind the accessible vault toilets and picnic shelter. It winds through the tundra, and offers several impressive views of the Alaska Range along the way. And you never know what wildlife you’ll run across, so keep your ryes peeled. Pack along a picnic lunch and enjoy it at one of the accessible tables at the picnic shelter, while you wait for the shuttle to Savage River.
Savage Cabin Trail
The shorter Savage Cabin Loop begins just to the left of the Savage River Campground shuttle bus stop, near the accessible vault toilet. The .3-mile loop is fairly level — with a few undulations — and is covered in compacted gravel. Midway along the route, you’ll find a historic cabin that was constructed by the Alaska Road Commission in 1924. It was originally used as a ranger cabin, but today it’s an interpretive site. Although the cabin isn’t accessible, you can still get a good glance at the inside from the doorway. And the docent programs are usually presented outside, in an accessible space. Even if there aren’t any docents at the cabin it still make a nice stop on this short jaunt.
Wheelchair-Accessible Denali Lodging Resource
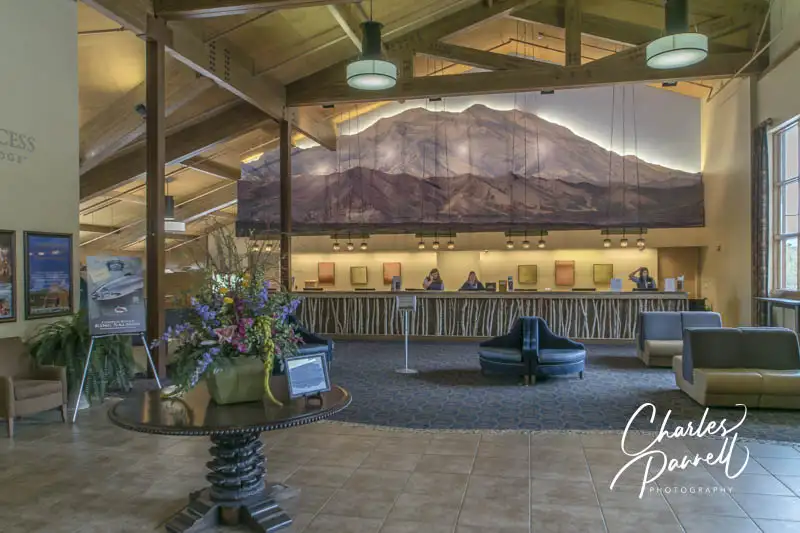
Lobby at the Denali Princess near Denali National Park
Of course, the final piece of the access puzzle in Denali National Park is lodging. There are no hotels or lodges in the park, but the campground has accessible spaces, and there are a number of accessible lodging choices nearby. Visit emerginghorizons.com/wheelchair-accessible-denali-lodging-options for more information.
Barrier-Free Travel Glacier, Yellowstone and Grand Teton National Parks for Wheelers and Slow Walkers
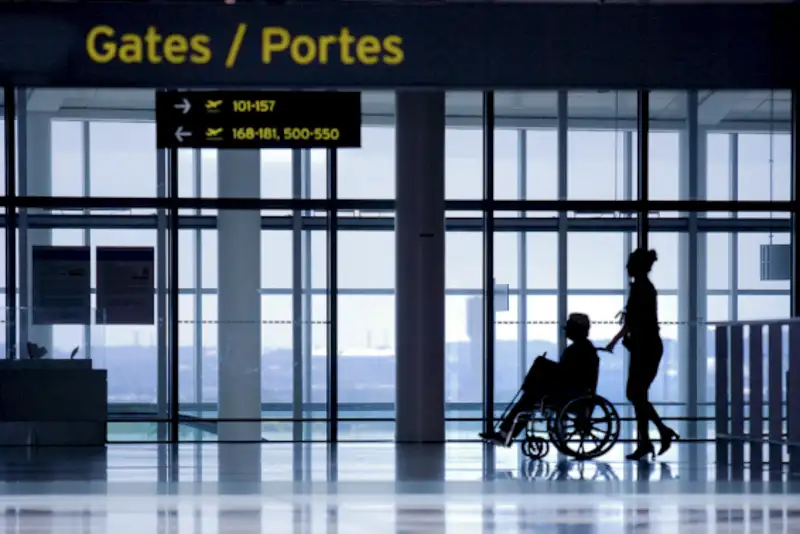
Travel by its very nature requires a good amount of preparation, especially when it includes air travel. Factor a disability into that equation and the complexity increases. With that in mind, here are some helpful tips for flying with a wheelchair.
Before You Go
The first thing you should do if you are flying with a wheelchair is to learn the law so you know what to expect. The Air Carrier Access Act (ACAA) — not the Americans with Disabilities Act — is that law that covers access on all US carriers, and foreign carriers on flights to and from the US. You can find the ACAA at https://www.ecfr.gov/current/title-14/chapter-II/subchapter-D/part-382.
Flying with a wheelchair in some parts of the world can come with some additional problems. If your trip involves domestic flights in Asia, Africa and the Caribbean, learn about the local access laws. Many domestic carriers in these regions have denied boarding to unaccompanied wheelchair-users. Choose your airline carefully.
Request a seat with a flip-up armrest when you make your reservation, as it makes transfers easier.
If you need a non-ticketed escort to accompany you to the gate, advise the airline of this when you make your reservation. Your escort will be asked for photo identification and given a security checkpoint pass.
Even if you don’t routinely use a wheelchair at home, consider requesting an airport wheelchair when you book your reservation if you are a slow walker. Some airports are quite large, and the whole boarding process can involve a lot of walking and standing.
Under the ACAA, airlines are required to carry wheelchairs, other mobility aids and assistive devices free of charge. This can include everything from oxygen concentrators and ventilators, to shower chairs and even catheter supplies. That said, remember to pack medical supplies in a clearly labeled box, and do not mix them with your personal items.
If you are traveling with oxygen or a ventilator, contact the airline to find out about their specific rules and procedures. Some airlines require doctor’s forms, so plan ahead for this.
If you have any questions regarding security screening procedures, call the TSA Cares hotline at (855) 787-2227 at least 72 hours prior to your flight. They will be able to supply you with airport specific information regarding your inquiry.
Download the TSA Notification Card (www.tsa.gov/sites/default/files/disability_notification_card_508.pdf), then fill it out with the specifics of your disability. Hand it to the TSA agent when you get to security. This is especially helpful if you have places on your body that are sensitive or painful to touch.
Finally, it you are flying with a wheelchair and you have any questions about the ACAA, call the DOT Hotline at (800) 778-4838.
At the Airport
When flying with a wheelchair, you can stay in your own wheelchair until you get to the gate, if you have non-spillable (gel) batteries. At that time you will be transferred to an aisle chair and boarded, and your wheelchair will be gate checked. If your mobility device does not have non-spillable batteries, you must transfer to an airport wheelchair at check-in, and surrender your wheelchair or scooter at that time.
If your mobility device has lithium ion batteries, contact the specific airline for their rules and regulations. US airlines are allowed to carry mobility devices with lithium ion batteries, however they are not required to do so. Every airline that accepts these devices has their own procedures,
If you use an airport wheelchair, don’t give it up once you get to the gate, because if there is a gate change you won’t have any way to get to the new gate. And sometimes it can be a very long walk.
Always allow extra time to get through security. Carry your wheelchair repair tools in your checked bag. If you encounter any problems at the security checkpoint ask for the Passenger Support Specialist, as these employees have additional training in access issues.
Remember, you are not required to perform any tasks at the security checkpoint that you are physically unable to do. If an TSA employee asks you to stand, walk, or even take off your shoes, just let them know that you are unable to do that.
When flying with a wheelchair, let the gate agent know that you need to preboard the aircraft. This will give you extra time to transfer and stow your gear in a more private setting. And don’t wander off from the boarding area, as you could miss preboarding.
Protect Your Wheelchair
Attach clear assembly and disassembly instructions (in Spanish and English) to your wheelchair or scooter. Photos and illustrations also help.
Remove any loose or protruding parts from your wheelchair or scooter. Protect your joystick with some type of a hard covered object, such as a plastic cup secured with packing tape.
Let a little bit of air out of your wheelchair tires. Carry on all gel cushions. Baggage compartments are not pressurized.
Snap a digital photo of your wheelchair before you board. It’s a good way to document the condition of your assistive device in case of damage.
Make sure you have adequate insurance. US airlines are only liable for the purchase price (not the replacement cost) of assistive devices on domestic flights. And on international flights the airline liability limit for damaged assistive devices is covered under the Warsaw Convention ($25.29/kilo) or the Montreal Convention ($1731 limit).
Put an air tag on your wheelchair. It won’t prevent it from getting misrouted, but at least you will know where it’s at if it doesn’t show up at your gate.
On the Airplane
On aircraft with more than 100 seats, there’s priority storage space aboard for one manual wheelchair. This space is available on a first-come basis, so it pays to get to the boarding area early, to get the first crack at the space.
Make sure an on-board wheelchair is aboard the aircraft before takeoff. If you cannot walk, this is how you will be transported to the lavatory. On-board wheelchairs are required on all aircraft with accessible lavatories, but sometimes they are accidentally offloaded, so it always pays to check.
Consider your toilet options when flying with a wheelchair, and plan ahead. Accessible airline lavatories are available on wide-body (two-aisle) jets. They have to be large enough to accommodate the on-board wheelchair, but in some cases there is not enough room for an attendant.
If Things Go Wrong
If you encounter any problems when flying with a wheelchair, contact the Complaints Resolution Official (CRO). The CRO is an airline employee that’s specifically trained about the ACAA. All US airlines are required to have a CRO on duty during airport operating hours. Foreign carriers are also required to have a CRO available at airports that serve flights that begin or end in the US.
If your equipment is damaged or you experience a access related service failure, report it to the airline and request compensation. If your assistive device is not usable, be sure to request an appropriate loaner.
And if you experience an access-related service failure, you can also file a ACAA complaint at secure.dot.gov/air-travel-complaint. This complaint will not result in compensation but it can help to make air travel more accessible in the long run.
Barrier-Free Travel National Park Lodges for Wheelers and Slow Walkers
Nearly a year ago, on July 26, 2023, the Department of Transportation (DOT) announced a new accessible airline lavatory rule. Unfortunately it will still be many years before single aisle aircraft with more than 125 seat have accessible lavatories, but at least it’s a start. The rulemaking process has been going on for quite some time and the DOT took into consideration comments from consumers, airlines and disability organizations.
So here are the highlights of the final accessible airline lavatory rule, along with a timeline for when you can expect to see some changes.
Lavatory Interiors
Under the new rule, US single aisle aircraft with more than 125 seats must include the following features in their lavatories. These features will be required on new aircraft delivered three years after the effective date (2023) of the rule.
Grab bars
Accessible faucets
Accessible call button
Accessible door lock
Room for onboard wheelchair
Ample toe Clearance
Privacy screen if door is not able to be closed
So basically you can expect to see start seeing these features in 2026.
But there is a catch. The usual life of a commercial commuter aircraft is 25 years, so only 4 percent of the fleet is replaced annually. This figure is from the DOT. If they start replacing aircraft with ones that include accessible lavatories in 2026 (as required), the entire fleet will not be outfitted with them until 2051. And during that interim time, passengers will not know if they have an accessible lavatory until they board the aircraft.
Onboard Wheelchairs
The new accessible airline lavatory rule also includes a provision that the onboard wheelchair must be maneuverable into the lavatory, so that the wheelchair-user will be able to completely close the door. This also applies to single aisle aircraft with over 125 seats.
Again, aircraft are not required to be retrofitted, and the same timeline applies, so this would begin in 2026 and be fully implemented in 2051.
Accessible Lavatory Space
Perhaps the biggest change with the new accessible airline lavatory rule is the requirement for accessible lavatories to have ample space for a person with a disability and an attendant. More specifically the lavatory must have enough room for two males in the 95th percentile of height and weight (6 ft. 2 in., 246 pounds). That’s a pretty large space and it would make airline lavatories truly wheelchair-accessible. And as with the other regulations this applies to single aisle aircraft with more than 125 seats.
But there is a different implementation time frame for this requirement. Specifically, it’s for aircraft ordered 10 years or delivered 12 years from the effective date. That means this would start in 2036 and 2038, and would be fully implemented in 2061 and 2063. And in the interim you won’t know in advance if your aircraft has a lavatory with this extra space.
To be fair, the preliminary rule required implementation in aircraft ordered 18 years from the effective date or placed into service 20 years from the effective date. On that timeline the fleets would be fully outfitted with accessible lavatories in 2069 and 2071.
I addressed the timeline issue in my public comments to the DOT, as did other folks, so at least they listened a bit. But rulemaking is always a process of give and take.
So bottom line, we will start to see some minor accessibility changes in 2026, with full implementation of this rule in 2071. It’s definitely a step forward, but it’s really for future generations. But then again, so was the ADA. Justin Dart was a visionary but he certainly didn’t live to see the strides in accessibility we have made since the first days of his activism.
There are numerous things that go into planning an accessible vacation; from finding the right hotel room, to securing airport transportation, and even finding out what local attractions are accessible. And then there are the emergency situations. What do you if something unforeseen happens while you’re on the road? Well my best solution is to play a healthy game of “what if ” before your travel.
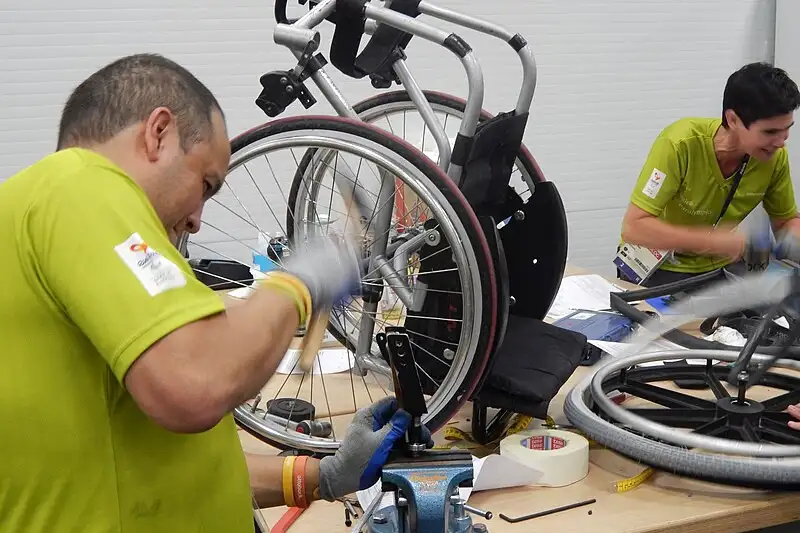
For example, ask yourself a question like, “What if my wheelchair breaks when I’m on vacation?”. Then find a solution to the problem. In this case, the solution would be to compile a list of wheelchair repair shops in your destination city. Problem solved. Write them down and take them with you. Chances are you won’t need to use the list, but if you do, you are prepared.
And if you happen to be going to Amsterdam, then you’re in luck, because Able Amsterdam has compiled a nice little list of wheelchair repair shops in Amsterdam. And although it contains shops that specialize in repairing medical equipment, it also has a bike shop that has experience repairing wheelchairs and rollators. So check out this list of wheelchair repair shops in Amsterdam for your future travels. www.ableamsterdam.com/blog/wheelchair-repair-service-amsterdam?fbclid=IwAR3H81Hgc_EfU4sVq9YpiWOnFqO-QKiCGtNKii8TCfSiiW7W50rtEzomVDA
Barrier-Free Travel the Grand Canyon for Wheelers and Slow Walkers
Make no mistake about it, Staunton State Park (cpw.state.co.us/placestogo/parks/Staunton) includes some challenging physical access barriers for folks with mobility issues. That doesn’t mean you should cross it off your “to visit” list though. Quite the contrary, as track chairs are now available at this Colorado park. These all terrain wheelchairs make inclusive access a possibility for wheelchair-users and slow walkers. Says Track Chair Program Manager Natalie Bostow, “The goal of our program is to help everyone experience the outdoors, and to enable wheelchair-users and slow walkers to enjoy hikes with friends and family. And the Staunton State Park track chairs are our means to accomplish that.”
An Innovative Program
The Staunton State Park track chairs are the result of a collaborative partnership. The Friends of Staunton State Park (friendsofstauntonstatepark.org) raised the funds to buy the track chairs, while the state park manages the program. To date, a robust group of volunteers have conducted more than 1,000 track chair hikes
The track chairs have tank tracks instead of wheelchair tires, which makes it possible to explore terrain that’s off-limits to standard wheelchairs. They can be operated with a joystick — either a golf ball, a tennis ball or a t-bar — which can be mounted on either side of the track chair. You do need some hand dexterity to operate these chairs; however if you can operate a power wheelchair, you can probably operate a track chair.
Suspension and non-suspension track chairs are available, but the suspension models offer much smoother rides. A car seat is also available, so small children over the age of two can utilize the track chairs. The track chairs can accommodate up to 350 pounds, and there are variety of transfer boards and a sling lift on hand to facilitate safe transfers. The track chairs will work for almost everyone; however because of safety issues they are not appropriate for someone who is 100% ventilator-reliant.
And the track chair rules are pretty simple. All track chair users must be accompanied by a companion as well as a volunteer. After a short orientation the volunteer will walk behind the track chair, so they can jump in to help out if the user can’t manage things. Generally speaking though, the volunteers are there for support and they try to let users be as independent as possible.
Take a Hike
The Staunton State Park track chairs are free, but reservations are required. They can be made online on the Staunton State Park reservation form. They are available from June to October on Fridays, Saturdays and Sundays. Reservations open for the season on May 1, so plan ahead as they fill up quickly. And if you have any questions, just call (303) 816-0912.
When you get to the park, follow the signs to the Meadow Parking Lot. There’s accessible parking in front of the track chair garage, and an accessible picnic table next to it. There’s also an accessible vault toilet in the parking lot.
The track chairs have a battery range of about eight miles, but volunteers usually keep the hikes to four or five miles, just to be on the safe side. All of the track chair trails depart from the Meadow Parking Lot.
The most popular track chair trail is the Davis Ponds Trail, which is a 2.7-mile beginner trail with some stream crossings. There’s an accessible fishing pier and a picnic table at the mid-point, and adapted fishing poles are available at the track chair garage.
The more advanced 2.3-mile Mason Creek Trail includes some rock obstacles, but it also includes a peaceful meadow and stone house ruins. The longest and most difficult track chair trail is the 3.5-mile Staunton Ranch Trail, which travels through aspen filled meadows and offers a great view of Pikes Peak.
The track chairs also come with a backpack that has rain gear, additional water, tools and a blanket, but track chair-users are asked to bring water, medication, additional clothing layers, a seat cushion, a hat, sunblock and glasses. And don’t forget to pack along a lunch as there are a number of pleasant picnic spots to stop for a break throughout the park.
Barrier-Free Travel Glacier, Yellowstone and Grand Teton National Parks for Wheelchair-Users and Slow Walkers
Road trips are a great way to travel. You can take things at your own pace, pack along all the gear you need, and you don’t have to worry about the airline losing your luggage. And there’s no better way to see some Western US national parks than on a road trip. This epic itinerary begins and ends in Las Vegas and visits nine national parks along the way. The whole route is 1880 miles long, but the longest drive is only 4.5 hours. You can do the whole itinerary, or just tackle a portion of this national park road trip. Either way, it’s a great spring, summer or fall travel choice
The Basics
Although this national park road trip begins in Las Vegas, you don’t have to be a local to give it a try. If you live close you can drive and spend a few days in town before hitting the road. Alternatively, you can grab a flight to Las Vegas and rent an accessible van to explore the national parks.
The good news is, accessible taxis are widely available in Las Vegas. At the airport just join the taxi queue, and the dispatcher will get an accessible cab for you. It’s a quick and easy process, and you don’t have to arrange for accessible transportation ahead of time. If you plan to spend a few days in the city prior to your road trip, most hotels will call for an accessible taxi for you.
Next, order an accessible van from one of these companies in advance, and you’re all set to hit the road.
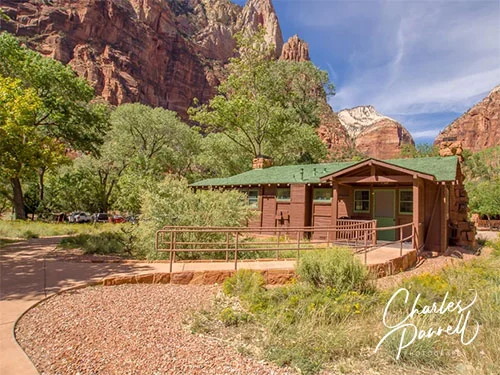
For an easy first-day drive, just take Interstate 15 to Hurricane, and then follow Highway 9 to Zion National Park (emerginghorizons.com/zion-national-park/). The drive takes about 2.5 hours, and there’s some great scenery along the way. Hop on the wheelchair-accessible park shuttle at the Zion Visitor Center and explore the park, and then spend the night at a wheelchair-accessible cabin at Zion Lodge.
Zion National Park to Bryce Canyon National Park
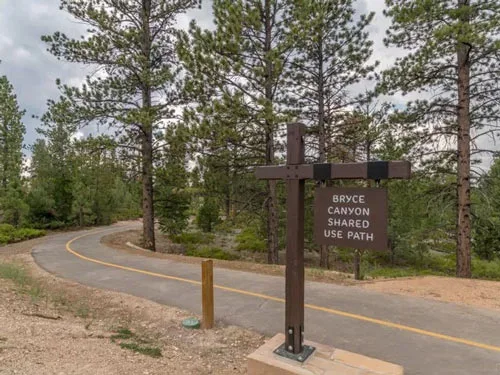
Shared use trail in Bryce Canyon National Park
From Zion, take Highway 9 to Mt. Carmel Junction and then hop on Highway 89 north to Highway 12 east. Save some time to stop along Highway 12 at the Red Canyon Visitor Center and take a stroll along the accessible Red Canyon Bicycle Trail. Continue on Highway 63, and follow the signs to Bryce Canyon National Park (emerginghorizons.com/bryce-canyon-national-park). If you drive it straight through, it will take about two hours. And there’s no shortage of accessible things to do in the park, including a roll or stroll along along the Bryce Multiuse Trail.
Bryce Canyon National Park to Capitol Reef National Park
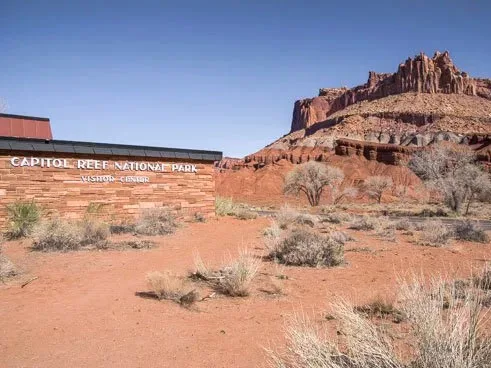
Visitor Center in Capitol Reef National Park
To continue along on your national park road trip, backtrack on Highway 63 and make a right on Johns Valley Road, which becomes Highway 22. Next, make a right on Highway 62, and another right on Browns Lane, then head east on Highway 24 through Torrey to Capitol Reef National Park (emerginghorizons.com/capitol-reef-national-park). It’s a scenic two-hour drive. Pick up a map at the visitor center, then take a driving tour of the park. And don’t miss the petroglyphs along Highway 24.
Capitol Reef National Park to Canyonlands National Park
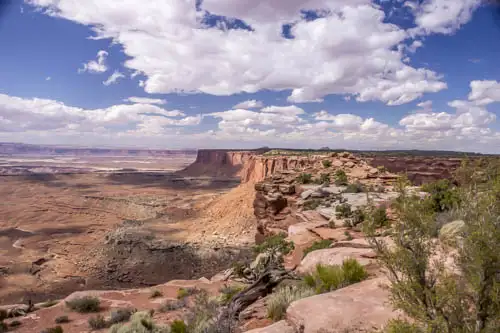
Vista in Canyonlands National Park
The next leg of your national park road trip is about a 4.5-hour drive. From Capitol Reef continue east on Highway 24, then take Interstate 70 east, and Highway 191 south to Highway 63. This will lead you to the Islands in the Sky section of Canyonlands National Park (emerginghorizons.com/canyonlands-national-park). This large mesa “island” rises 1,000 feet above the adjacent land and is surrounded by the Colorado River and Green River. And if you don’t fancy camping out in the park, Field Station Moab (emerginghorizons.com/field-station-moab-a-breath-of-fresh-air) has some comfortable accessible rooms, and it’s just a 30-minute drive away.
Canyonlands National Park to Arches National Park
Devil’s Garden Trail in Arches National Park
For the next leg of your national park road trip, take Highway 313 back out to Highway 191 and continue south to Arches National Park (emerginghorizons.com/arches-national-park). It’s a short 35 minute drive. Stop at the visitor center, then take a driving tour of this beautiful park. Don’t miss the trail at Balanced Rock, Wall Street, the trail to the petroglyphs at Wolfe Ranch, and the Windows Section of the park. Although this park offers some spectacular scenery, advance planning is a must, as timed entry reservations are now required (emerginghorizons.com/national-park-entrance-reservations-required-in-2024). And remember, reservations are not available onsite — you need to purchase them online, ahead of your visit.
Arches National Park to Black Canyon of the Gunnison National Park
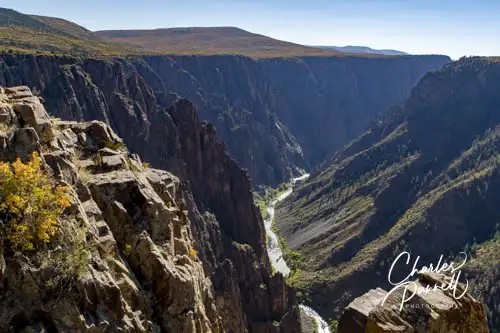
Black Canyon of the Gunnison
The next segment of your national park road trip takes about 2.5 hours. From Arches National Park backtrack north on Highway 191 to Interstate 70 east, then take Highway 50 east to Highway 92 in Delta, to the Black Canyon of the Gunnison National Park (www.nps.gov/blca/index.htm) entrance. There’s no shortage of scenic views on the seven-mile scenic drive along the south rim of the canyon. Even better — most of the viewpoints are wheelchair-accessible. And when it’s time to bed down for the night, there’s a comfy accessible yurt in Ridgeway State Park, which is about a half-hour away.
Black Canyon of the Gunnison National Park to Mesa Verde National Park
Mesa Verde National Park
To continue your national park road trip, take Highway 50 east to Interstate 550 to Ridgeway. From there take Highway 60 to Highway 145 south to Cortez. To complete this four-hour journey follow Highway 160 to Mesa Verde National Park (www.nps.gov/meve/index.htm). Highlights at Mesa Verde include the scenic Mesa Top Loop Drive, Chapin Mesa Archeological Museum, and the ruins at the Far View Sites. And if you’d like to spend the night in the park, Far View Lodge has some nice accessible rooms with roll-in showers.
Mesa Verde National Park to Petrified Forest National Park
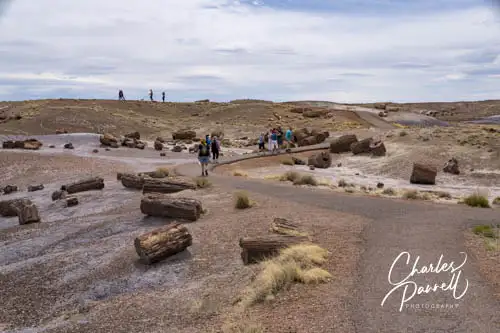
The Crystal Forest in Petrified Forest National Park
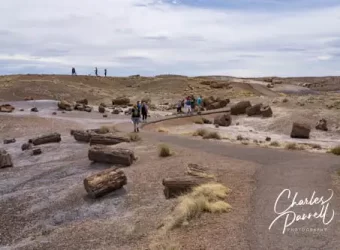
From Mesa Verde, backtrack on Highway 160 to Cortez, then head south on Highway 491 to Interstate 40. Go west on the interstate and take exit 311 to reach Petrified Forest National Park (www.nps.gov/pefo/index.htm). The Painted Desert is located near the north entrance, and it features expansive views and a former Harvey House (The Painted Desert Inn). The Crystal Forest is worth a stop near the central part of the park, and don’t miss the Rainbow Forest near the South Entrance. And when you’re done, just exit the south entrance and head north to rejoin Interstate 40.
Petrified Forest National Park to Grand Canyon South Rim
Grand Canyon National Park
After you rejoin Interstate 40, head west and take exit 165 in Williams, then follow Highway 64 to Grand Canyon National Park (emerginghorizons.com/grand-canyon-national-park). It’s a scenic three-hour drive. There’s no shortage of accessible things to do on the South Rim, but for a scenic overview of the whole park, take a wheelchair-accessible flightseeing tour on Grand Canyon Scenic Airlines (www.scenic.com). The 45-minute flight departs from Tusayan, and features ramp access and plenty of room to transfer to a seat. And with the large windows on the plane, you won’t miss a thing. For another great view, check-in to Thunderbird Lodge — the only property in the park that offers wheelchair-accessible rooms with canyon views.
Grand Canyon South Rim to Grand Canyon North Rim
View from the North Rim Grand Canyon Lodge
The last stop on your national park road trip is just a four-hour drive away. From the Grand Canyon Visitor Center, follow the South Entrance Road to Desert View Drive and head east. In Cameron go north on Highway 89, and connect to Highway 89A in Jacob Lake, then just follow Highway 67 south to the Grand Canyon North Rim (www.nps.gov/grca/planyourvisit/north-rim.htm). The great thing about the North Rim is that it doesn’t attract as many visitors as the South Rim. And after the day visitors are gone, it’s just you and the other lodge guests. Grand Canyon Lodge North Rim has a variety of accessible cabins, many which are equipped with roll-in showers. So plan to spend a few days and enjoy the beauty of the North Rim.
Grand Canyon North Rim to Las Vegas
Fabulous Downtown Las Vegas
To complete your national park road trip, take Highway 67 back out to Highway 89A and head north. Next, travel west across the Kaibab Reservation on Highway 389, which turns into Highway 59 when you cross into Utah. Finally, take Highway 9 to Interstate 15 west and circle back to Las Vegas. It’s just a 4.5 hour drive, with lots of great scenery along the way.
Barrier-Free Travel
Utah National Parks for Wheelchair-users and Slow Walkers
Thanks to modern technology it’s now possible to share your travel photos with friends and family with just a few swipes and a tap or two. And I absolutely love seeing those smiling faces enjoying cruises, beaches and luxury resorts. But lately I’ve also been seeing another kind of travel post – it usually features a photo of an obviously inaccessible room, with the caption “Really? This is a wheelchair-accessible hotel room?”
And the truth is, well, maybe it isn’t.
How Does This Happen?
I’ve looked at thousands of wheelchair-accessible hotel rooms over my career, and I’ve seen just about every kind of access faux-paus you can imagine; however I’ve also had more than a few managers take me to view a supposed “accessible room” only to discover that it wasn’t. So how does that happen? According to many a red-faced hotel manager, “Somehow the rooms type was entered into the computer incorrectly.”
And although this seems like a minor computer error it can wreck havoc on travelers who need a wheelchair-accessible hotel room. Think about it for a minute. You reserve an accessible room, and because the inaccessible room is coded wrong that’s the room you get. Even worse, when you open the door and discover the lack of access and report it to the front desk, the clerk continues to insist that you ARE in an accessible room. Why? Because the computer says so. And believe me, it’s darn near impossible to convince a rank-and-file employee that the computer is wrong.
Clues That You Aren’t in a Wheelchair-Accessible Hotel Room
Although access features can and do vary from property to property, there are a few clues that you may have been incorrectly assigned to a standard room, rather than a wheelchair-accessible hotel room (in the US). Here are a few tip-offs.
Check the bathroom. Although access features may vary in the shower or tub, check out the toilet area. Are there grab bars by the toilet? If not, you may well be in a standard room, as that’s one access feature that is seldom missed.
Is the roll-in shower really a low step shower? Many hotels have replaced their tub/shower combinations with low-step showers in their standard rooms. Look inside the shower – if the only access feature you see is a set of grab bars, then you may be in a standard room. In this day and age even standard rooms have shower grab bars for safety, so that by itself doesn’t really indicate you are in an accessible room. Look for a hand-held showerhead.
It’s also important to note that under the Americans with Disabilities Act, accessible rooms can have either a roll-in shower a tub/shower combination or a transfer-type shower. In fact properties with 50 or fewer rooms aren’t required to have an accessible room with a roll-in shower. That said, if your tub/shower combination only has grab bars, and does not include a hand-held showerhead and some type of shower bench, you may be in a standard room.
Next, look out in the hallway. Do you see any rooms marked with the wheelchair pictogram? Are there any that have lowered peepholes? These are sure signs of an accessible room. If some rooms have them, but your room lacks them, it may be a sign that you are in a standard room.
How to Remedy the Situation
Of course if your room is listed incorrectly in the inventory, you won’t get much satisfaction from the front desk. You will have to go higher. Ask to speak to the manager. Ask the manager what features their wheelchair-accessible rooms have. Tell him that you are supposedly in a wheelchair-accessible room, but your room does not have those features. Then show him photos of the room.
And then perhaps suggest that this room was entered into the inventory incorrectly.
Chances are if this is the case, the manager will find you another room – one that is truly accessible. Of course there’s always the chance that there won’t be any accessible rooms available; in which case you should ask to be accommodated at a nearby property. After all, you did book an accessible room, and the mistake wasn’t your fault.
Granted this is a time consuming – and somewhat frustrating — process, so go ahead and ask to be compensated for your time. You may get some free points or maybe even a free night. In the end, managers want happy customers, so don’t be afraid to ask for whatever you feel you deserve.
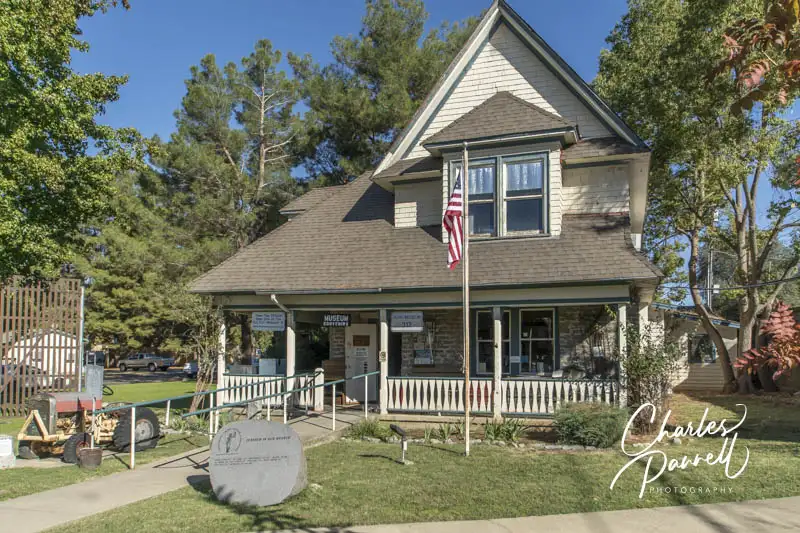
Driving along Prison Road the sight of the massive granite walls of Folsom State Prison are unmistakable, as you approach the nation’s first maximum-security prison. Interestingly enough, the granite for the walls was quarried by the prisoners, and the imposing structure was later built by inmates back in the early 1900s. That’s just one of the fun facts you’ll learn on a visit to the Folsom Prison Museum (www.bighouseprisonmuseum.org).
To be honest, visiting the museum is a tad bit intimidating, as it’s located just inside the prison grounds. That said, I timidly approached the guard after following the “museum” signs that led to the prison entrance, and hesitantly stammered, “I’m looking for the museum”. I heaved a giant sigh of relief when the guard cracked a smile and enthusiastically directed me to the museum entrance, located just beyond the checkpoint.
Accessible parking is located across the street from the checkpoint, and there’s a level pathway over to the ramped museum. Inside, quarters are a bit tight in the historic structure, however there’s still room enough to maneuver a wheelchair around the exhibits. The tiny restroom is not accessible — so plan ahead — and there’s about a half-inch step down to the Johnny Cash room, but again it’s all quite manageable.
The Folsom Prison Museum
Folsom Prison Museum
Operated by retired correctional officers, the museum features an impressive collection of weapons, shackles and confiscated items. Highlights include a hand-crank Gatling gun, a substantial number of inmate-crafted firearms, and even a homemade bomb. Add in some old gas masks, an operating table and Rick James’ guitar, and you have a very eclectic collection. There’s also a sizable display of things made from everyday items by the inmates, including a purse made from potato chip bags, a Ferris wheel crafted from a quarter-million toothpicks, a hangman’s noose made from toilet tissue and a number of creative soap bar carvings. A large collection of California license plates also adorn one wall in this room, just to remind folks where they are all manufactured today.
There’s also a room devoted to Johnny Cash, who visited the prison and recorded a live album there in 1968. There’s a load of photographs of Cash and his wife at the prison, along with his own “gag” mug shot and even some stationary from the Sacramento hotel where he stayed. It’s definitely a must-see for any Cash fan.
Granted this small museum doesn’t warrant a dedicated trip to Folsom; however if you’re heading to South Lake Tahoe on Highway 50, it’s definitely worth a stop. Just take the Folsom Boulevard exit, turn left and then make a right on Natoma Street. From there turn left on Prison Road which dead-ends in the visitor parking lot. And when you’re back on your way to Lake Tahoe, take note of the granite mileage markers along the road, as those were also crafted by Folsom Prison inmates.
Barrier-Free Travel Yosemite, Sequoia and Kings Canyon National Parks for Wheelers and Slow Walkers
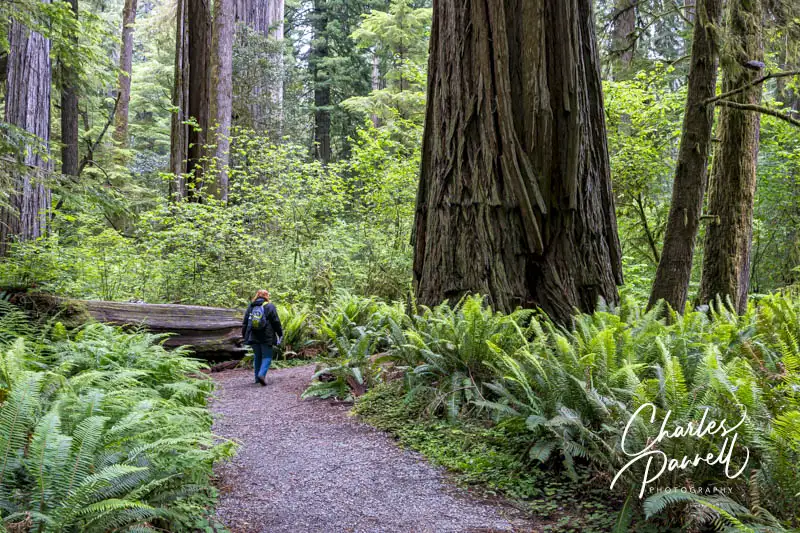
At first glance it appears that Northern California’s coastal redwoods are out of reach for wheelchair-users and slow walkers. After all, these majestic giants are located in some pretty remote areas. Granted, many redwood groves present some formidable access barriers; however these three coastal stands offer a nice selection of accessible trails, picnic areas and even camping cabins. So check out these wheelchair-accessible coastal redwoods on your next California road trip
Redwood National Park
Lost Man Creek trail in Redwood National Park
Located about 320 miles north of San Francisco, Redwood National Park (emerginghorizons.com/redwood-national-and-state-parks/) tops the list of the Golden State’s wheelchair-accessible coastal redwoods. Although the drive through the park offers some stunning windshield views, the Lost Man Creek Trail is definitely worth a stop. The trail is easy to find — just follow Highway 101 north for about five miles from Orick, and turn on Lost Man Creek Road. The trailhead is about a mile down the road.
There’s accessible parking near the trailhead, next to an accessible vault toilet, with level access over to the trail. This former logging road is wide, level and free of obstacles for the first half-mile. After that the grade becomes steeper and there are rocks and other obstacles along the way, until the last bastions of access are obliterated at the ¾-mile point. Still, it makes a lovely out-and-back one-mile hike.
Additionally, there’s an accessible picnic table on a level dirt pad near the trailhead, so bring along a lunch and enjoy your repast in the shaded grove. It’s the ideal way to top off this very accessible hike.
Trees of Mystery
Paul Bunyan and Babe the Ox at the Trees of Mystery
The Trees of Mystery (www.treesofmystery.net) is another fun stop on Highway 101. It’s located about 25 miles north of the Lost Man Creek Trail, up in Klamath. You can’t miss it, as a giant statue of Paul Bunyan and Babe the Ox mark the site of the kitschy yet cool roadside attraction.
There’s plenty of accessible parking in the large lot, and barrier-free access over to the gift shop and ticket booth. The main attraction at this site is the Sky Trail, an aerial tramway which takes visitors on a scenic journey through the tree tops. There is a .8-mile trail that leads from the parking lot to the upper Sky Trail station; however it has a steep grade and a substantial cross slope in a few places, so it’s not a good option for wheelchair-users and slow walkers. Alternatively, accessible transportation in a lift-equipped vehicle to the upper Sky Trail station is available for anyone who can’t manage the trail.
There’s ramped access up to the upper Sky Trail station, with roll-on access and plenty of room for a wheelchair in the individual gondola cars. Be sure and stop for a view from the adjacent observation deck before you board though, as the bird’s eye view is magnificent. From the upper Sky Trail station, it’s a seven-minute 1570-foot descent back down to the lower station. And when you get there, treat yourself to some fudge or ice cream, and take time to browse through the gift shop. It’s a fun stop and definitely a unique way to experience the coastal redwoods.
Jedidiah Smith Redwoods State Park
The Simpson-Reed-Trail at Jedidiah Smith Redwoods State Park
Last but not least on the list of wheelchair-accessible coastal redwoods is Jedidiah Smith Redwoods State Park (www.parks.ca.gov/?page_id=413). This Northern California state park is located about 20 minutes north of Klamath along scenic Highway 199, near Crescent City.
One of the highlights of this park is the accessible Simpson-Reed Discovery Trail, which can be found near the end of Walker Road, off of the main highway. Accessible parking is located next to the accessible vault toilet, near the trailhead. This one-mile loop, passes a number of fallen giants as it weaves through the forest and along the Smith River. It’s a very pleasant — and accessible — stroll.
And if you’d like to spend the night in the park, there are four accessible camping cabins in the campground. Cabins 24, 26, 30 and 105 feature accessible parking with ramp access up to the front porch. They are each furnished with two bunk beds, with a single on top and a double on the bottom. Other cabin features include, electricity, lights, a heater, a raised grill and an accessible picnic table.
Guests need to bring their own bedding, and an air mattress or mattress pad is also recommended. There’s no water in the cabins, but an accessible showerhouse with a roll-in shower is located nearby. It’s a beautiful campground, and the perfect place to top off a visit to California’s wheelchair-accessible coastal redwoods.
Barrier-Free Travel California National Park Road Trips for Wheelchair-Users and Slow Walkers







 Travel by its very nature requires a good amount of preparation, especially when it includes air travel. Factor a disability into that equation and the complexity increases. With that in mind, here are some helpful tips for flying with a wheelchair.
 Nearly a year ago, on July 26, 2023, the Department of Transportation (DOT) announced a new accessible airline lavatory rule. Unfortunately it will still be many years before single aisle aircraft with more than 125 seat have accessible lavatories, but at least it’s a start. The rulemaking process has been going on for quite some time and the DOT took into consideration comments from consumers, airlines and disability organizations.
 There are numerous things that go into planning an accessible vacation; from finding the right hotel room, to securing airport transportation, and even finding out what local attractions are accessible. And then there are the emergency situations. What do you if something unforeseen happens while you’re on the road? Well my best solution is to play a healthy game of “what if ” before your travel.
 Make no mistake about it, Staunton State Park (