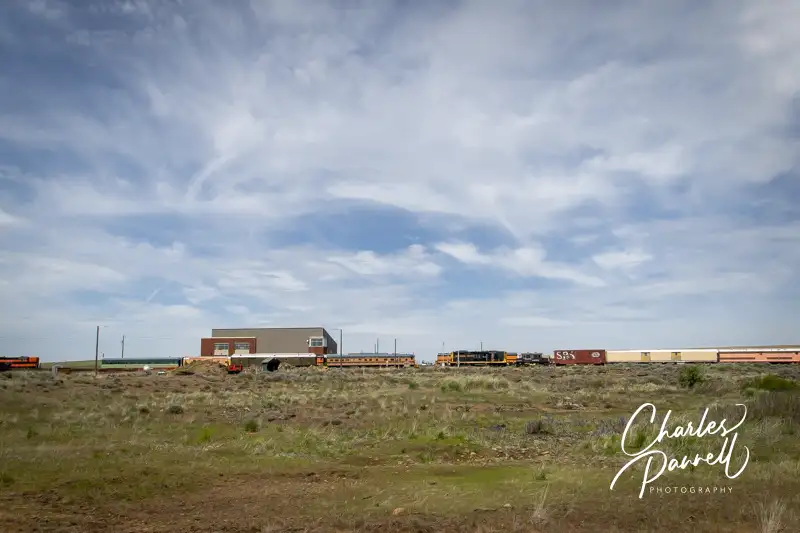
Located off Highway 2, about 25 miles west of Spokane in Reardon, the Inland Northwest Rail Museum (inlandnwrailmuseum.com) is a bit off the beaten path. That said, if you happen to be traveling from Spokane to North Cascades National Park (emerginghorizons.com/north-cascades-national-park/), it makes a nice road trip stop. Make sure and check the website for their operating hours though, as as this largely volunteer-operated museum is open on limited days — usually weekends. Still it’s worth a stop on any North Cascades road trip
A Bit of PNW Railroad History
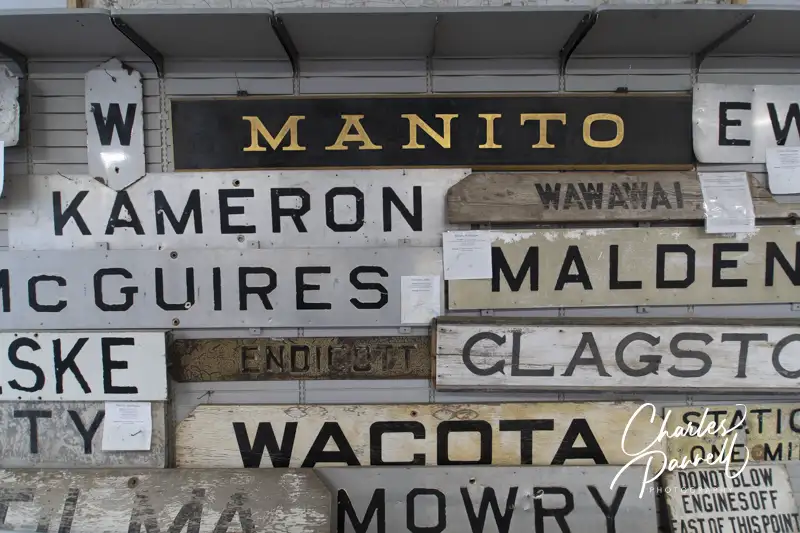
Railroad Signs At The Inland Northwest Rail Museum
The Inland Northwest Rail Museum’s collection focuses on railroad history in the Pacific Northwest (PNW). There’s accessible parking in front, with level access to the front door. And although the folks at the museum have done a good job providing access throughout the facility, there are still some limitations due to the nature of the exhibits.
There’s level access around most of the inside exhibits, elevator access to the second floor, and accessible restrooms on the ground floor. That said, most of the rolling stock — which comprises at least half of their exhibits — can only be accessed by climbing a few steps. Still it’s a great — and very nostalgic stop — for slow walkers.
The centerpiece downstairs exhibit is the 1906 Spokane United Railways Streetcar. After streetcar use was discontinued in Spokane, this car served as a restaurant in Chewelah, and was later donated to the museum. There are several steps up to the streetcar, and it’s kind of fun to walk through, sit down and imagine the public transportation system of yesteryear.
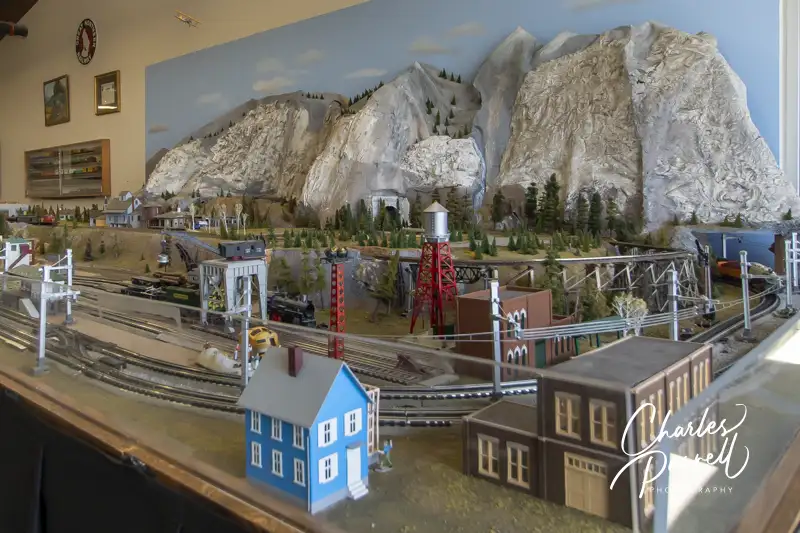
The inside exhibits also include a large collection of railroad equipment, signs, signals, photos, horns, uniforms and lots of interesting tidbits. Don’t miss the model trains and the photo collection of PNW train wrecks upstairs. And while you’re upstairs, stroll down to the end of the building and get a birds eye view of the rolling stock out in the yard.
Model Train Layout at The Inland Northwest Rail Museum
All Aboard!!
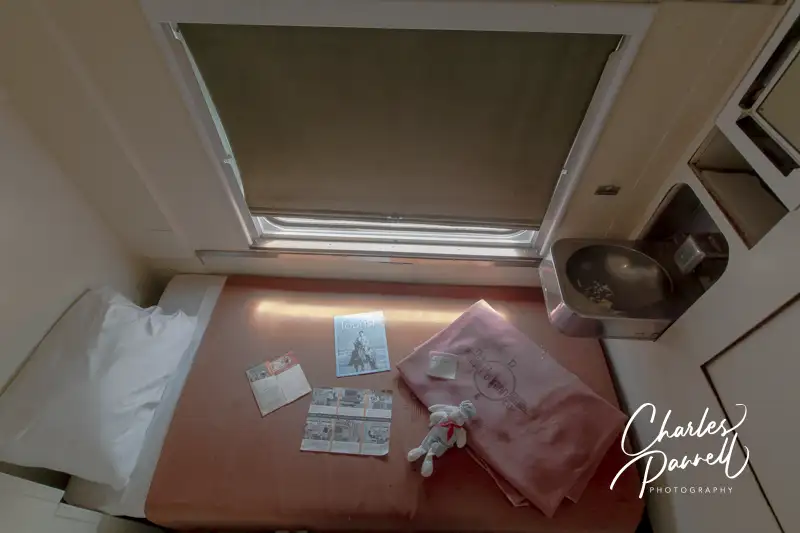
The great thing about the rolling stock in the yard is that you can explore as little or as much of it as you want, depending on your energy level. There’s level access to the yard, and the 1941 American Scene Sleeper Car sits rights outside the back door of the museum. Although there’s level access to it — no steps required — the hallways of yesteryear are too narrow for a wheelchair.
Inside the sleeper car, many of the compartments are set up as they would have been in the 1940s. And there are other exhibits about railroad life peppered in throughout the car. The sleeping car is attached to a dining car which has more exhibits that highlight life on board. From dishes and photos, to a uniform and even a telegraph display, there’s something for everyone.
Berth in Sleeper Car at The Inland Northwest Rail Museum
And don’t miss the Spokane, Portland & Seattle Railway’s St. Helens Sleeper Buffet Lounge Car. It’s located a short walk away, and although the ground is covered with gravel it’s fairly level. There are several steps up to this beauty, which was built by the Pullman Standard Company in 1950. Inside the compartments are roomier than the 1940s model, and they each include a toilet that pulls out from the sink cabinet. Although it’s a far cry from modern day trains, it was luxurious back in the day.
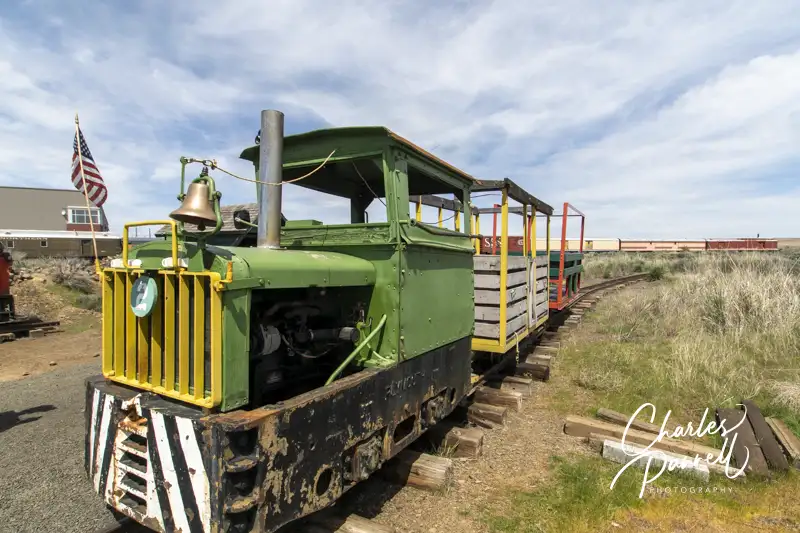
Last but not least, don’t miss a ride on the Rearden Rocket — a two-foot gauge railroad that runs through the museum grounds. You have to be able to step up into the open-air car for this two-mile ride that circles the campus, but it’s a fun finale. The engines are operated by enthusiastic volunteers, and hearing their stories is part of the fun. It’s the perfect finale to any Inland Northwest Rail Museum visit.
The Reardon Rocket at The Inland Northwest Rail Museum
Barrier-Free Travel Washington National Parks for Wheelers and Slow Walkers
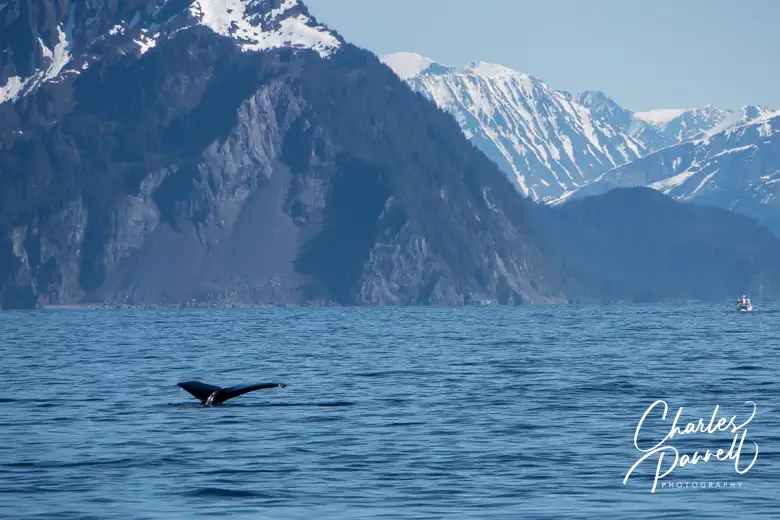
Whale Tail Breaching at Kenai Fjords National Park
Located at the head of Resurrection Bay, Seward is a popular port for many cruise ships, including Celebrity, Viking, Royal Caribbean and Silversea vessels. It’s also the gateway to rugged Kenai Fjords National Park, and the southern terminus of the Seward Highway. The good news is, it is possible to explore Seward in a wheelchair. In fact, this port city offers visitors a number of wheelchair-accessible tours and attractions. And that’s reason enough to spend at least one day in this Kenai Peninsula community on your next Alaskan cruise or road trip.
Explore Kenai Fjords
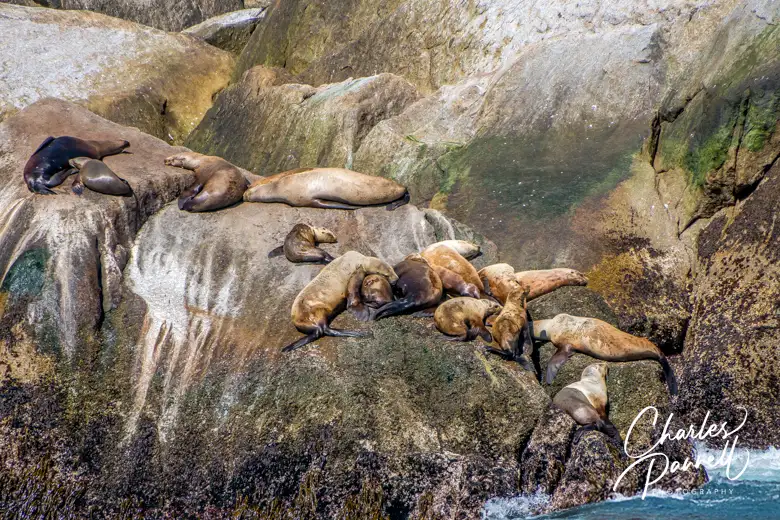
Seals viewed on the Kenai Fjords Tours
Although the lion’s share of Kenai Fjords National Park (www.nps.gov/kefj/) is comprised of backcountry trails and inaccessible glaciers, visitors can get a peek at the diverse wildlife and stunning scenery of the park on a day cruise.
Conducted by Kenai Fjords Tours (www.alaskacollection.com/day-tours/kenai-fjords-tours/), the Classic Kenai Fjords Park Tour tour departs twice daily from the Seward harbor. There’s level access to the ticket office , with a large drop-off area in front. Accessible parking is available in front of the Kenai Fjords Tours office, and in the remote parking lot, which is a few blocks away. There’s also accessible shuttle service from the remote parking lot to and from the harbor.
There’s level access out to the tour boat, and employees will provide boarding assistance with advance notice. Unfortunately the vessels cannot accommodate scooters. The main deck features good pathway access; and wheelchair users can transfer to a reserved accessible table or stay in their own wheelchair. If you opt for the latter, there’s also a handy fold-down table next to the accessible space. Additionally, there’s a large accessible marine head — reserved for disabled passengers — on the main deck.
Enjoy the Cruise
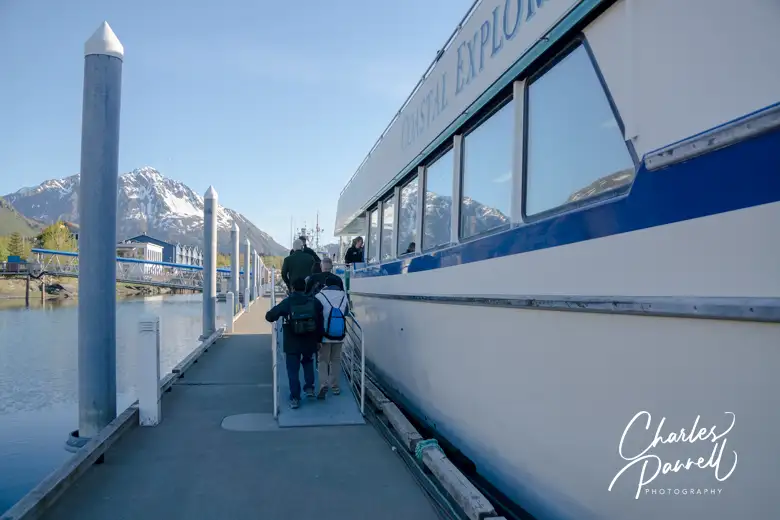
Boarding the Kenai Fjords Tour Boat
Although there’s only stairway access to the top deck, the main deck has large picture windows, so the view is equally good in both spaces. And the captain provides an excellent interpretation of the wildlife found in the water and along the shore. Sightings include whales, seals and puffins and maybe even bear or moose.
About midway along, the captain stops and turns off the engine so passengers can see and hear the glaciers calve off into the water below. Afterwards the crew retrieves a piece of an iceberg, so everybody can get a closer look. In short, it’s a very scenic, informative and entertaining cruise. Add in a tasty lunch served at your table, and a very accommodating crew, and you have the perfect way to enjoy Seward in a wheelchair.
Alaska Sealife Center
Alaska Sealife Center
A visit to the Alaska Sealife Center (www.alaskasealife.org/) is the ideal companion to a Kenai Fjords Cruise, as it offers a closer look at some of the local marine life. This unique facility, which is a cross between an aquarium and a research center, was partially funded by Exxon after the Valdez oil spill in 1989. Prior to that disaster, researchers had very little knowledge about the delicate ecosystem of Prince William Sound.
The tourism component of the facility allows visitors the chance to get up-close-and-personal with a variety of marine mammals, birds and fish found in the area. Accessible parking is available in the adjacent lot, and there’s level access to the center. There’s barrier-free access throughout the building, elevator access to all floors and a loaner wheelchair at the information desk. Best of all, the wheelchair-height aquariums offer unobstructed views of the marine life.
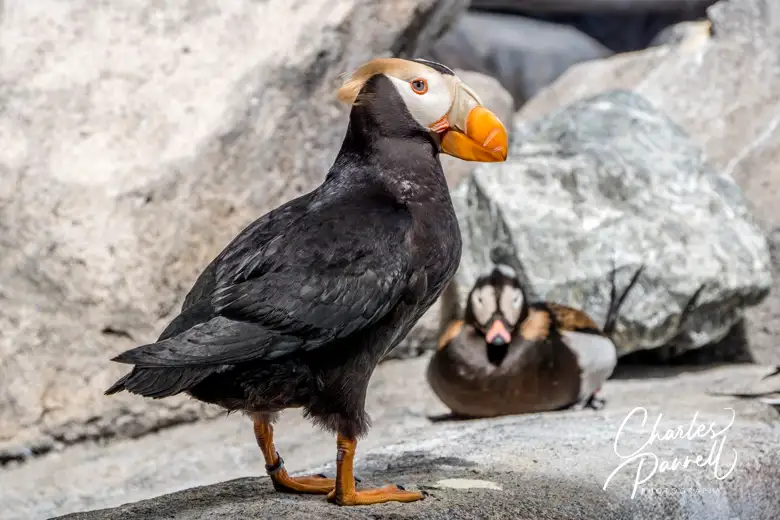
The first-floor exhibits include interpretive panels about fishing sustainably and wild Alaskan seafood, while the second floor has a nice collection of interactive exhibits. There’s also level access to the seabird aviary on the second floor, where visitors can get a close look at the resident puffins, cormorants and murres. And don’t miss the equally enjoyable antics of the stellar sea lions, harbor seals and ringed seals in the enclosure across the hall. And if you’d like a backstage look at the animal enclosures, a level overlook offers an accessible glimpse of that too. All in all, the Alaska Sealife Center is a fun and educational stop, and a must-see on any Seward itinerary.
Puffin at the Alaska Sealife Center
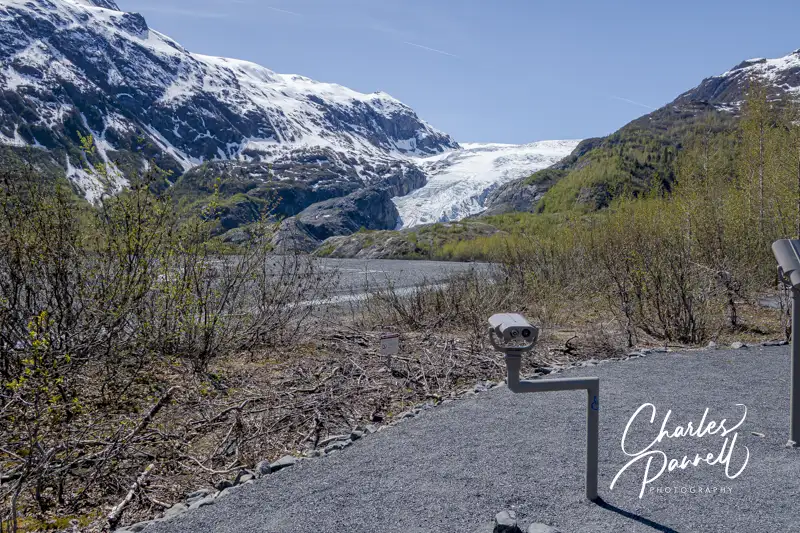
Visit Exit Glacier
Exit Glacier in Kenai Fjords National Park
Finally, a drive out to Kenai Fjords National Park to see Exit Glacier is a must-do on any Seward visit. Not only is it one of Alaska’s walk-up glaciers, but Exit Glacier is the only part of Kenai Fjords National Park that is accessible by road. It’s located three miles north of Seward, just off the Seward Highway. Keep a lookout for Herman Leirer Road and follow it for about eight miles, until it dead-ends in the parking lot.
There’s accessible parking near the Exit Glacier Nature Center, with level access over to the small building. Inside there are a few exhibits as well as a staffed ranger desk. There are also a few accessible picnic tables outside, near the accessible restrooms.
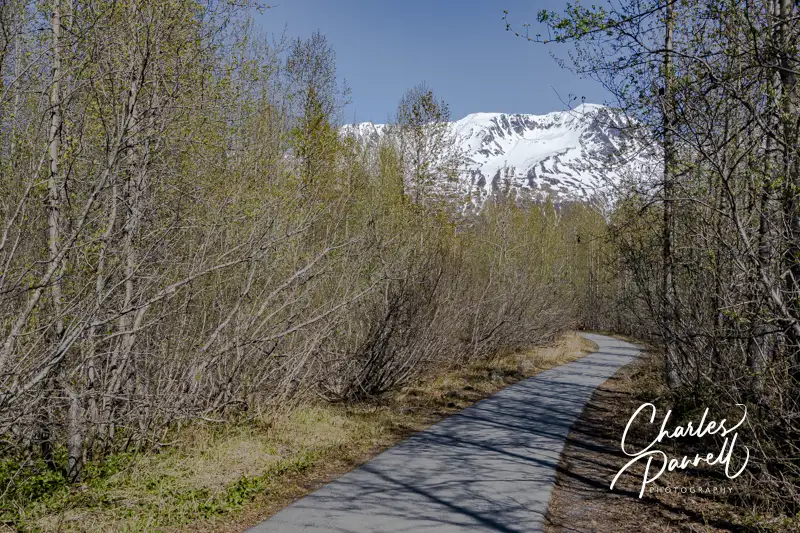
The wheelchair-accessible one-mile Glacier View Loop Trail begins on the other side of the nature center. The paved trail leads through a cottonwood forest and transitions into a hard-packed dirt trail topped with stabilized granite. About halfway along the trail there’s a level viewing spot, where you can get an excellent view of Exit Glacier, as it spills down the mountain from the Harding icefield. And if you didn’t bring along binoculars, there’s also a wheelchair-height viewing scope in the viewing area.
And although the view is spectacular, the walk is equally pleasant, as there are interpretive plaques and benches to sit and enjoy the forest along the way. And if you are visiting Seward on a cruise, Exit Glacier makes a great shore excursion. No matter how you get there, Exit Glacier is a must-see for anyone who visits Seward in a wheelchair.
Trail to the Exit Glacier in Kenai Fjords National Park
Barrier-Free Travel the Grand Canyon for Wheelers and Slow Walkers
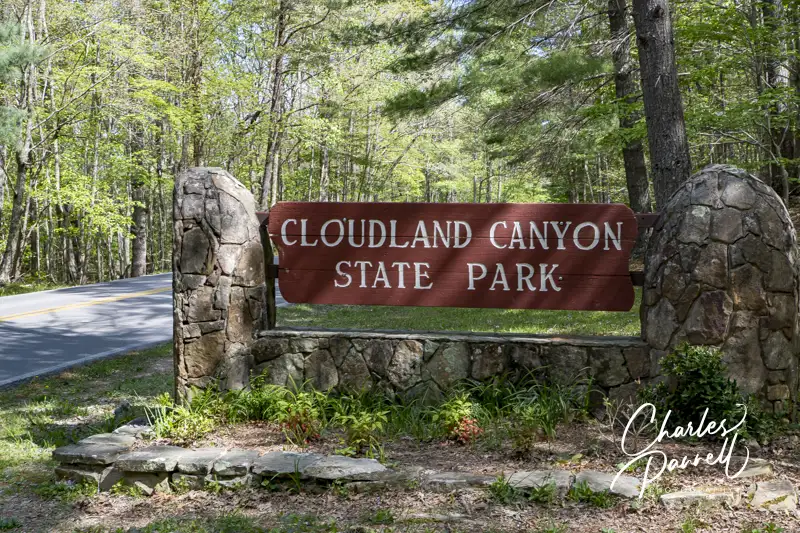
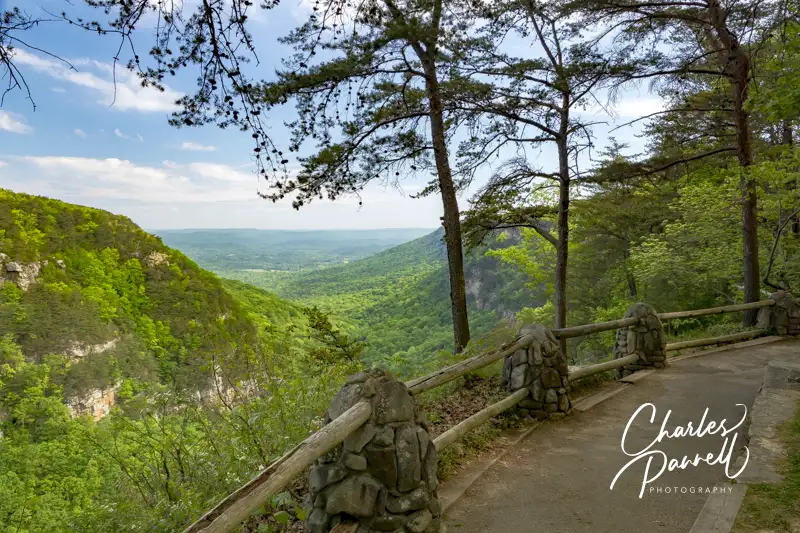
Located on the western edge of Lookout Mountain in far Northwestern Georgia, Cloudland Canyon State Park (gastateparks.org/CloudlandCanyon) boasts some of the best views in the state. Visitors marvel at the deep gorge cut by Daniel Creek, and enjoy sandstone cliffs, dense woodlands and abundant wildlife in this remote natural area. But remote doesn’t necessarily mean inaccessible, as slow walkers and wheelchair-users can also enjoy the scenery and then bed down in an accessible yurt at this off-the-beaten-path scenic find.
Enjoy the Canyon View
Overlook Trail in Cloudland Canyon State Park, Georgia
Although a good chunk of Cloudland Canyon State Park is composed of rugged backcountry and some challenging trails, the most spectacular canyon views can be found on the accessible Overlook Trail. Accessible parking is available in the picnic area parking lot, with level access over to the trailhead. There are also accessible picnic tables and restrooms near the parking area.
Make a right at the trailhead to take the Overlook Trail, as a left turn will put you on the inaccessible West Rim Loop Trail, which descends into the canyon. The Overlook Trail is wide and paved and mostly level, and is marked by light blue blazes on the trees. This half-mile trail winds along the canyon and offers some nice views along the way.
The most accessible overlook is located directly behind the interpretive center. Some manual wheelchair-users may require assistance with the slight grade, but it’s quite doable for most power wheelchair-users. There are also two more overlooks along the trail, but due to some aging Civilian Conservation Corps stone steps, they are not accessible.
After the second overlook the trail winds through the forest past a picnic table before it loses its access. Still it’s a pleasant one-mile round trip hike, with benches to sit and enjoy the forest along the way. And if you can’t manage the distance, at least stop for the beautiful canyon view behind the interpretive center.
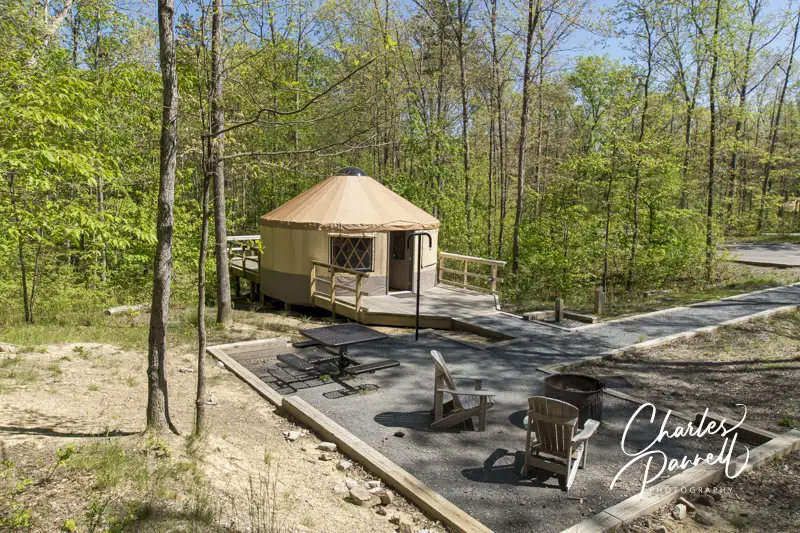
Camp Out in an Accessible Yurt
Yurt 10 in Cloudland Canyon State Park, Georgia
If you’d like to spend the night at Cloudland Canyon State Park, then reserve a comfortable yurt. Yurt 10 is wheelchair accessible and can sleep up to six people. Accessible parking is available near the yurt, with a drop-off space directly in front of the level walkway to the front porch.
The yurt features wide doorways and wood floors and is outfitted with a 13-inch high bunk bed (bottom bunk) and a 19-inch high double futon. Other furnishings include four bar stools, a tall table, a shorter wheelchair-height table and some shelves. The yurt is also equipped with electric outlets, a ceiling fan and a heater. Linens are not provided, so make sure to pack along your sleeping bag.
There’s level access out to the private back porch that’s surrounded by the forest, and furnished with two Adirondack chairs and a small table. Out front there’s an accessible picnic table on a pad, a grill, a deer dressing stand and a water spigot. It’s a comfortable set up, and with only 10 yurts in the village, it’s not as crowded as the campgrounds.
The comfort station is located a short walk down a paved road; however there’s also an accessible parking space in front if you’d prefer to drive. The standard comfort station is not accessible, but there are two large accessible family restrooms next door. They each feature a toilet with grab bars, a roll-under sink and a full five-foot turning radius. The shower area includes a roll-in shower with grab bars, a fold-down shower bench and a hand-held shower head. And since these two units are mirror images, there’s a choice in regards to toilet grab bar placement.
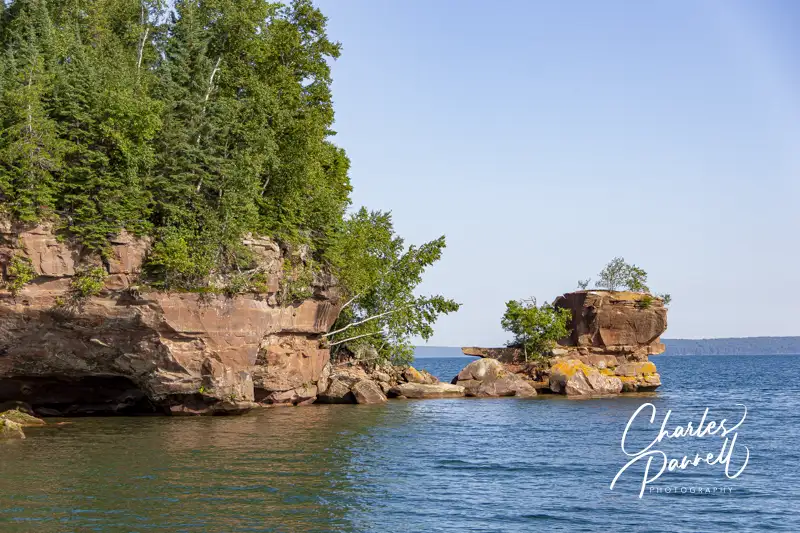
Located in Lake Superior, just off the Bayfield Peninsula, Apostle Islands National Lakeshore (www.nps.gov/apis/) is composed of 21 islands. Early settlers only found 12 of the islands though, so they named the site for the 12 apostles. The only way to explore the lakeshore is by boat – your own or a tour boat – and although there are a number of choices, Apostle Islands Cruises (www.apostleisland.com) is the best wheelchair-accessible Apostle Islands cruise option.
Anchors Aweigh
Based in Bayfield, Wisconsin, Apostle Islands Cruises offers several tours, including the comprehensive Grand Tour. This 55 mile scenic cruise departs from the Bayfield City Dock, aboard the accessible catamaran, Archipelago.
Accessible parking is available on Front Street near Rittenhouse, in front of the Keeper of the Light Gift Shop. There’s ramp access to the Apostle Islands Cruises ticket office, which is located on the corner of Front and Rittenhouse. From there it’s a short level walk out to the dock; however a loaner wheelchair is available for folks who can’t manage the distance.
There is level access to the Archipelago, and wheelchair-users and slow walkers are preboarded upon request (just ask at the ticket office). There’s plenty of room to maneuver a wheelchair around the spacious main deck, which is lined with large windows for panoramic views. There’s also a head on the the main deck that may work for some slow walkers. It has a two-inch coaming and a 28-inch wide doorway, and it’s equipped with one grab bar. On the plus side, the cruise is only 2.5 hours long so it’s easy to plan ahead if this setup won’t work for you.
Best bet is to buy your tickets online, as this is a popular summer tour. That said, feel free to call Apostle Islands Cruises if you have any access related questions or concerns (800-323-7619), as the staff is quite helpful.
The Wheelchair-Accessible Apostle Islands Cruise
The wheelchair-accessible Apostle Islands Grand Tour features a good overview of the history and natural features of the area, and includes an on-board guide. From the harbor the cruise heads past Basswood Island, which is know for it’s “sea stack” rock formation on the north shore. After that the cruise continues north past the sandstone carved formations on Hermit Island and then passes the tallest of the Apostle Islands — Oak Island.
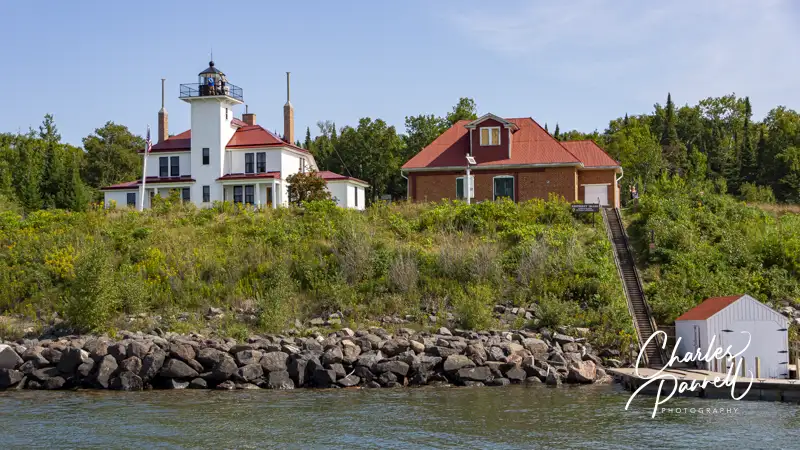
Raspberry Island in Apostle Islands National Lakeshore
Next the captain pulls in to give passengers a close look at the Raspberry Island Lighthouse. Built in 1862 this duplex building features the light tower in the middle with living quarters on both sides. The lighthouse keeper lived in one side, while the assistant lighthouse keeper lived in the other.
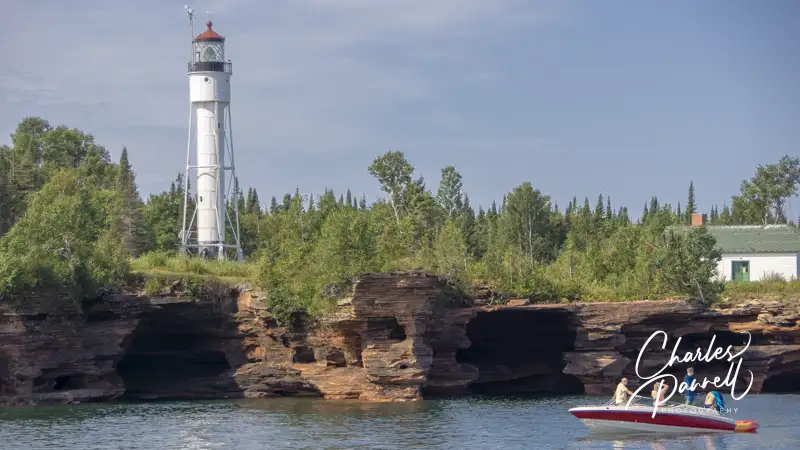
Devil’s Island in Apostle Islands National Lakeshore
After that the cruise continues north past Bear Island before it circles Devils Island for a look at another lighthouse and the rocky southern shore. Native Americans believed the island was haunted — hence the name — because the waves that crashed against the rocks sounded like a woman screaming. Today the shore is a popular spot for sea kayakers. The highlight of the island — Devils Island Light Tower — dates back to 1898, and it’s still in service today.
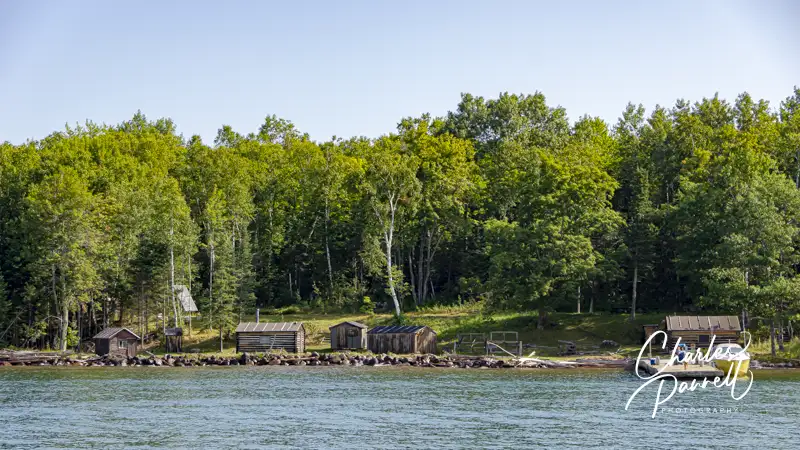
Finally, the cruise heads south past the fish camp on Manitou Island, then skirts Stockton Island, before it returns to the Bayfield City Dock. It’s a pleasant and educational cruise, and a nice accessible way for wheelchair-users and slow walkers to explore this remote national lakeshore.
Fish Camp on Manitou Island in Apostle Islands National Lakeshore
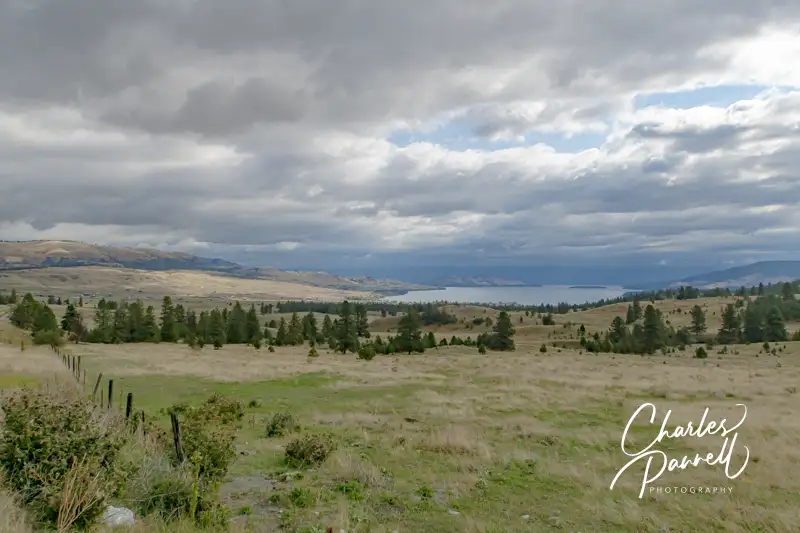
Billed as the largest freshwater lake west of the Mississippi, Flathead Lake takes up a fair amount of real estate. Measuring 30 miles long and 16 miles wide, it covers 197 square miles. And although there are a number of campgrounds around the lake, the one at the Big Arm Unit (montanastateparks.reserveamerica.com/camping/big-arm-unit–flathead-lake-state-park/r/campgroundDetails.do?contractCode=MT&parkId=630110) is particularly attractive. This section, which was name for the large bay that resembles a “big arm,” has just 40 campsites; most of which are located under a mature stand of ponderosa pines.
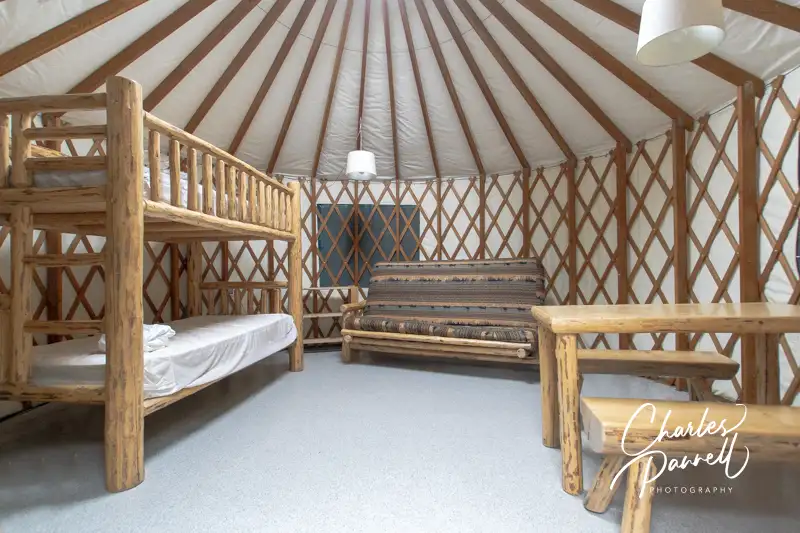
And then there are the yurts, which are perched on a hillside overlooking the lake. There are three of them, including one that’s ideal for wheelchair-users and slow walkers. So pack the car and hit the road to Western Montana, and spend the night in this wheelchair-accessible Flathead Lake yurt.
Wheelchair-Accessible Flathead Lake Yurt
Interior of Yurt at Flathead Lake, Montana
The organization of the campground at the Big Arm Unit allows for maximum privacy for folks in the yurts. Most of the campsites are located along the main park road near the shoreline, while only the yurts and the host sites are located on a small road above the lake. Finding it may be a bit tricky the first time though, because the sign pointing to the yurts is located right after the turn. No problem, just continue down to the general campground, turn around by the restrooms, then hit the turn on your way back. The wheelchair-accessible Swan yurt is the last one on the right.
There’s parking in a level area, with room to deploy a ramp near the yurt, and a level pathway over to the deck. The deck winds around to the front of the yurt, where there’s level access through a wide door. Inside, there’s plenty of room to roll around the yurt, which is furnished with two shelving units, a table with two benches, a bunk bed (the lower bunk is 21 inches high) and a futon. The 19-inch high futon folds down and can accommodate two people, with wheelchair access on one side.
The yurt also includes several electrical outlets, lights, a heater and a fan. And the unit is partially surrounded by trees for privacy, but there’s still a nice view of the lake from the front deck. Add in an accessible vault toilet next door, and you have just about everything you need.
There’s More!
Accessible Yurt at Flathead Lake, Montana
There’s certainly enough room on the deck for a camp chair or two, but there’s also an accessible picnic table right next to the yurt. There’s a raised grill and a fire ring next to it, so bring some s’more makings and you’re good to go.
There’s also a tent pad next to the picnic table. The short pathway to the tent pad has a steep slope, which would be a challenge for many wheelchair-users. That said, it might be a good option for friends or family who don’t need any accessible accommodations.
And of course, you just can’t beat this location, as Flathead Lake is beautiful. You can get a closer look at it from the day-use area, which is near the park entrance. Make a right, just after you pass the entrance kiosk. This road goes all the way to the boat launch, but there’s a nice picnic and viewing area on the right, before you hit the launch.
There’s accessible parking in this lakeshore lot, and a sidewalk that leads over to an accessible vault toilet. There are two accessible picnic table under the pines near the lake, with level access out to them. There’s also a large ramada in this area, and although it does have level access and an accessible picnic table, it’s reserved for groups. And if you happen to be launching a boat, there’s an accessible trailer parking spot right behind the vault toilet. All in all, the Big Arm Unit of Flathead Lake is a pleasant place for a picnic, or a nice place to take a break, spend the night and and enjoy the view.
Barrier-Free Travel Glacier, Yellowstone and Grand Teton National Parks for Wheelchair-Users and Slow Walkers
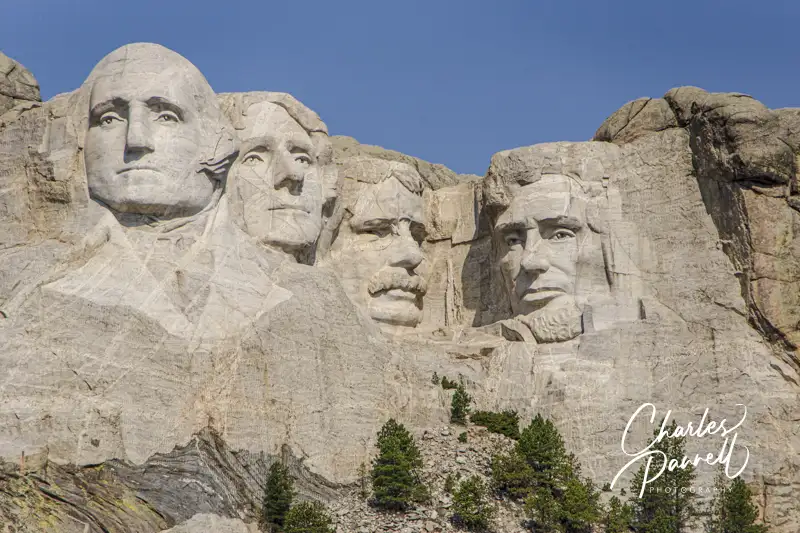
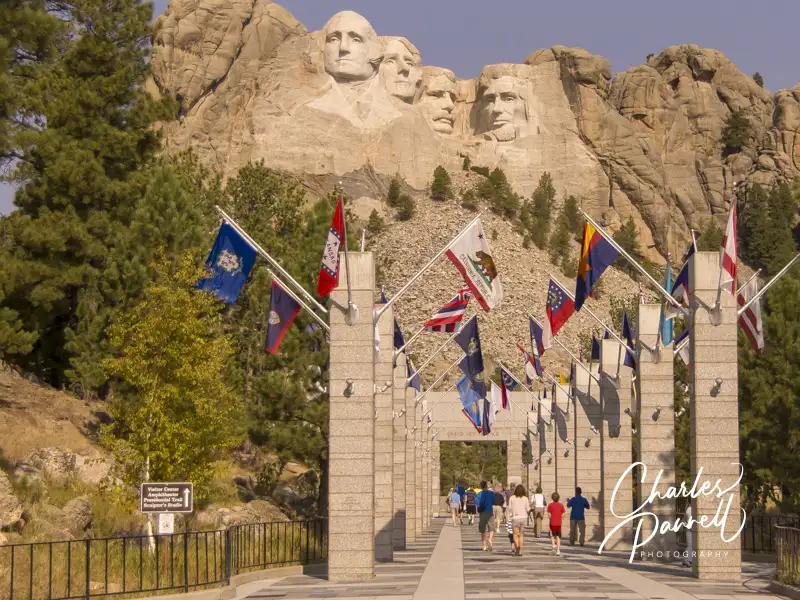
Mount Rushmore is a bucket list item for many folks. It’s also makes a great stop on any Black Hills road trip. And although the stately presidential carvings are indeed a sight to see, there’s also a scenic drive with lots of wildlife viewing opportunities nearby. And the the good news is that Mount Rushmore — like the majority of US National Parks and monuments — includes some upgraded access features. So don’t forget to make a stop at wheelchair-accessible Mount Rushmore on your next trip through South Dakota.
Mount Rushmore for Wheelchair-Users
Avenue of the Flags at Mount Rushmore National Memorial, South Dakota
Located just 35 minutes from Rapid City, Mount Rushmore (www.nps.gov/moru/) was sculpted by the father-son team of Gutzom and Lincoln Borglum. It took them 14 years to complete the intricate carvings of the four presidents — Washington, Jefferson, Roosevelt and Lincoln. And as a result of their hard work, the sculptures have stood the test of time.
Although there’s no entrance fee to Mount Rushmore, there is a fee to park in the garage. Accessible parking is available in the garage, with ramp and elevator access up to the main level. Additionally, there’s a drop-off area right in front of the main entrance. Loaner wheelchairs are available at the Information Center, which is located near the main entrance, just across from the restrooms (which are also accessible).
There is barrier-free access down the Avenue of the Flags to Grand View Terrace, where you’ll catch your first glimpse of the four presidents. From there, take the left entrance to the Presidential Trail, which travels past the Lakota Indian Heritage Village to four alcoves with optimal views of each president. The trail is paved and level, and the accessible portion ends at the Upper Terrace, where you’ll get another good view of the mountain. From there you’ll have to double back, as the trail continues downhill with lots of steps along the way. Still, the quarter-mile accessible stretch offers the best views of the presidential carvings.
There’s also elevator access to the amphitheater and the Lincoln Borglum Visitors Center, on both sides of Grand View Terrace. And if you’ve worked up an appetite, the Carver’s Cafe along the Avenue of the Flags is wheelchair-accessible.
A Scenic Drive and More
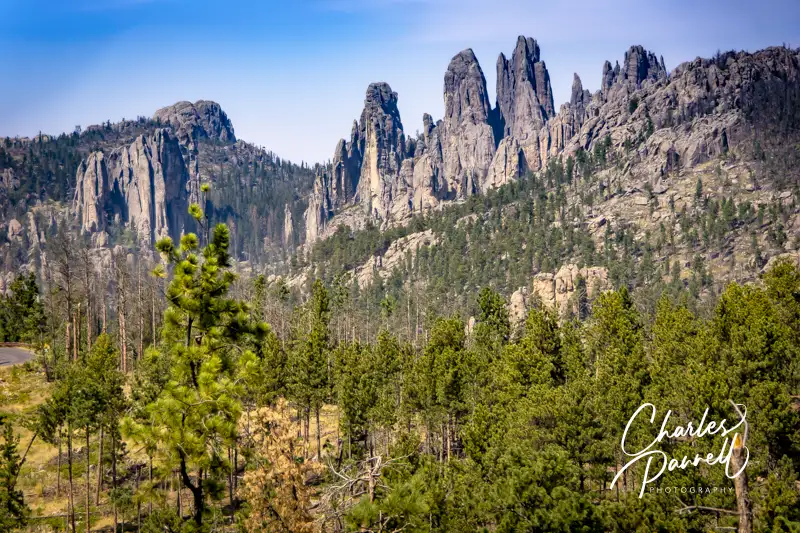
Little Devil’s Tower and Cathedral Spires on the Needles Highway Scenic Drive in Custer State Park, South Dakota
After your wheelchair-accessible Mount Rushmore visit, save some time to enjoy one of the most scenic drives in the state. From Mount Rushmore, follow the signs back to Highway 16A, then head towards Custer State Park. Along the way you’ll pass through three one-lane tunnels, and get some absolutely gorgeous windshield views of the scenic Black Hills. Have your camera ready as you exit the second tunnel, as it’s a great vantage point for the iconic shot of Mount Rushmore.
After your visit, be sure to take a cruise along the Needles Highway Scenic Drive. At the end of Wildlife Loop Road, take a right on Highway 87 and follow the signs. Named for the needle-like formations and cathedral spires that dot the landscape, the route traverses a Ponderosa Pine forest and passes through three narrow tunnels.
There are lots of spots to stop and enjoy the view, but make sure and use the pullout right before tunnel five, for a great view of Little Devil’s Tower and Cathedral Spires. After that, you’ll get up-close-and-personal with the spire-like formations, as the road cuts right through them. It’s a once-in-a-lifetime drive, and a great way to end a wheelchair-accessible Mount Rushmore visit.
Barrier-Free Travel Glacier, Yellowstone and Grand Teton National Parks for Wheelchair-Users and Slow Walkers
As one of the most popular national parks, Yellowstone tends to attract the bulk of its visitors during the peak summer season. And although crowds can detract from the pristine natural beauty of Mother Nature, there are a few ways to dodge the crowds in Yellowstone.
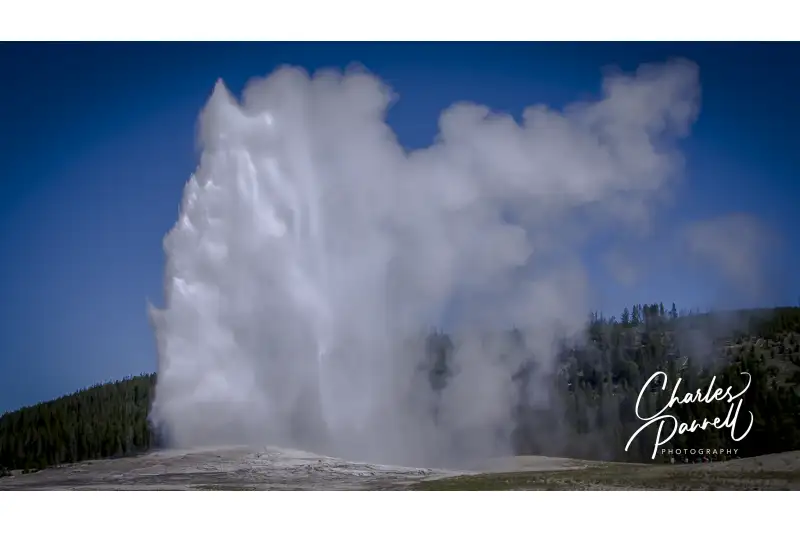
First off, get an alpine start no matter when you visit; and if possible try and plan your trip in the shoulder seasons for a less crowded experience. And although Old Faithful is a must-see, seek out some of these less touristed spots in the park to avoid the masses. And the good news is, all of these sites are good choices for wheelchair-users and slow walkers.
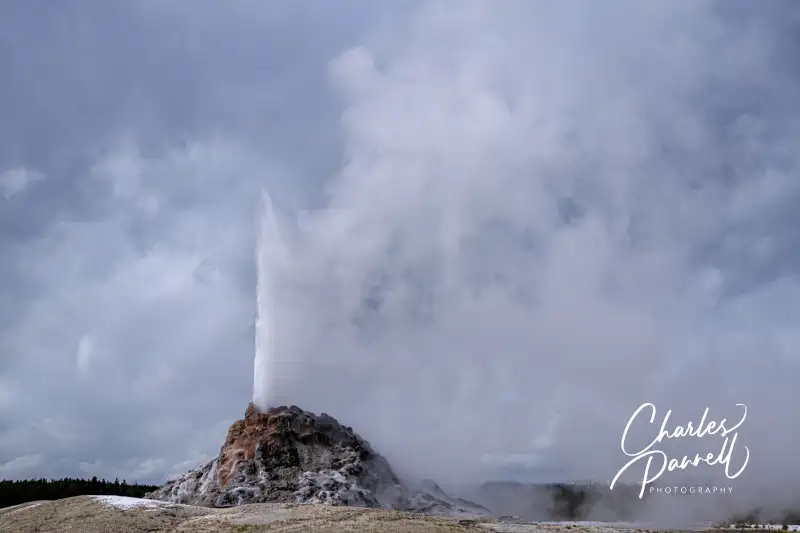
White Dome Geyser on Firehole Lake Drive
White Dome Geyser on Firehole Lake Drive at Yellowstone National Park
A scenic ride along Firehole Lake Drive tops the list of ways to dodge the crowds in Yellowstone. This one-way loop drive begins about a mile south of Fountain Paint Pot, along the road to Old Faithful. You can drive the route straight through, as many of the geysers and hot springs are visible from the road; or opt to stop at the pullouts along the way and get a closer look at the thermal features.
As an added bonus, it’s not unusual to spot bison along the first section of the drive; and there’s nothing quit like hearing their eerie grunts and groans from the boardwalks of the nearby geysers. Even better — the route is pleasantly devoid of the bus loads of tourists that frequent the other area attractions, as larger vehicles are not allowed on this road. And finally, most visitors completely pass it by in their rush to get to Old Faithful.
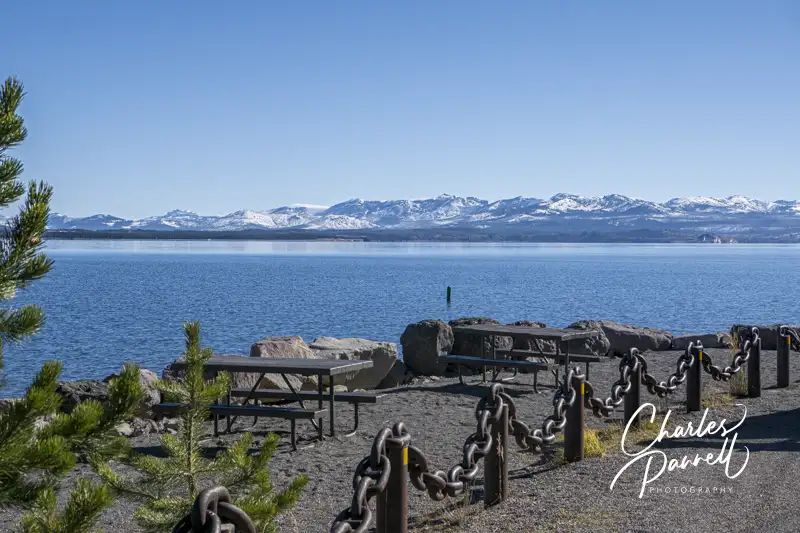
Gull Point Road Unnamed Picnic Area
Gull Point at Yellowstone National Park
Eating alfresco in a national park is a great experience, but unfortunately some of the more popular picnic areas in Yellowstone are packed to the brim. That said, this little gem — that unfortunately lacks a name — usually makes for a pleasant lunch stop. It’s located near the Bridge Bay (north) end of Gull Point Road, about a half-mile north of the turnoff to the Gull Point Picnic Area.
There are just two tables there, but they are located on a level pad and they offer a great view of the lake and the surrounding mountains. Parallel parking is available on a level asphalt area, just steps from the tables, so this spot is especially good for folks who can’t do distances. And even though the tables lack extensions, there’s still room on the end for a wheelchair. There are no restrooms at this picnic area, but don’t let that deter you, as you can always use the accessible ones down the road at the Bridge Bay Marina.
West Thumb Geyser Basin Boardwalk
West Thumb Geyser Basin at Yellowstone National Park
Next up on the list of ways to dodge the crowds in Yellowstone is a visit to West Thumb Geyser Basin. Located just north of Grant Village, this geothermal area offers a short wheelchair-accessible boardwalk. The half-mile trail begins near the accessible parking area, and leads around the inner loop. Along the way it passes by the thumb paint pots and offers a good view of the central basin with the mountains in the background. There are benches to sit and rest along this fairly level boardwalk trail, and accessible vault toilets are located in the parking lot.
The longer outer loop in this geothermal area is not accessible because of a steep grade, and it may be dangerous for wheelchair-users. Still the inner loop offers a good look at the unusual geothermal features. Although West Thumb Geyser Basin isn’t devoid of visitors, it not nearly as crowded as the geothermal areas near Old Faithful.
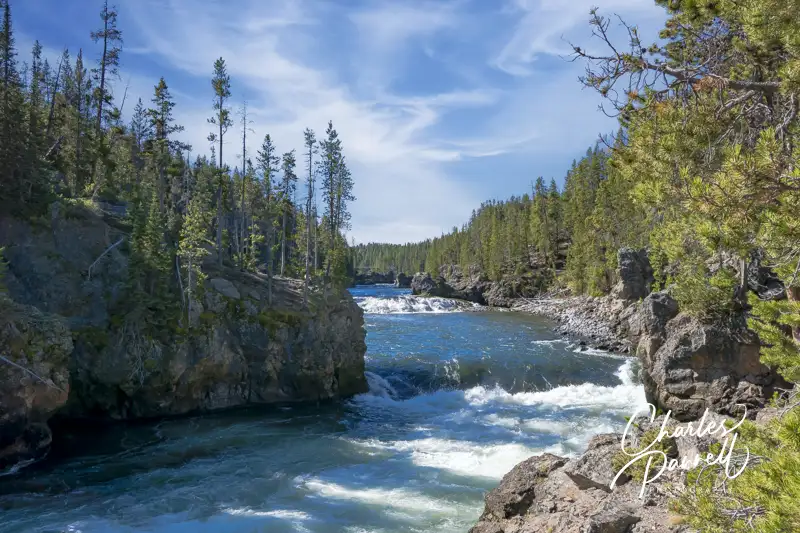
North Rim Trail
River View on the North Rim Trail at Yellowstone National Park
A portion of the North Rim Trail located near the Brink of the Upper Falls is wheelchair-accessible, and most people opt for the brink instead of this trail. To find the trail, take the turnoff to the Brink of the Upper Falls, which is located midway between North Rim Drive and South Rim Drive along the road to Lake Village. From the parking lot follow the sign to the brink, but instead of bearing left and heading downhill, continue straight ahead at the fork.
The path to the right is the North Rim Trail, which offers an equally impressive falls view. The paved trail leads through the woods for a half-mile, before it crosses over the historic Canyon Bridge and offers a great view of Chittenden Bridge in the distance. This trail loses its access because of a steep grade just before Chittenden Bridge, but it still makes for a lovely 1.6-mile out-and-back-hike.
Frying Pan Spring
Frying Pan Spring in Yellowstone National Park
This small hot spring is located north of Norris Campground on the west side of the road to Mammoth. It’s easy to drive right by it, and many folks do exactly that. There’s no striped parking in the pullout, but there’s usually enough room to parallel park an accessible van in the small paved area.
A 400-foot level boardwalk leads from the parking area over to this unusual spring, that’s roughly shaped like a frying pan. There’s also a bench at the end of the boardwalk, if you’d like to sit and admire the view. You’ll most likely have this site to yourself too, as it’s not included on any of the park maps, and it really doesn’t look like much from the road.
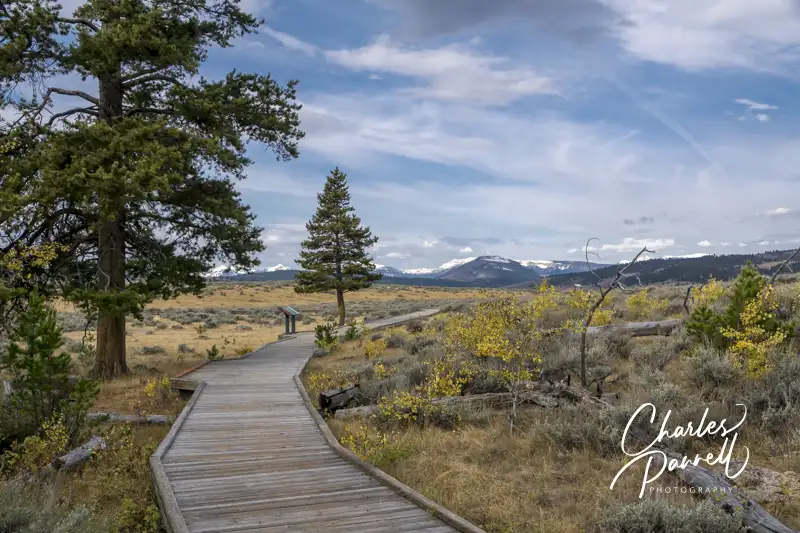
Forces of the Northern Range
Forces of the Northern Range Boardwalk in Yellowstone National Park
Last but certainly not least on the list of ways to dodge the crowds in Yellowstone, is to check out the Forces of the Northern Range boardwalk. Tucked away along the road between Tower Junction and Mammoth Hot Springs, the trail is only marked by a small brown “self-guided trail” roadside sign. And most folks just zip right on by it.
The half-mile accessible boardwalk winds through the sagebrush and shrub-lined landscape and features scenic views of Yellowstone’s Northern Range in the distance. Interpretive plaques that detail the flora, fauna and geology of the area are dotted along the boardwalk, and several short spurs lead out to secluded areas that are lined with benches, so folks can sit back and admire the scenery. And even though it’s a short trail, because of the spurs and vegetation, it doesn’t feel crowded, even when there are a lot of people out there. It’s a very well designed trail, with magnificent views of the surrounding landscape.
Barrier-Free Travel Glacier, Yellowstone and Grand Teton National Parks for Wheelchair-Users and Slow Walkers
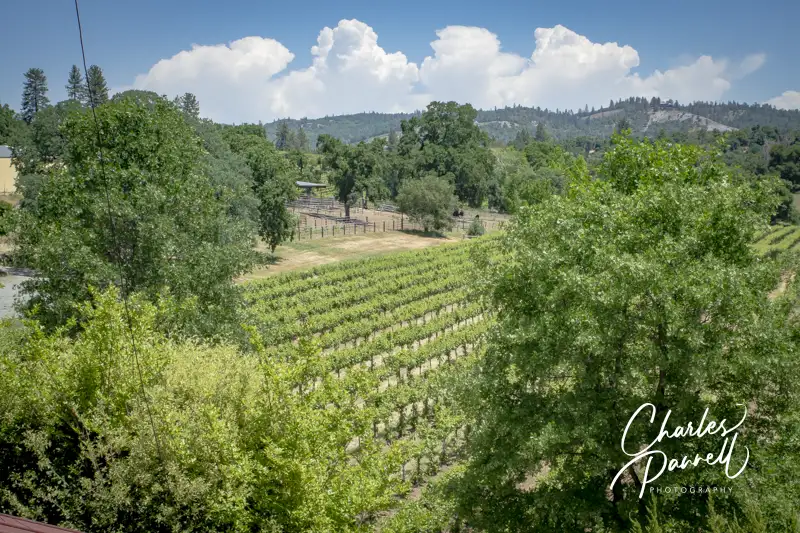
Located in the Sierra Nevada foothills, just 133 miles east of San Francisco, Calaveras County is the perfect spot to slip away for a weekend wine tasting getaway. The pace is slower than some of the more famous California wine regions, and the winemakers are unpretentious and happy to chat about their wines. It’s a relaxing and refreshing experience. And although there’s no shortage of tasting rooms in the area, Ironstone Vineyards tops the list for location, variety and wheelchair access
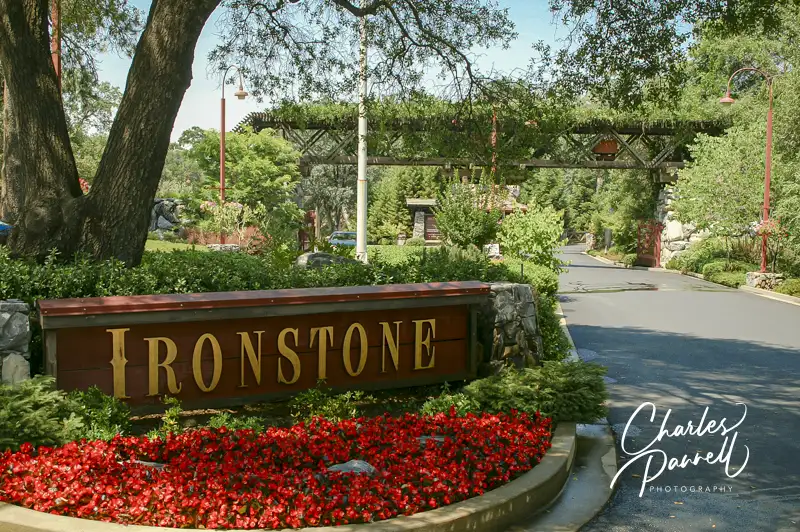
Ironstone Vineyards
Vineyards at the Ironstone Winery
Getting to Calaveras County is easy. From the Bay Area head east on Interstate 5 to Stockton, then continue east on Highway 4. As you leave the city you’ll feel the stress melt away while you cruise along this country byway. About an hour down the road, just outside of Murphys, make a left on 6 Mile Road. Ironstone Vineyards (www.ironstonevineyards.com) is about three miles down the road — you can’t miss it.
There’s plenty of accessible parking at this popular winery, with level access over to the tasting room. Owned by the Kautz family, this vineyard grows a variety of fruit, including Cabernet Franc, Symphony, Cabernet Sauvignon and Merlot. Visitors can choose five tastes from the daily menu, to see what strikes their fancy. There’s also a store, a lakeside park, a museum , and even an amphitheater in the complex. And access is good throughout the complex, with elevator access to all floors, level thresholds and paved pathways.
Estate tours are also available, and most of the stops on this walking tour feature level access. And if you can’t manage the walk, golf cart transportation is also available. Highlights of the tour include the 44-pound gold nugget in the Heritage Museum, the 1,200-pipe organ in the Alhambra Music Room and the spectacular seasonal flower gardens. Ironstone Vineyards is definitely more than just a winery.
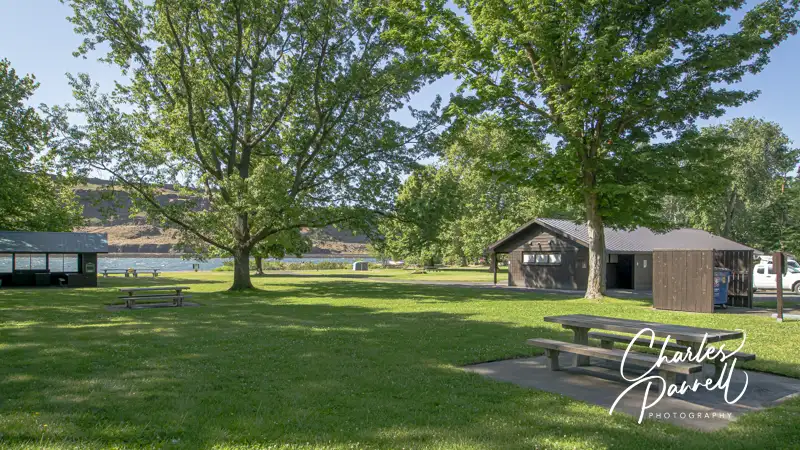
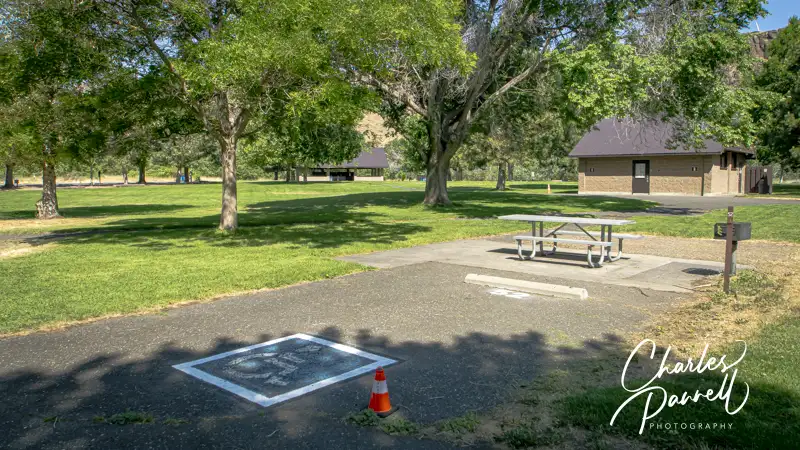
Located near the Intersection of Interstate 84 and Highway 97 in rural Washington, Maryhill State Park makes a great rest stop on any Columbia River road trip. With great views of the majestic river, this 81-acre park offers a nice selection of picnic sites, as well as a variety of overnight camping options. Granted it’s a great choice for a quick hop-off-the-highway lunch break, but because of its proximity to some unique roadside attractions, this Southern Washington gem is also an optimal pick for an overnight stay. So hop off the Interstate on your next Columbia River road trip, and stay a spell at Maryhill State Park (parks.wa.gov/find-parks/state-parks/maryhill-state-park).
Eat and Sleep
Maryhill State Park has both RV sites and tent sites, with good access in both. Tent Sites 52 and 53 are accessible, and they are located near the accessible restroom and shower house. Both sites have accessible van parking, a level tent site, an accessible picnic table and a raised grill. There’s also a paved path from each site to the restroom, which includes a large accessible stall with grab bars. Each side also has a roomy compartment with a roll-in shower with with grab bars, a lowered showerhead and a fold-down shower seat. Best of all, the showers are free.
Tent Camping Site 53 at Maryhill State Park, Washington
The accessible RV site (51) is located near the day use area. It has a paved driveway, an accessible picnic table, and a standard grill. It’s a short walk away from the accessible restroom, but not as close as the tent sites. This site was an addition to the property and it sits outside of the RV loop, and on the plus side it doesn’t neighbor any other RV sites. All of the accessible sites in the park require proof of disability — such as an accessible parking placard — in order to occupy them. It should also be noted, that there’s some freeway noise and train noise in this park.
There’s also a nice picnic area in the park, with a Columbia River view. There’s accessible parking near the accessible restrooms. It’s about a 30-foot roll over a level grassy patch out to the closest picnic table. Although it’s a standard table on a cement pad, there’s room for a wheelchair at the end. It’s a pleasant place to stop for lunch on the road.
Art Appreciation 101
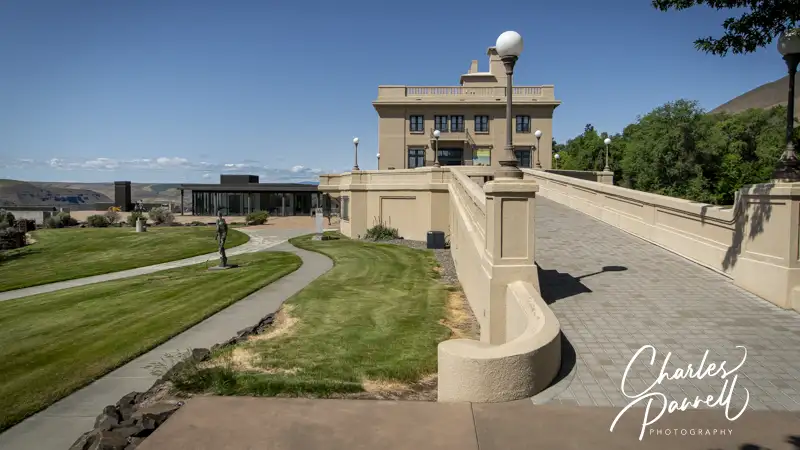
The Maryhill Museum of Art
If you’re spending the night at the park, be sure and plan a visit to the Maryhill Museum of Art (www.maryhillmuseum.org), which is just up the road. The museum building was originally the home of Sam Hill. Hill’s goal was to establish a Quaker community — named after his daughter Mary — on his land; however due to a lack of irrigation it never came to fruition. He later donated his home, which subsequently became the Maryhill Museum of Art. It was dedicated by Hill’s friend Queen Marie of Romania in 1926.
There’s accessible parking in front, with a long ramp up to the museum entrance. If the slope and length of the ramp are too much for you, there’s an accessible entrance on the lower level on the left side of the building. Just follow the sidewalk around to the door, and ring the bell. Inside there’s good pathway access throughout the museum, elevator access to all levels and accessible restrooms on the ground level and lower level.
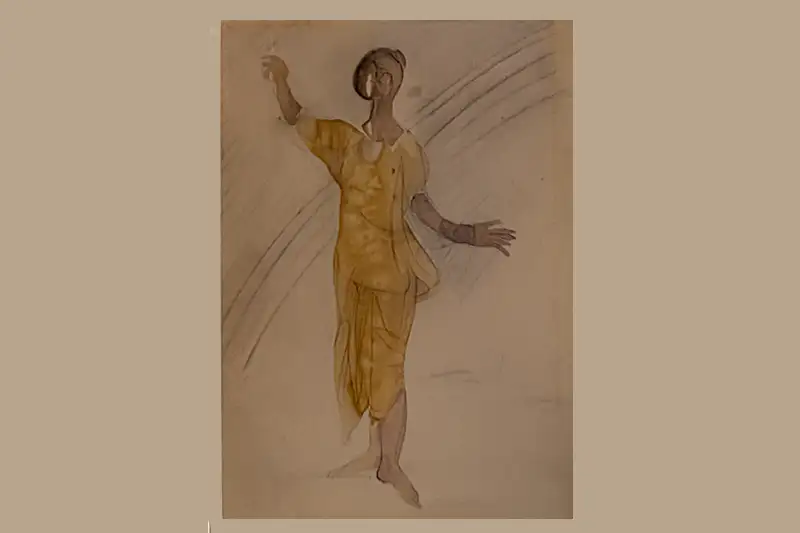
Variety is the key word at this museum, which also offers some interesting visiting exhibitions. Don’t miss the Queen Marie of Romania gallery near the entrance, which includes the gown she wore to the coronation of Nicholas II in 1896. The ground level features a substantial collection of indigenous peoples artifacts, including an extensive basket display. And in contrast, the opposite wing offers and equally diverse Rodin exhibition. Round things out with a display of over 80 chess sets and related works of art, and the contemporary Stevenson Wing that’s lined with windows, for the full Maryhill Museum of Art experience. And don’t forget to take a stroll along the accessible paths outside, to take in some of the garden sculptures and enjoy a Columbia River view.
Rodin Sketch of Cambodian Dancer at the Maryhill Museum
A Little Vino
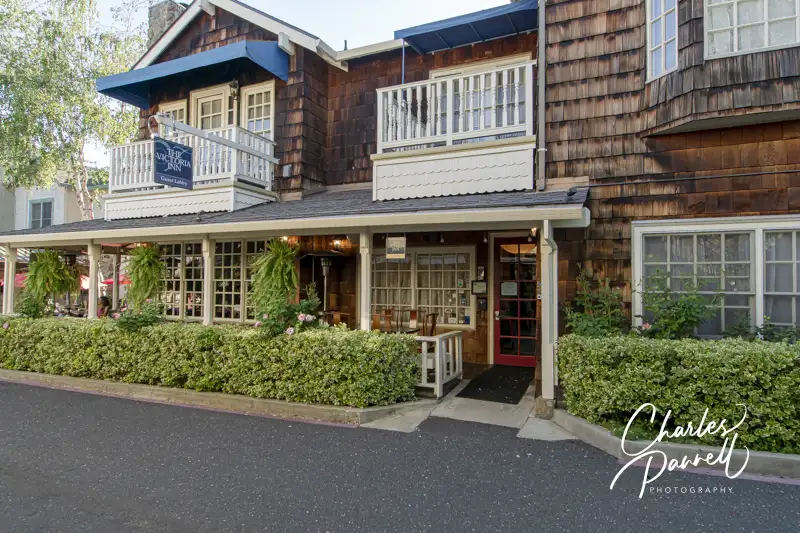
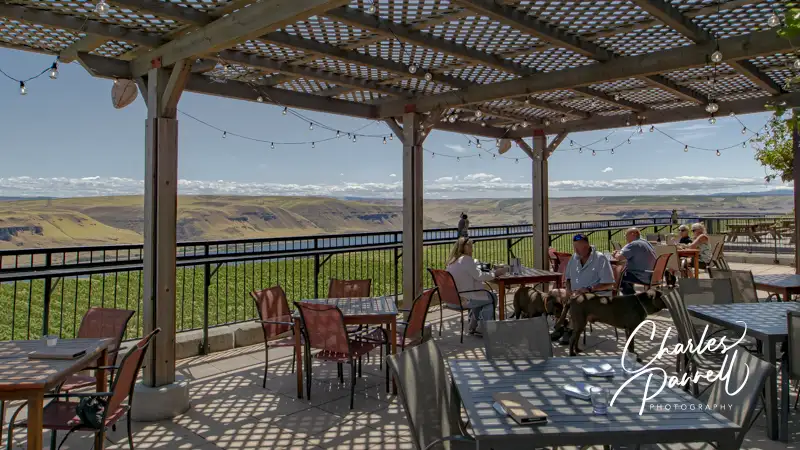
Bistro at the Maryhill Winery
When it’s time for a break, be sure and stop in at the Maryhill Winery (www.maryhillwinery.com), which is just a mile west of the museum. Established in 1999 by Craig and Vicki Leuthold, Maryhill Winery is one of the largest wineries in Washington state. Their first vintage was released in 2001, and since then they’ve garnered over 4,000 awards. They are known for their Washington state varietals, but they also produce some equally impressive blends.
And you just can’t beat their location, high above the Columbia River. Accessible parking is available right next to the entrance. You have two choices here — you can have a bite to eat in the bistro, or you can do a tasting flight in the bistro or the tasting room. Personally I recommend lunch in the bistro, followed by a tasting flight. The menu includes sharable snacks, sandwiches, salads and pizza, and you just can’t beat the Columbia River view.
That said, there’s also level access to the adjacent tasting room, with several lowered tables located near the windows. If Mother Nature isn’t cooperating, it’s another way to snag a great river view while tasting the wines. And with an accessible restroom just around the corner, you have everything you need at Maryhill Winery.
A Historic Museum
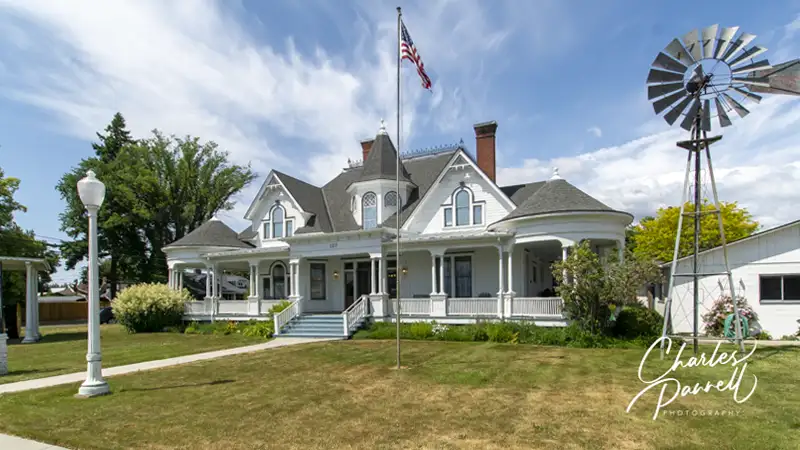
The Presby Museum in Goldendale, Washington
For a different view of the area, head north on Highway 94 and stop in at the historic Presby Museum (www.presbymuseum.com) in Goldendale. Located on the corner of Broadway and Grant, this spacious home was built by Winthrop B. Presby in 1902. He lived there with his second wife Zoe from 1903 to 1915. After that the mansion served as a boarding house for teachers and railway workers, before it was sold to the Klickitat County Historical Society in 1962. Today it’s home to the Presby Museum, where visitors can step back in time and get a taste of yesteryear.
There’s accessible parking to the right of the museum, in the driveway between the museum and the Carriage House. And although steps grace the front facade there’s a wheelchair lift on the side of the house. The first floor of the home is wheelchair-accessible, but the second and third floors can only be accessed by stairs. That said, some of the most interesting pieces are on the first floor.
A larger-than-life pump organ dominates the parlor, which also includes a Victrola and a pianola (a type of player piano). Across the way Mr. Presby’s office includes some interesting artifacts, including a clock from the 1800s and some period law books. The only original piece of furniture — a sideboard hutch — can be found in the dining room. And the kitchen has a gaggle of vintage utensils as well as a wood stove and a washing machine. It’s an interesting peek into the early 1900s.
Finally, the Carriage House and the Annex, have a small one-inch step, and they include everything from a vintage printing press to relics from an old schoolhouse. They’re definitely worth a visit, and if you have questions, just ask the docents.
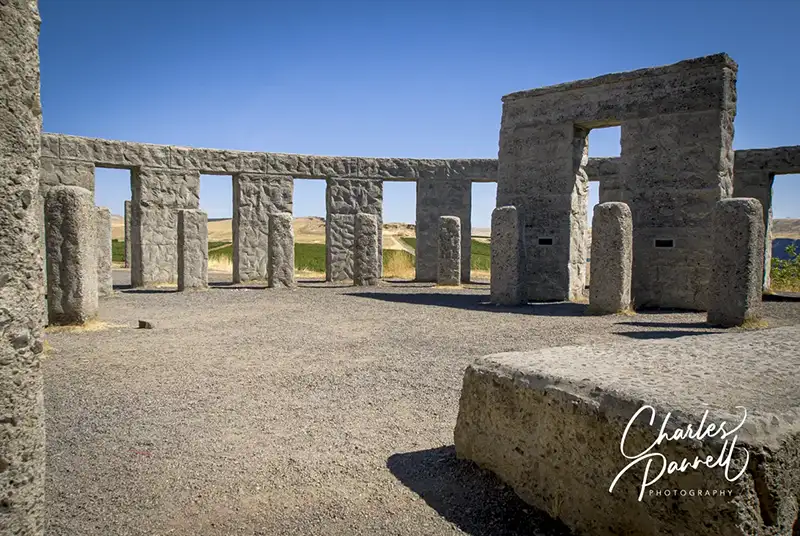
Don’t Forget Stonehenge
Last but not least, don’t leave the area without a visit to the Maryhill Stonehenge replica (emerginghorizons.com/stonehenge-memorial) down near the Columbia River. At first glance it seems an odd location for this monument, but the reason for the choice was due to misinformation. Sam Hill designed the monument in 1918, as a memorial to local men who perished in the Great War. At that time Hill believed that the original Stonehenge was used as a place for human sacrifices. And he reasoned that the human sacrifices at Stonehenge were not unlike the loss of life in WWI.
And although the replica was designed to look like the original, because of the difference in latitude and different alignment, the Maryhill rendition cannot be used as a astronomical calendar. Still it’s definitely worth a stop, as there’s level access to the entire monument. And like many of the other Maryhill stops, you’ll also get a great Columbia River view from the monument.
Barrier-Free Travel Washington National Parks for Wheelers and Slow Walkers
Established in Yosemite National Park in the 1930s, the National Park Junior Ranger Program has a long history of introducing kids to the ecology, wildlife and geology in US National Parks. Available at most national lands, the premise is pretty simple. Kids pick up a field manual at the ranger station, complete the age-appropriate activities in it, then return it to the ranger and get a patch, badge or other rewards. And of course, they are also sworn in as a junior ranger.
And although the National Park Junior Ranger Program is targeted at kids between and 5 and 13, it’s also for the young at heart. Truth be told, anyone can take part in this fun and educational program, even if you don’t have any kids in tow. Case and point, is my own up-close-and-personal experience of earning my coveted junior ranger badge in Isle Royale National Park. And to be honest, it was harder than it looked at first.
My National Park Junior Ranger Program Experience
My junior ranger journey began with a happenstance encounter with two ladies who I fondly nicknamed Thelma and Louise, aboard the USS Voyageur in the national park of the same name. Thelma and Louise were about my age and they were having quite the animated conversation about a magazine they were both perusing. Upon closer inspection I saw that the magazine was actually a junior ranger field manual for Voyageurs National Park. I was intrigued, as I always thought that the Junior Ranger program was reserved for kids, so I wandered over and struck up a conversation.
As it turned out Thelma and Louise were visiting national parks across the country and racking up junior ranger badges along the way. And the park rangers absolutely loved it, as the field manual activities and questions make participants — no matter what their age — think and learn about our national parks.
Thelma and Louise were thrilled when they completed their Voyageurs junior ranger field manual, and they were ceremoniously sworn in before the tour boat docked. As Thelma later told me, “I’ve really learned so much doing this, and the questions are not as easy as you might think. You have to pay attention, study the exhibits and listen to the rangers to get the right answers. It’s such a fun way to learn.”
Over the next few days I observed several other adults with junior ranger field manuals in hand, so when we rolled up to Isle Royale National Park I decided to give it a try. To my amazement the ranger at the Houghton Visitor Center didn’t even bat an eye when I requested a junior ranger field manual with nary a kid in tow.
Earning My Junior Ranger Badge
Then the real work began. I opened my field manual, and although there were some easier activities for younger kids, some of the exercises for older kids took some definite critical thinking. For example, I had to learn about the fish in Lake Superior and then name and describe a new species that I was tasked to create. I also had to learn a little about the Native Americans that once inhabited the area, and figure out what natural mineral was abundant on the island. There of course was the requisite maze that tested my knowledge of “leave no trace camping”; and a short quiz to determine what kind of a ranger I would be in real life.
Once I got to the park, I had to go out in search of traces of wildlife, then illustrate my findings and make an educated guess as to what type of animal left the trace evidence. When I returned to the Houghton Visitor Center the ranger checked my work, put on his hat and swore me in as a junior ranger. I then received my junior ranger badge and a super cool moose eraser.
Looking back on my experience, I heartily recommend it for national park visitors of all ages. Even if you don’t go the full nine yards and get the official badges, you’ll still learn a lot about the national parks you visit by completing the activities in the junior ranger field manuals. Best of all, there’s a different junior ranger field manual for every national park, and there’s no cost for the field manual or the badge. And as proven by my recent accomplishment, you really can be a junior ranger at any age.
Barrier-Free Travel the Grand Canyon for Wheelers and Slow Walkers


")