Although the America the Beautiful Passes (emerginghorizons.com/how-to-get-a-lifetime-national-park-pass) grant free admission to US national parks, not everybody qualifies for them. Of course you can always purchase a yearly pass that will get you in any national park; however if you only visit a few parks that’s not very cost effective. On the other hand, not all national parks charge an admission fee. With that in mind, here are six national parks you can visit for free.
North Cascades National Park
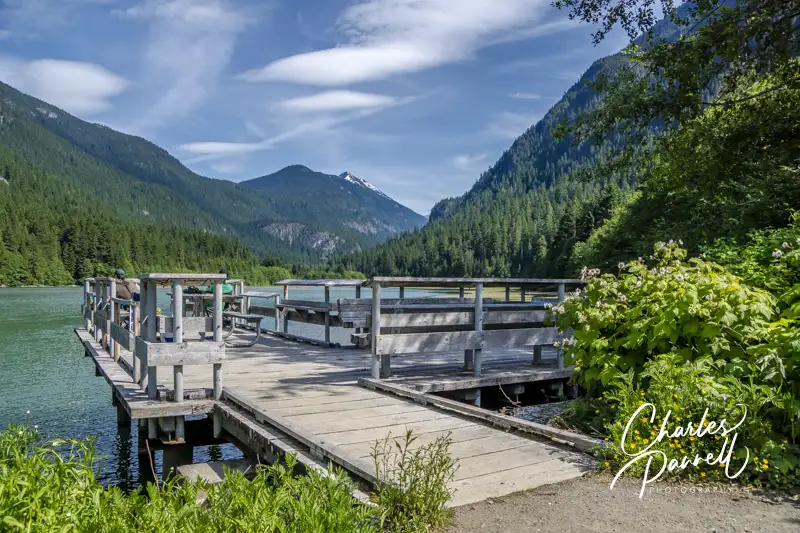
Accessible pier on Diablo Lake in North Cascades National Park
emerginghorizons.com/north-cascades-national-park
Located in Northern Washington, North Cascades National Park, not only offers free admission, but it also boasts nearly three miles of wheelchair-accessible trails. Enjoy a short jaunt on the .3-mile Trail of the Cedars, or go for a longer hike on the 1.4-mile accessible section of the River Loop. Or just enjoy the scenic drive on the State Route 20 Corridor.
Redwood National & State Parks
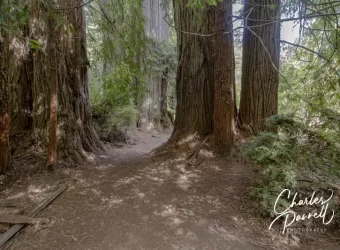
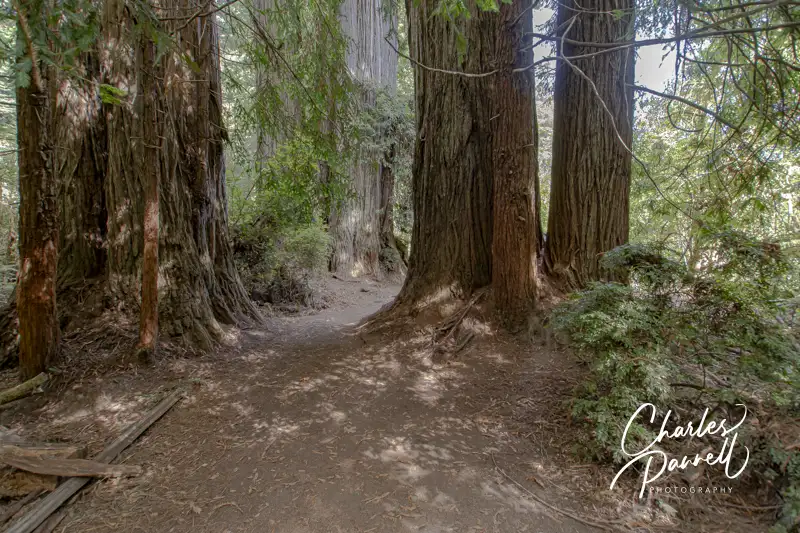
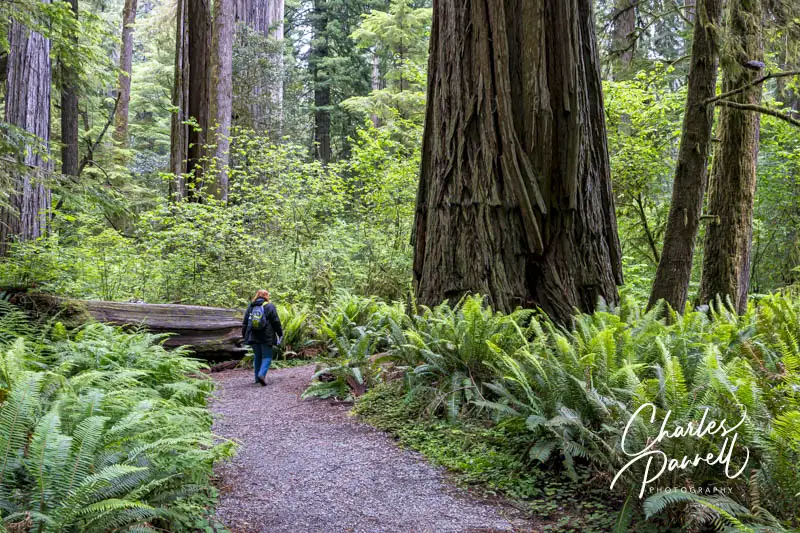
Prairie Creek trail in Prairie Creek Redwoods State Park
emerginghorizons.com/redwood-national-and-state-parks
Nothing beats the majesty of Northern California’s coastal redwoods in this mixture of federal and state lands. There are numerous wheelchair-accessible trails, campsites and attractions in both the original national park, and the three additional state parks. And if you’d like to spend the night, two of the state parks offer wheelchair-accessible camping cabins.
Great Basin National Park
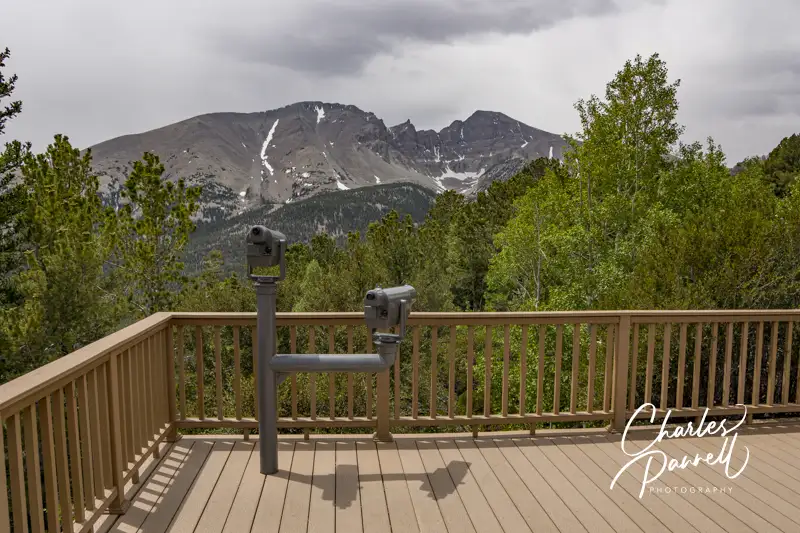
Wheeler Peak Overlook in Big Basin National Park
A bit off-the-beaten-path in Eastern Nevada, Great Basin National Park is one of America’s least visited national parks. And that makes it a great place to get away from the crowds. There are numerous accessible overlooks on the Wheeler Peak Scenic Drive that offer excellent views of the “great basin”. And if you’d like to stretch your legs, the wheelchair-accessible Island Forest trail makes a .4-mile loop through a pine and fir forest.
Great Smoky Mountains National Park
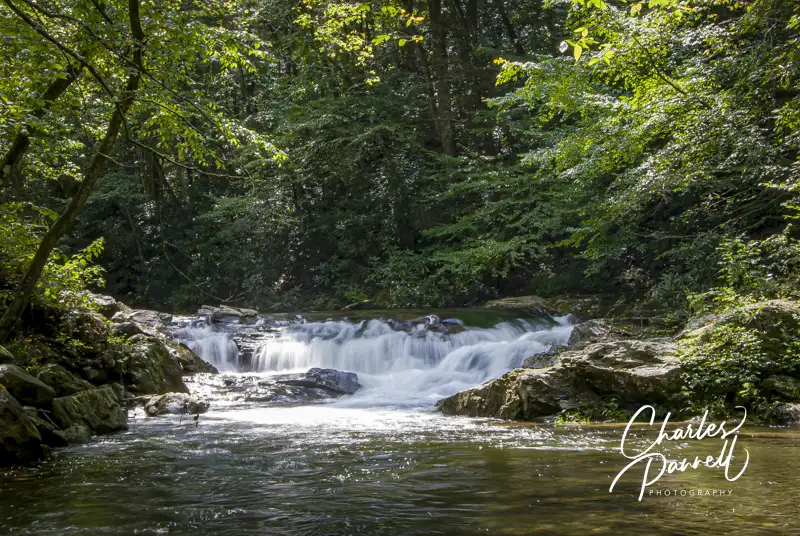
Cades Cove in Great Smokey National Park
Although there’s no entrance fee to this popular national park, there is a parking fee if you stop for longer than 15 minutes. That said, the Roaring Fork Motor Trail begins just outside of Gatlinburg, and winds 5.5 miles through a hardwood forest filled with chestnuts, oaks, maples and magnolias. You can stop along the way and snap a few photos, and still visit without a parking pass. And it’s an absolutely beautiful fall foliage drive.
Cuyahoga Valley National Park
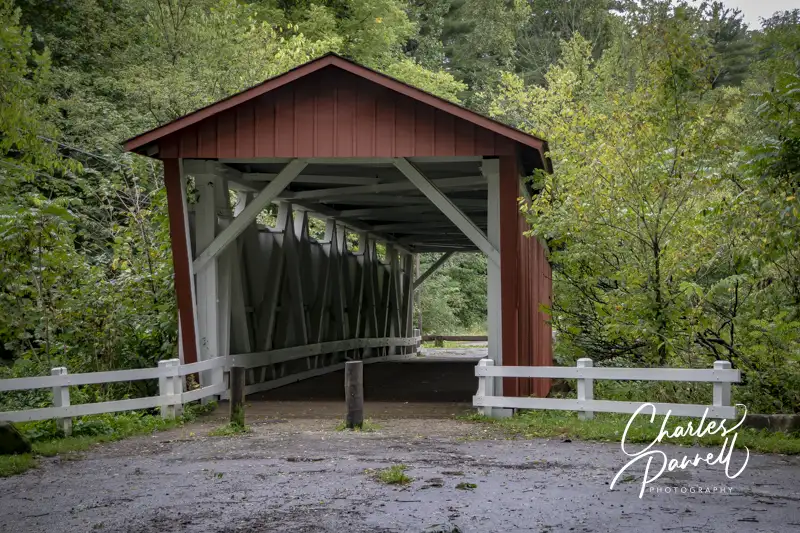
Everett Covered Bridge in Cuyahoga National Park
This Ohio national park offers a scenic drive along the Cuyahoga River, plus several accessible trails and attractions. Save some time to stop at the Canal Exploration Center and the Breckville Nature Center, and don’t miss the Everett Covered Bridge. And if you’d like a little hike, then take the wheelchair-accessible Ohio & Erie Canal Towpath to the Beaver Boardwalk.
Kenai Fjords
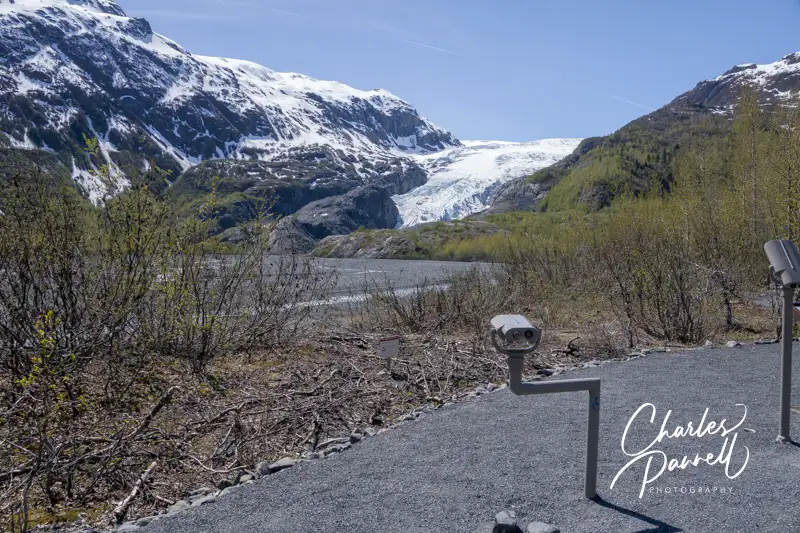
View of Exit Glacier
Wrapping up our list of national parks you can visit for free is Kenai Fjords National Park. Although you can certainly visit this Alaska national park by taking a cruise to see some of the nearly 40 glaciers in the Harding Icefield, you can also get a good view of Exit Glacier from the shore. Located three miles north of Seward, Kenai Fjords National Park boasts a one-mile wheelchair accessible loop trail that leads through a cottonwood forest to an accessible viewing area. And you just can’t beat the sight of Exit Glacier, as it seemingly spills down the mountain.
Barrier-Free Travel Washington National Parks for Wheelers and Slow Walkers
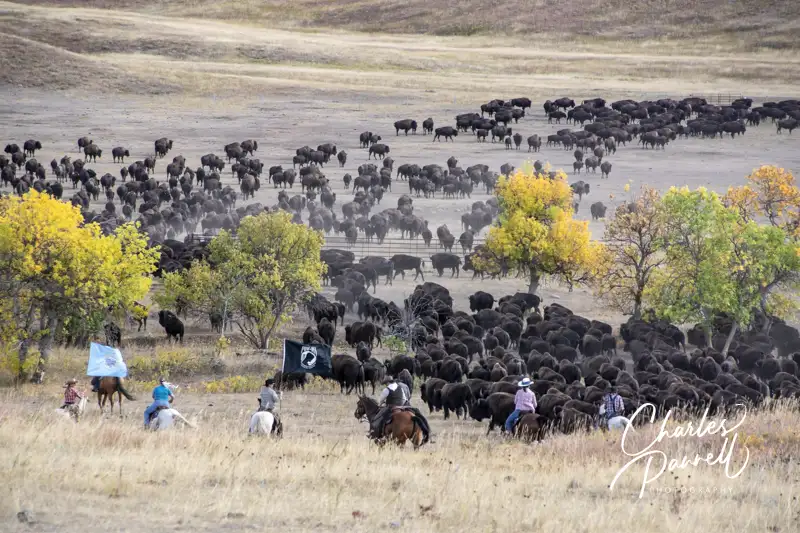
Buffalo Roundup in Custer State Park, South Dakota
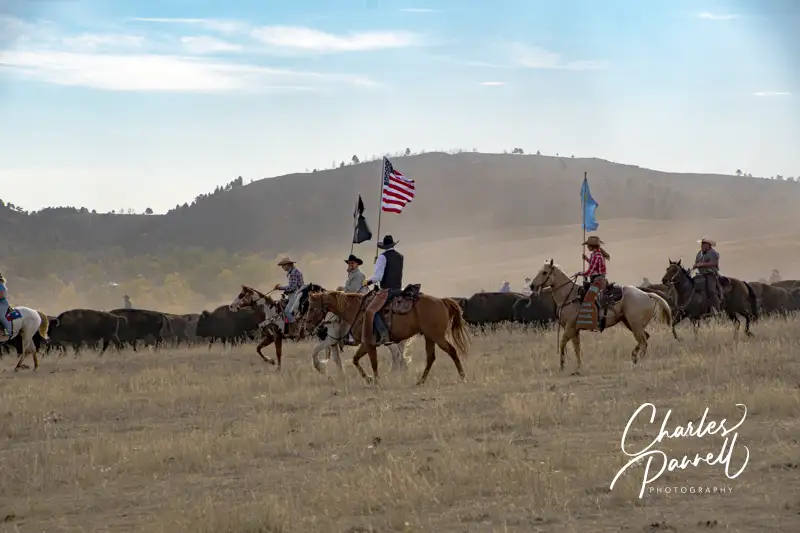
Although it sounds like something straight out of an old western movie, an honest to goodness buffalo roundup takes place every fall in Custer State Park. Granted, it’s the precursor to the fall buffalo sale, but it’s also a fun stand-alone event that’s open to the general public. Held on the last Friday in September, the Custer Buffalo Roundup (https://www.custerresorts.com/activities/buffalo-roundup) attracts wranglers from across the west who skillfully corral some 1,500 head of buffalo that reside on a 71,000 acre swath of Custer State Park. And it’s a sight to see — and hear — for sure. Even though this rustic event takes place in an open pasture, accommodations have also been made for wheelchair-users and slow walkers. So grab your cowboy hat, and get ready to hit the trail to see the Custer Buffalo Roundup.
Round ’em Up
Although the big round up officially begins at 9:30, you’ll want to get an early start. The two viewing locations along Wildlife Loop Road open at 6:15 AM. It should be noted that you need to choose your viewing area before you set out, as Wildlife Loop is closed to through traffic at the corrals. If you want to use the North viewing Area, then head south from the State Game Lodge on Wildlife Loop Road; and if you want to use the South Viewing Area, head east of Wildlife Loop Road near Blue Bell Campground.
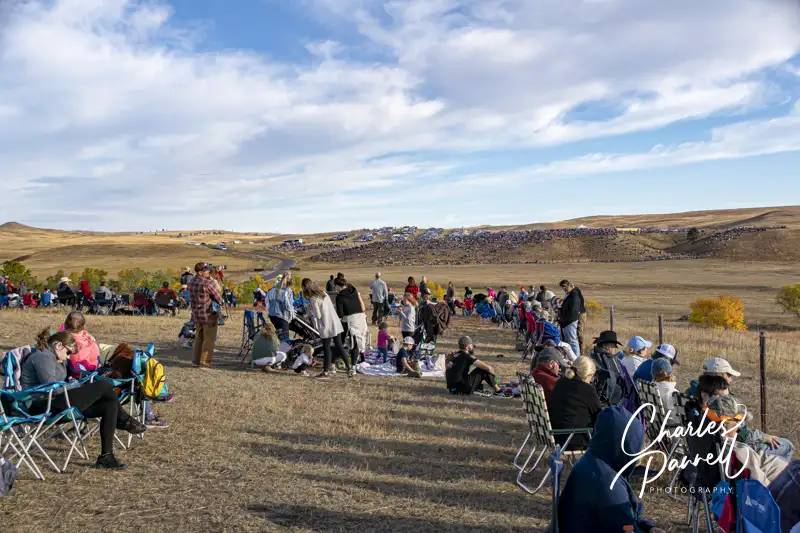
Spectators at the Buffalo Roundup in Custer State Park, South Dakota
Be sure and display your parking placard as you enter the lot, so you will be directed to the accessible parking area. From there, it’s just a short walk to a level viewing space, and accessible porta-potties. And if you are a slow walker, it’s a good idea to pack along a camp chair, as there’s no seating. Patrons are required to stay in the viewing areas until the buffalo are safely contained, which is usually around 11:30.
So what do you do while you wait for the roundup to begin? Well there’s the pancake breakfast for one. It’s held in a level area near the accessible parking, and to be honest, it’s nice to have a hot breakfast instead of a granola bar. There’s no seating, so you just take your meal back to your area. And then you can always chat and get to know your neighbors until you see the wranglers emerge on the horizon.
And then, there’s a great ruble over the plains, a bit of telltale dust, and with that the buffalo are herded past the crowd into their corrals. After that they are branded, examined and sorted, which the public is invited to watch.
Wranglers at the Buffalo Roundup in Custer State Park, South Dakota
Art, Music & More
After the buffalo are all rounded up, it’s time to head over to the Game Lodge area for the Buffalo Roundup Arts Festival. It actually runs from Thursday to Saturday, but it makes a good post-roundup choice. Here you’ll find hundreds of arts and crafts vendors, music and food.
Parking is available in a remote parking lot that is about a half-mile from the arts festival. That said, it’s a level walk on a paved sidewalk, so it’s doable for many wheelchair-users. Alternatively, there’s a wheelchair-accessible shuttle that runs from the remote parking lot to the arts fair. And there’s also a small accessible parking area close to the vendors, for anyone who just can’t manage the distance.
There’s level access around the 175 vendor tents, that have a wide range of art work, including many native made products. And at the end of the line there’s a place you can chow down on a bison burger and the fixins. Then, take some time to listen to some music for a relaxing afternoon.
Save some time to drive back down to the corrals later in the day, or even the next day. There’s accessible parking near the Bison Center, with level access to the dirt paths around the corrals. And although personal vehicles are prohibited in this area on roundup day, people with accessible parking placards are permitted to drive there. Alternatively, you can visit the corrals on the next day for a close look at the whole vaccination and examination process, as it takes about four days for staff to work the entire herd. It’s a good — and safe — opportunity for a close look at the resident buffalo during the Custer Buffalo Roundup.
Barrier-Free Travel National Park Lodges for Wheelers and Slow Walkers
Let’s face it, all yurts are not created equal. These round canvas structures with wooden floors are popping up at state parks and campgrounds across America; and let’s just say some offer more creature comforts than others. Some are pretty basic, with just the roof over your head and a pair of bunk beds. Others, such as this wheelchair-accessible Umpqua yurt, offer a bevy of deluxe features, including a private bathroom, a kitchen and electricity. And you just can’t beat the location — in the heart of Umpqua Lighthouse State Park (oregonstateparks.org/index.cfm?do=parkPage.dsp_parkPage&parkId=83). So pack you car and hit the road to the Oregon coast, and spend the night in this deluxe wheelchair-accessible Umpqua yurt.
Sleeping in Style
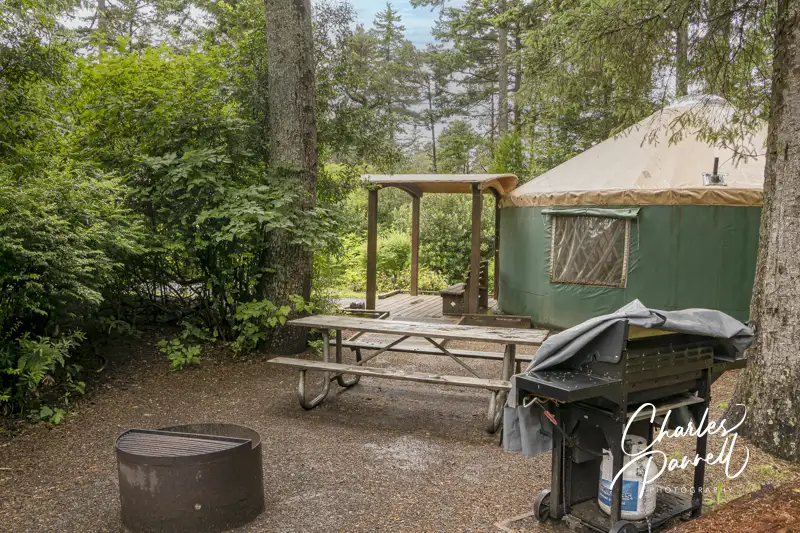
Located in a secluded enclave just north of the campground, the Yurt Village includes six yurts, including the wheelchair-accessible model (yurt 16). Accessible parking is located in a small parking lot near the yurt village, which is a short level roll to the wheelchair-accessible Umpqua yurt. The yurt is is surrounded by vegetation for maximum privacy, and there’s level access to the covered front porch.
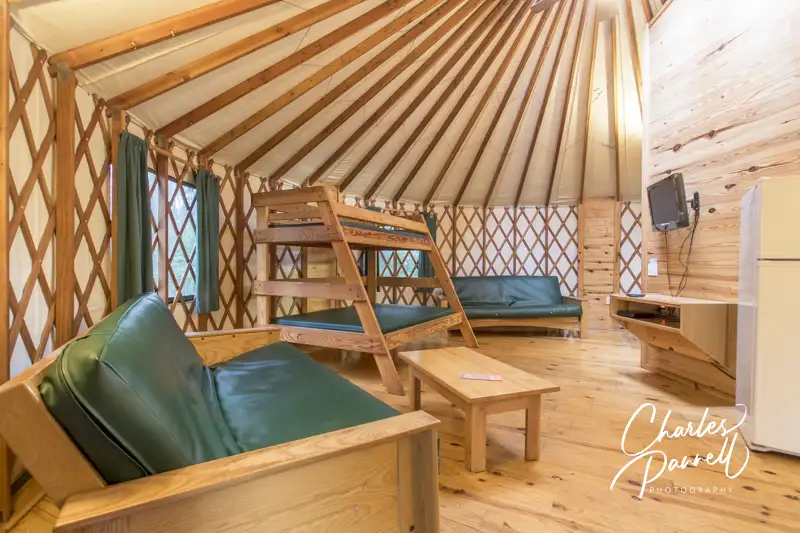
Great room in Yurt 16 at Umpqua Lighthouse State Park
There’s plenty of room to maneuver a wheelchair around the great room, which is furnished with two 18-inch high futons and a 21-inch high bunk bed (bring your own linens), with a double on the bottom and a single on the top. There’s also a DVD player and a TV in the unit, and although there’s no TV reception, it’s a good entertainment option if you bring along your own DVDs. As an added bonus the yurt also comes equipped with lights, electric outlets and even a heater.
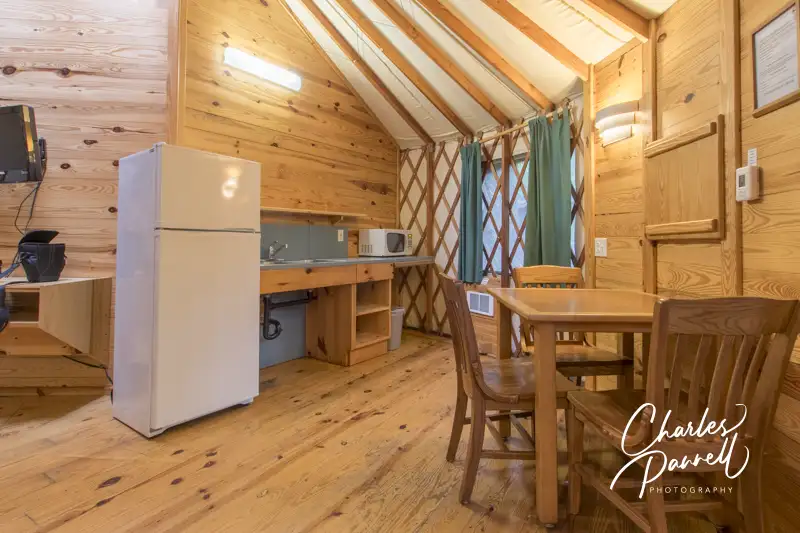
Kitchen in Yurt 16 at Umpqua Lighthouse State Park
The adjacent kitchen is equipped with full size refrigerator, a microwave, and a sink. There’s also a table with four chairs next to the kitchen. It’s a simple set-up, but quite functional, although you do need to pack along dishes, cookware and utensils.
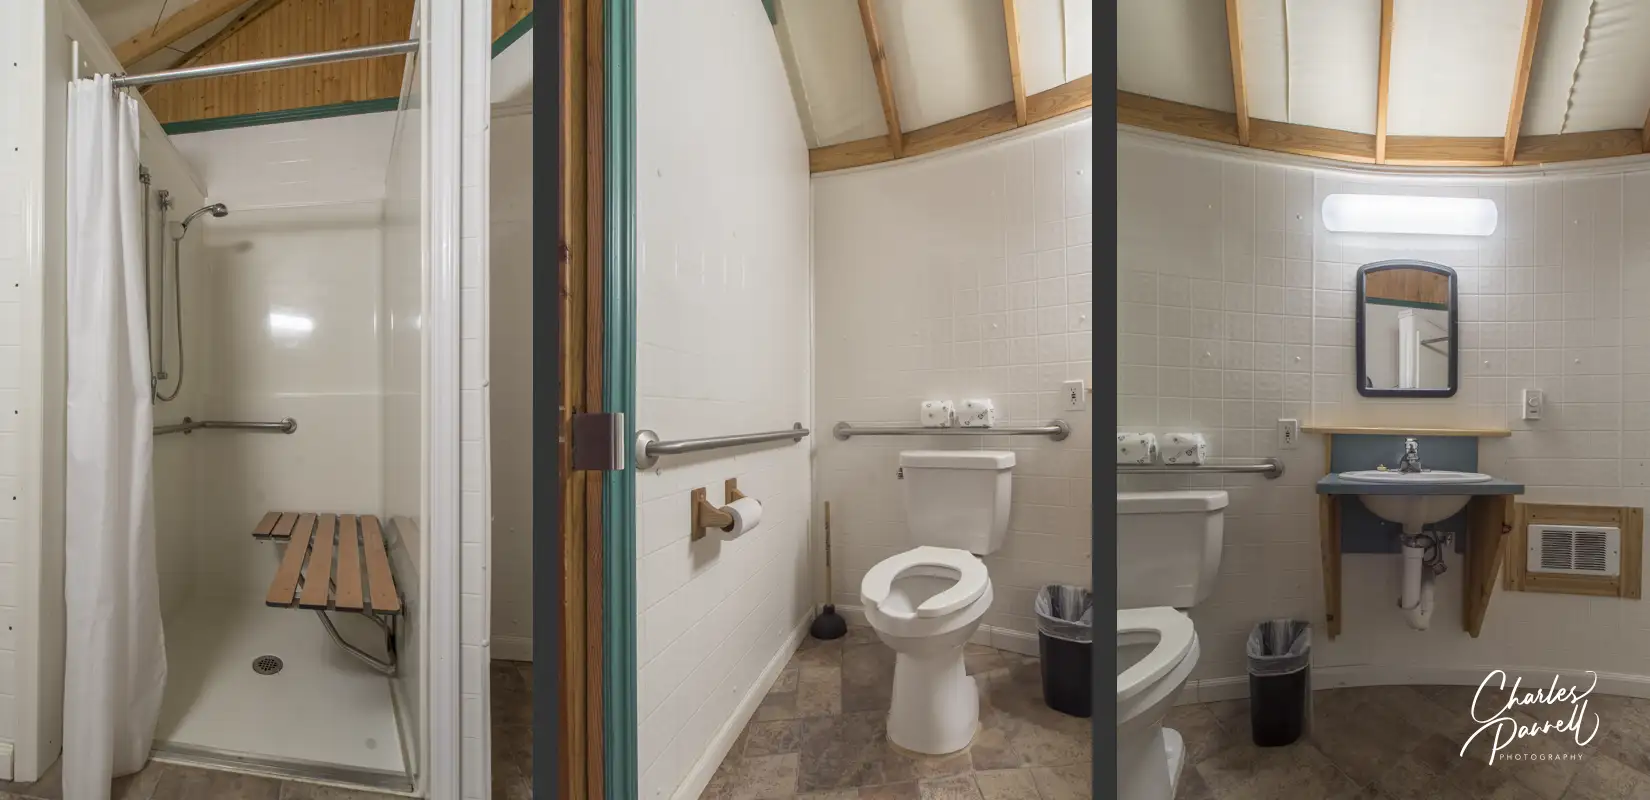
The bathroom has a wide sliding door, and it features a full five-foot turning radius. It’s equipped with a roll-in shower with grab bars, a hand-held showerhead and a fold-down shower bench. Other access features include toilet grab bars on the back and right walls (as seated), and a roll-under sink.
Bathroom in Yurt 16 at Umpqua Lighthouse State Park
And if you’d like to grill your dinner, there’s also a propane BBQ near the front porch. Top it off with an accessible picnic table and a fire ring, and you have everything you need.
Reservations for this wheelchair-accessible Umpqua yurt can be made up to nine months in advance at www.reserveamerica.com.
Whale Watching and More
While you’re in the area, be sure to take a short drive over to the Umpqua River Lighthouse. Built in 1857, this 65-foot tall tower sits at the entrance to Winchester Bay. There’s accessible parking near the lighthouse, with level access over to the adjacent museum. Even though the museum is accessible, admission is only offered as part of the lighthouse tour, which is not accessible. Still it’s worth a stop just to get a look at the outside of the historic lighthouse. And if you have a picnic lunch, there’s also a few accessible picnic tables in front of the museum.
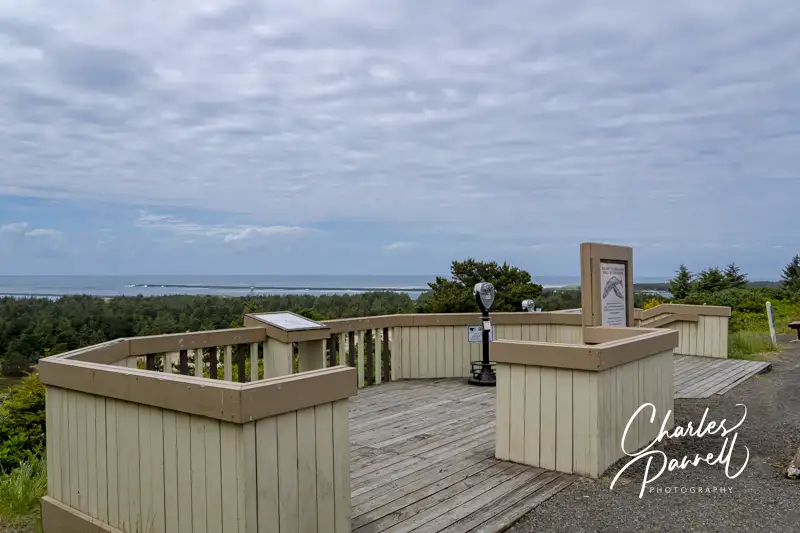
Save some time to stroll across the street, where you’ll find an accessible overlook which offers a nice view of the Umpqua River and the Pacific Ocean. And although the scenery by itself is splendid, during the winter months it’s also possible to spot migrating gray whales in the distance. Be on the lookout for these massive giants from late November to early January, when the pregnant females head south from Alaska, to give birth in the warm waters off of Baja California. Of course whale watching is a matter of luck and timing, but to increase your odds, visit during the peak migration in early January. And don’t forget to bring along your binoculars.
Whale watching platform at Umpqua Lighthouse State Park
Dean Creek Detour
For more wildlife viewing, take a short detour to Dean Creek Elk Viewing Area (www.blm.gov/visit/dean-creek-elk-viewing-area). Just follow highway 38 east from Reedsport for about three miles, and keep your eyes peeled for Roosevelt Elk on the right side of the road.
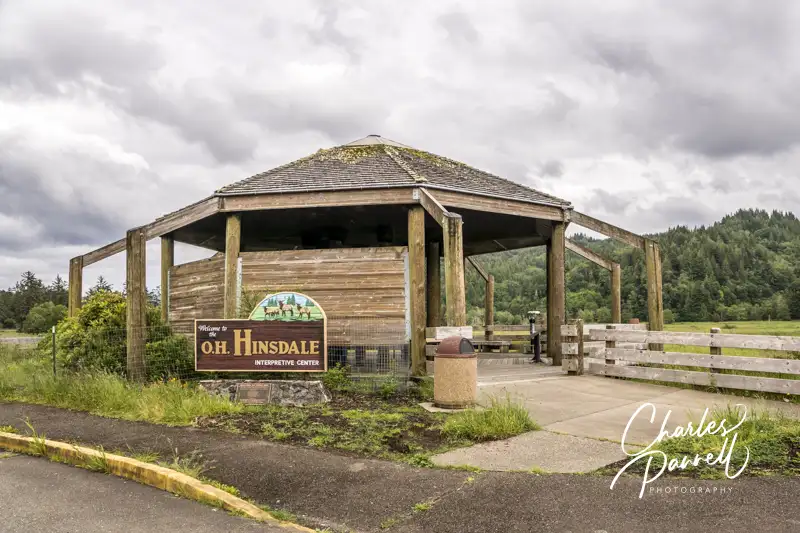
Interpretive display at Dean Creek Elk Viewing Area
There are several spots along the road that have accessible viewpoints and overlooks, and there’s even a small interpretive display near one popular viewing area. Access is good at all the viewing areas, with accessible parking, level access out to the overlooks, and accessible restrooms. There’s also a pullout on the right side of the road at about the 4.5-mile mark that offers some incredible windshield views.
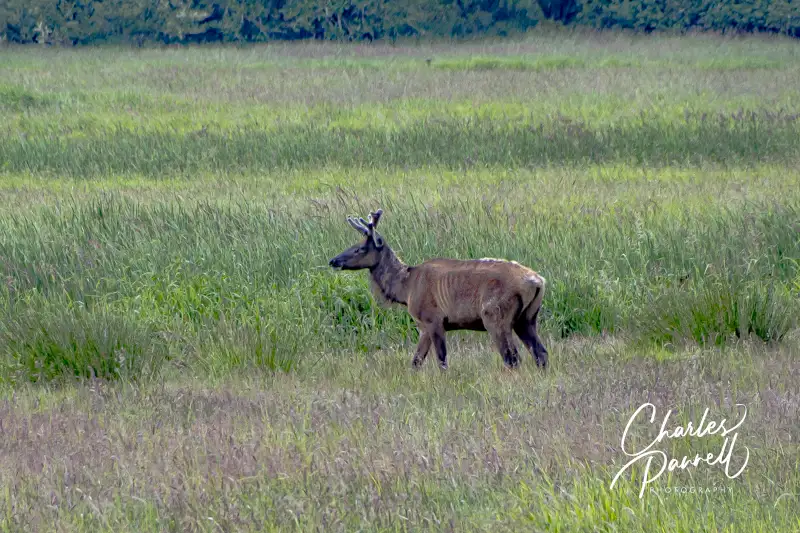
The good news is that because of mild winter temperatures and abundant food supplies, the elk remain in the area year-round. The not so good news is that, like most wildlife viewing opportunities, spotting these animals depends a lot on luck. That said, you can increase your odds by visiting in the early morning, or just before dusk. On the plus side, the Dean Creek Elk Viewing Area is close to Umpqua Lighthouse State Park, so it’s possible to make several return visits during your stay.
Elk at Dean Creek Elk Viewing Area
Barrier-Free Travel California National Park Road Trips for Wheelchair-Users and Slow Walkers
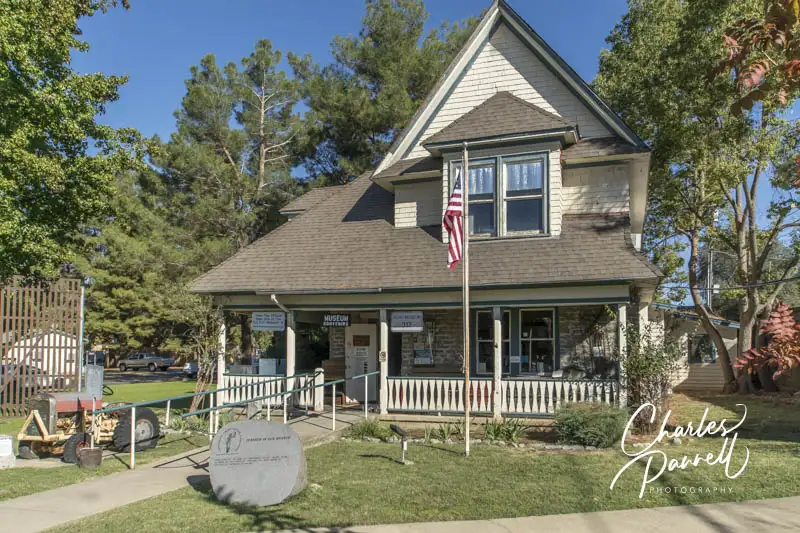
Edge of the Cedars State Park MuseumNamed for its unique location, Edge of the Cedars State Park (stateparks.utah.gov/parks/edge-of-the-cedars is a hidden gem in a state filled with natural beauty. In fact it’s easy to miss if you are zipping down Highway 191 from Canyonlands and heading over to Monument Valley. This Blanding attraction is a must-see, as not only does it boast an impressive collection of Ancestral Puebloan pottery; but it also includes a partially excavated Puebloan village. And the diversity of the artifacts is only surpassed by the accessibility of the site for wheelchair-users and slow walkers.
Edge of the Cedars — The Museum
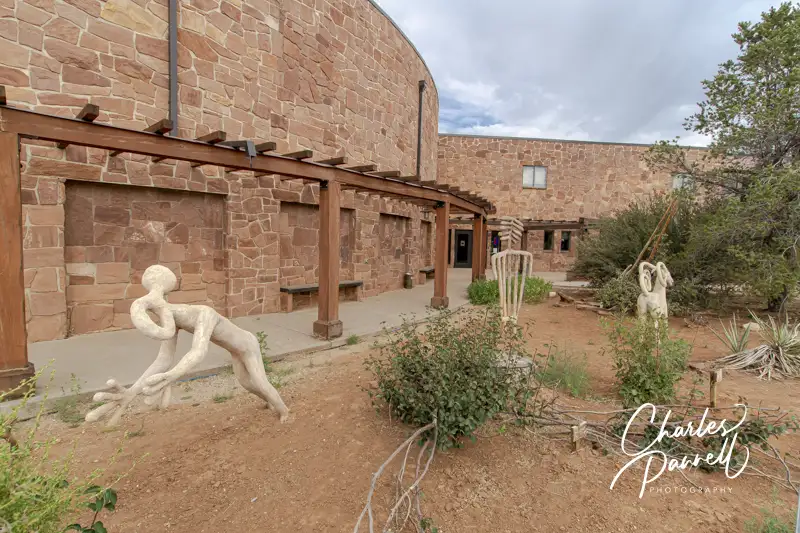
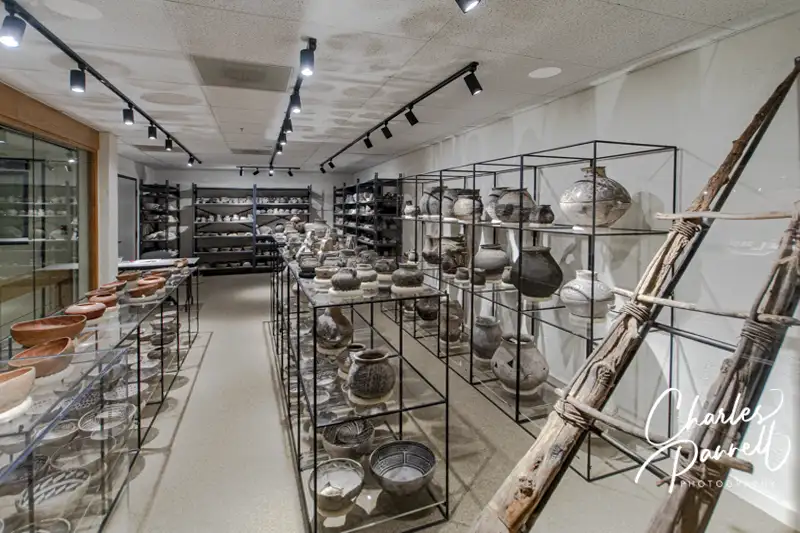
Pottery from the Four Corners in the Edge of the Cedars MuseumThere’s accessible parking near the front entrance of the museum, with a level sidewalk that winds past a sculpture garden to the front door. Take some time to linger on in the garden and enjoy the pieces that were inspired by rock art. Inside there’s level access to the front desk, gift shop, accessible restrooms and gallery space, and elevator access up the second floor. For a good primer on the site, be sure and watch the 15-minute movie in the adjacent adjacent auditorium, which features barrier-free access and plenty of room for wheelchairs and scooters.
The downstairs gallery includes rotating exhibits, but the upstairs gallery houses the real gems. The Puebloan Pathways exhibit features interpretive panels that outline the different styles of housing, masonry and crops, and includes a time lime of the rise and fall of the civilization. And there’s a good sampling of pottery, baskets, dart tips and other items that were excavated in Southeastern Utah. The Visible Storage exhibit, which is behind glass, showcases some of the prized artifacts including a large collection of Ancestral Puebloan pottery and an impressive macaw feather sash that dates back to 1150 AD.
There’s also an entire room devoted to artifacts that were unearthed at the Edge of the Cedars Pueblo. Actually there were several villages that were superimposed on one another that occupied the site from 800 AD to 1225 AD. Part of the pueblo has been excavated, but the rest will remain intact out of respect for the descendants of the Ancestral Puebloans. And if you’d like to get a good overview of the site, there’s also ramp access up to a viewpoint with a large window.
Edge of the Cedars — The Pueblo
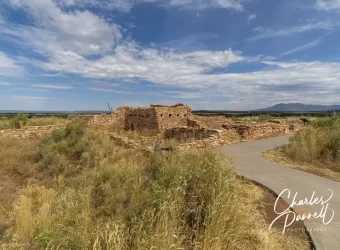
Pueblo at the Edge of the Cedars State ParkThere’s level access to the ruins out back, with a sidewalk out to the great house and kiva. The sidewalk circles the excavated structures, and although you can’t go inside the great house, you can certainly get a good view from the sidewalk. Visitors are allowed to access the kiva, but that requires stepping up on the structure and climbing down a ladder. Still the ruins are impressive, and there are a number of interpretive panels explaining the significance of the structures. All in all, it’s about a quarter-mile level walk around the pueblo, but if that distance is a problem, you can do a shorter out-and-back hike.
Don’t miss the Sun Marker sculpture by Joe Pathak, which is located down a 300-foot dirt path near the kiva. This is a modern interpretation of prehistoric archeoastronomy sites that were found in the southwest, and it’s designed to interact with the sun. Throughout the year sunlight shines through the cutouts on the sculpture and casts shadows and images on other parts of the sculpture. No two days are ever the same, so you can see it many times and it will seem like an entirely different piece.
Edge of the Cedars State Park also makes a good lunch stop. There’s sidewalk access over to a covered picnic area with accessible picnic tables near the front parking lot. It’s a great way to top off a visit to this one-of-a kind Southeastern Utah archaeological find.
Barrier-Free Travel Utah National Parks for Wheelchair-users and Slow Walkers
Located about 240 miles north of Anchorage and 120 miles south of Fairbanks, Denali National Park (www.nps.gov/dena/index.htm) is one of the crown jewels of the 49th State. One of Alaska’s eight national parks, Denali occupies just over six million acres of wild land bisected by a seasonal road. And if all that sounds a bit rugged for your taste, rest assured it is possible to plan a wheelchair-accessible Denali visit. Granted, scaling the 20,310 namesake mountain may not be on your to-do list; however the park also offers a nice selection of wheelchair-accessible trails, attractions and tours suitable for non-mountaineering visitors.
Getting There
A top concern about a wheelchair-accessible Denali National Park visit is actually getting to the park. Although there’s no airport there, Denali is easily accessible by rail and car. The peak visit time is from late May through early September, but that’s primarily because of the train schedules and the unpredictable weather. Still if you have a vehicle, and a bit of a sense of adventure, late spring and fall can also be beautiful times to enjoy Mother Nature’s majesty in Denali.
Alaska Railroad
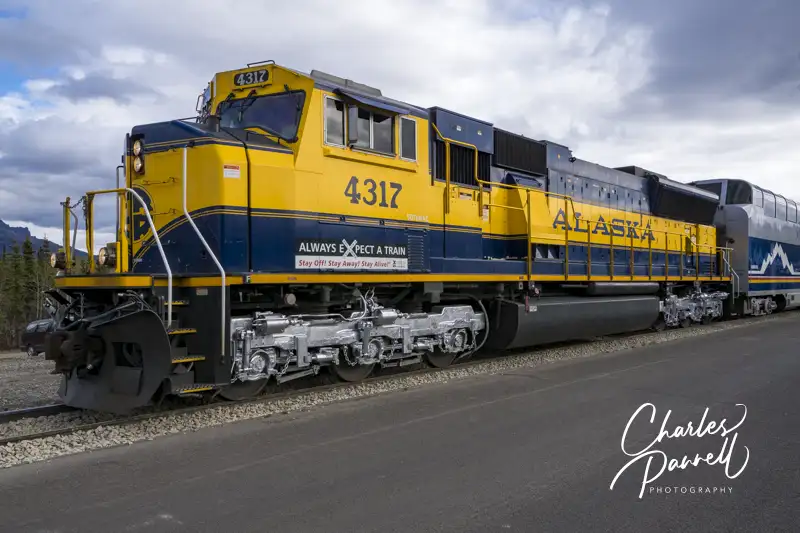
Daily train service is available from Anchorage and Fairbanks on Alaska Railroad’s (www.alaskarailroad.com) Denali Star during the summer months. The northbound train departs from Anchorage, and takes three hours to get to Denali. It stops in Wasilla and Talkeetna along the way. The southbound Fairbanks to Denali nonstop route takes four hours to get to Denali. And the good news is, all the stations include lift boarding, and the GoldStar Dome Cars feature elevator access, accessible seating and accessible lavatories downstairs. Additionally, most of the major cruise lines also offer cruise tour packages that include a Denali stop, on their own accessible railcars.
If you’d prefer to drive, accessible rental vans are available in Anchorage from Alaska Mobility (www.alaskamobility.com). After you pick up your van, just hop on The George Parks Highway (Highway 3). Also designated as a National Scenic Byway, this well traveled route runs between Fairbanks and Anchorage, and offers access to the park. The drive on this well maintained paved road is doable in a day from Anchorage; but plan for extra time as there’s no shortage of viewpoints and roadside stops along the way. And for information on places to stop en route, visit themilepost.com, an excellent Alaska road trip resource.
Wheelchair-Accessible Denali Shuttles
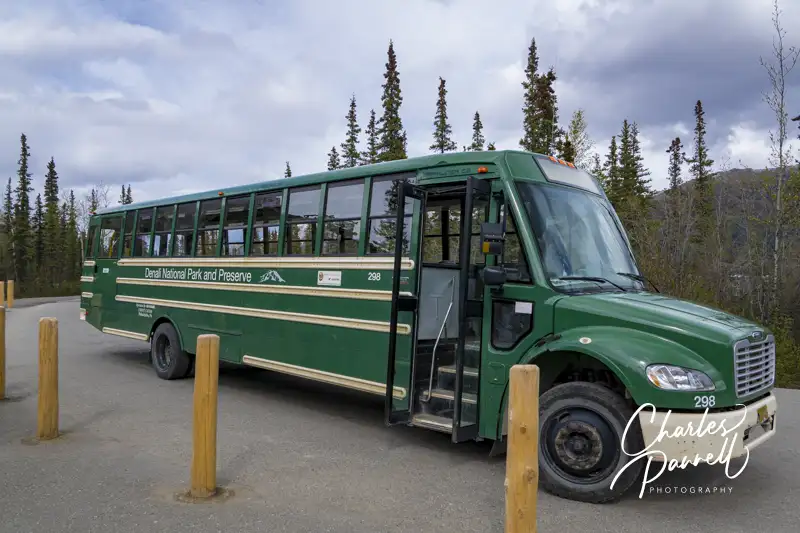
Accessible shuttle bus
Another wheelchair-accessible Denali feature is the free accessible shuttle bus system. After the winter snow is cleared in late spring, the road into Denali National Park is open to private vehicles to the Savage River area. Transportation further into the park is only available from concessionaires, and it’s largely dependent on road conditions.
That said, the free shuttle bus system operates in the Riley River area near the park entrance, and in the Savage River area 15 miles down the road. And all of the shuttle buses and shuttle bus stops wheelchair-accessible. The Savage River Loop and the Riley Creek Loop shuttles run all day and stop at a number of trails and attractions along the way. The Sled Dog Demonstration Shuttle, which runs from the Denali Visitor Center to the sled dog kennels, departs 40 minutes prior to the demonstrations, and returns shortly after they are completed.
The shuttle bus schedule is available at www.nps.gov/dena/planyourvisit/courtesy-shuttle-buses.htm, and it’s also posted at all the shuttle stops. Printed schedules are not available in the park, and cell phone service is limited, so it’s best to save a screen shot of the schedule for planning purposes.
Riley Creek Hikes
McKinley Station Trail
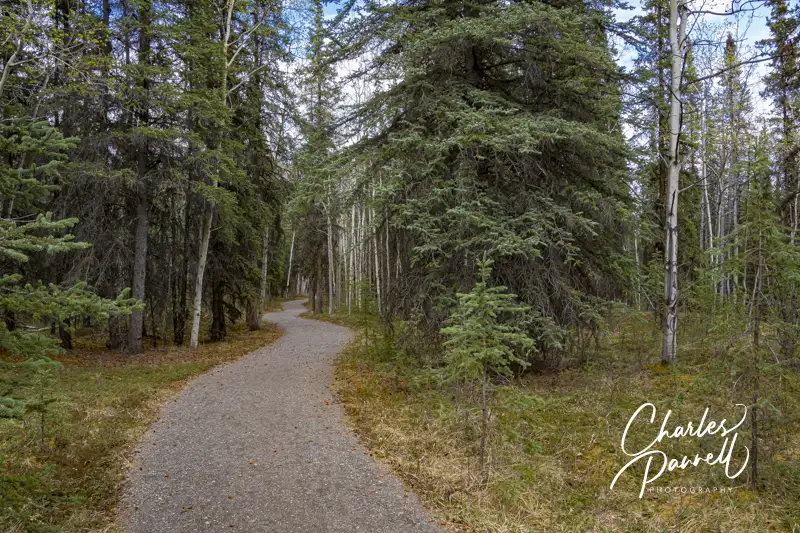
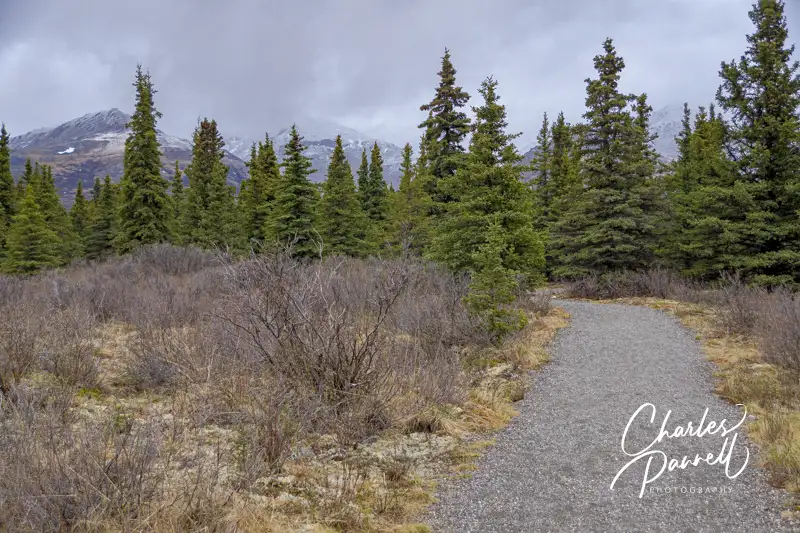
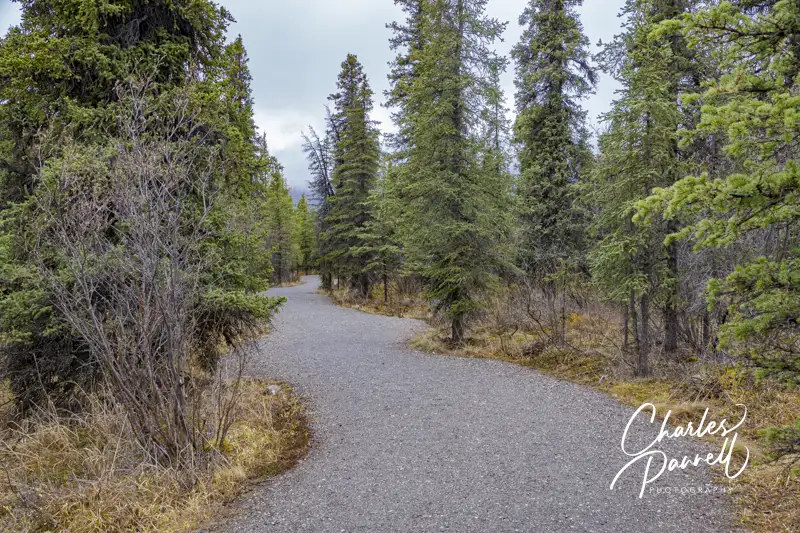
If you’d like to try a hike in the Riley Creek area, then hop on the shuttle, get off at the Riley Creek Campground and explore the McKinley Station Trail. This 1.6-mile hard-packed dirt trail runs from the campground to the visitor center. Although it’s not completely level, it offers an undulating — and accessible — route through the forest. There are also a few accessible boardwalk sections along the way. Be forewarned though — there’s a short cut to the visitor center about half-way along the route, but it goes straight uphill. Stick to the original trail for a gradual accessible path to the visitor center.
If you’d prefer a shorter walk, check out the Spruce Forest Loop, which is located right behind the visitor center. This .15-mile trail meanders through the forest, and offers visitors a good introduction to the vegetation and wildlife found in the park. It’s also very convenient, as you can just take the shuttle to the visitor center and hop on the trail from there.
Sled Dog Demonstration
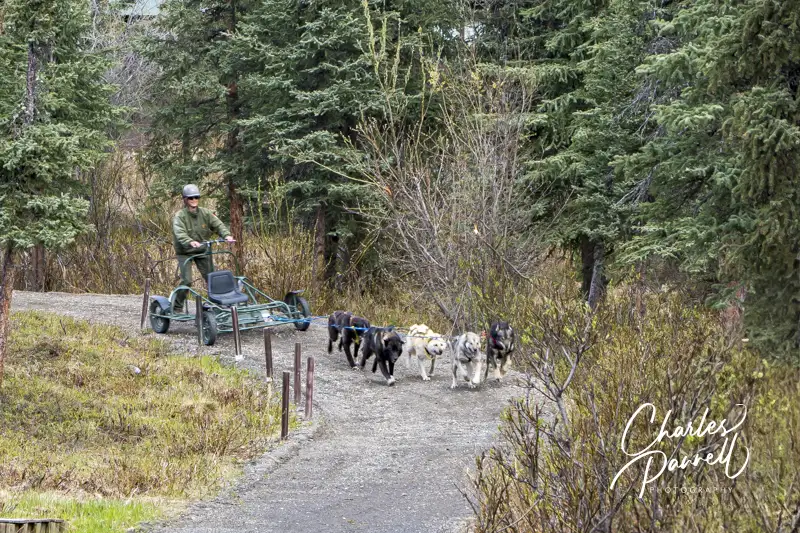
Sled dog demonstration
The Sled Dog Demonstration is another wheelchair-accessible Denali must-do. Although accessible shuttle service is available from the visitor center, you can also drive over to the kennels. There’s plenty of accessible parking available at the kennels; however it’s a longer jaunt from the parking lot than it is from the bus stop, so slow walkers might want to opt for the shuttle. It should also be noted that the Roadside Trail that runs from the visitor center to the kennels has a steep grade and numerous obstructions, and it’s definitely not an accessible option to get to the kennels.
The sled dog demonstration is fun to watch, as the team is hitched to a wheeled sled that speeds around a dirt track. Accessible seating for wheelchair-users and slow walkers is available in the front, so everyone is guaranteed a good view. A ranger is on hand to answer questions about the sled dogs — which are still used in the winter in the park — and folks can walk though the sled shed and around the kennels after the demonstration. Best of all, there’s no charge for this educational demonstration.
Savage River Hikes
Mountain Vista Trail
Last but not least, save some time to explore the Savage River area of the park, which offers a few accessible trails, and some great scenery. The shuttle stops at the Mountain Vista and Savage trailheads; and if Mount Denali is “out” (not obscured by cloud cover), you’ll get a great view from several vantage points along the way.
The Mountain Vista Trail is the most accessible trail in the area. This .6-mile hard-packed dirt trail begins near the shuttle stop, behind the accessible vault toilets and picnic shelter. It winds through the tundra, and offers several impressive views of the Alaska Range along the way. And you never know what wildlife you’ll run across, so keep your ryes peeled. Pack along a picnic lunch and enjoy it at one of the accessible tables at the picnic shelter, while you wait for the shuttle to Savage River.
Savage Cabin Trail
The shorter Savage Cabin Loop begins just to the left of the Savage River Campground shuttle bus stop, near the accessible vault toilet. The .3-mile loop is fairly level — with a few undulations — and is covered in compacted gravel. Midway along the route, you’ll find a historic cabin that was constructed by the Alaska Road Commission in 1924. It was originally used as a ranger cabin, but today it’s an interpretive site. Although the cabin isn’t accessible, you can still get a good glance at the inside from the doorway. And the docent programs are usually presented outside, in an accessible space. Even if there aren’t any docents at the cabin it still make a nice stop on this short jaunt.
Wheelchair-Accessible Denali Lodging Resource
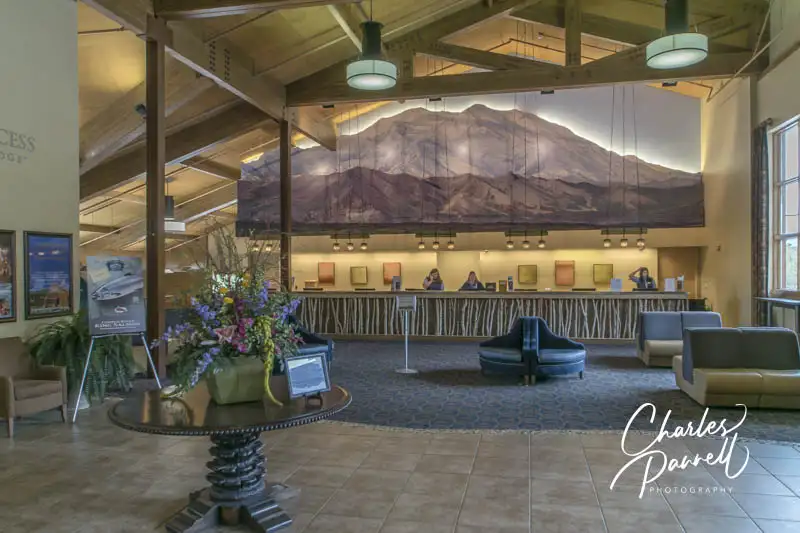
Lobby at the Denali Princess near Denali National Park
Of course, the final piece of the access puzzle in Denali National Park is lodging. There are no hotels or lodges in the park, but the campground has accessible spaces, and there are a number of accessible lodging choices nearby. Visit emerginghorizons.com/wheelchair-accessible-denali-lodging-options for more information.
Barrier-Free Travel Glacier, Yellowstone and Grand Teton National Parks for Wheelers and Slow Walkers
Road trips are a great way to travel. You can take things at your own pace, pack along all the gear you need, and you don’t have to worry about the airline losing your luggage. And there’s no better way to see some Western US national parks than on a road trip. This epic itinerary begins and ends in Las Vegas and visits nine national parks along the way. The whole route is 1880 miles long, but the longest drive is only 4.5 hours. You can do the whole itinerary, or just tackle a portion of this national park road trip. Either way, it’s a great spring, summer or fall travel choice
The Basics
Although this national park road trip begins in Las Vegas, you don’t have to be a local to give it a try. If you live close you can drive and spend a few days in town before hitting the road. Alternatively, you can grab a flight to Las Vegas and rent an accessible van to explore the national parks.
The good news is, accessible taxis are widely available in Las Vegas. At the airport just join the taxi queue, and the dispatcher will get an accessible cab for you. It’s a quick and easy process, and you don’t have to arrange for accessible transportation ahead of time. If you plan to spend a few days in the city prior to your road trip, most hotels will call for an accessible taxi for you.
Next, order an accessible van from one of these companies in advance, and you’re all set to hit the road.
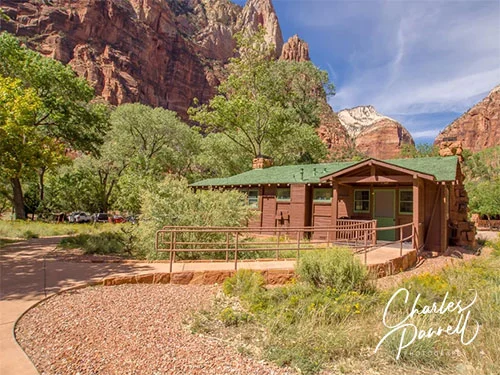
For an easy first-day drive, just take Interstate 15 to Hurricane, and then follow Highway 9 to Zion National Park (emerginghorizons.com/zion-national-park/). The drive takes about 2.5 hours, and there’s some great scenery along the way. Hop on the wheelchair-accessible park shuttle at the Zion Visitor Center and explore the park, and then spend the night at a wheelchair-accessible cabin at Zion Lodge.
Zion National Park to Bryce Canyon National Park
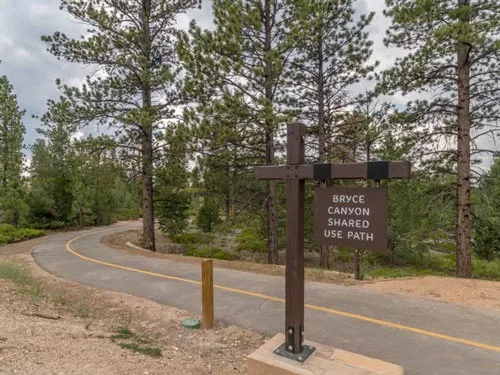
Shared use trail in Bryce Canyon National Park
From Zion, take Highway 9 to Mt. Carmel Junction and then hop on Highway 89 north to Highway 12 east. Save some time to stop along Highway 12 at the Red Canyon Visitor Center and take a stroll along the accessible Red Canyon Bicycle Trail. Continue on Highway 63, and follow the signs to Bryce Canyon National Park (emerginghorizons.com/bryce-canyon-national-park). If you drive it straight through, it will take about two hours. And there’s no shortage of accessible things to do in the park, including a roll or stroll along along the Bryce Multiuse Trail.
Bryce Canyon National Park to Capitol Reef National Park
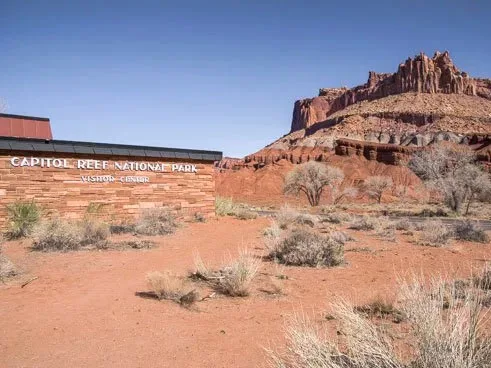
Visitor Center in Capitol Reef National Park
To continue along on your national park road trip, backtrack on Highway 63 and make a right on Johns Valley Road, which becomes Highway 22. Next, make a right on Highway 62, and another right on Browns Lane, then head east on Highway 24 through Torrey to Capitol Reef National Park (emerginghorizons.com/capitol-reef-national-park). It’s a scenic two-hour drive. Pick up a map at the visitor center, then take a driving tour of the park. And don’t miss the petroglyphs along Highway 24.
Capitol Reef National Park to Canyonlands National Park
Vista in Canyonlands National Park
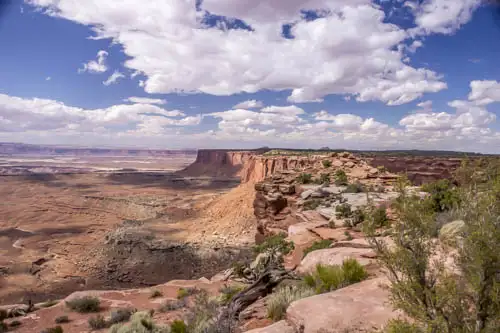
The next leg of your national park road trip is about a 4.5-hour drive. From Capitol Reef continue east on Highway 24, then take Interstate 70 east, and Highway 191 south to Highway 63. This will lead you to the Islands in the Sky section of Canyonlands National Park (emerginghorizons.com/canyonlands-national-park). This large mesa “island” rises 1,000 feet above the adjacent land and is surrounded by the Colorado River and Green River. And if you don’t fancy camping out in the park, Field Station Moab (emerginghorizons.com/field-station-moab-a-breath-of-fresh-air) has some comfortable accessible rooms, and it’s just a 30-minute drive away.
Canyonlands National Park to Arches National Park
Devil’s Garden Trail in Arches National Park
For the next leg of your national park road trip, take Highway 313 back out to Highway 191 and continue south to Arches National Park (emerginghorizons.com/arches-national-park). It’s a short 35 minute drive. Stop at the visitor center, then take a driving tour of this beautiful park. Don’t miss the trail at Balanced Rock, Wall Street, the trail to the petroglyphs at Wolfe Ranch, and the Windows Section of the park. Although this park offers some spectacular scenery, advance planning is a must, as timed entry reservations are now required (emerginghorizons.com/national-park-entrance-reservations-required-in-2024). And remember, reservations are not available onsite — you need to purchase them online, ahead of your visit.
Arches National Park to Black Canyon of the Gunnison National Park
Black Canyon of the Gunnison
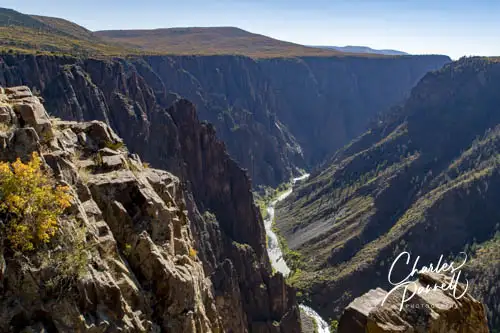
The next segment of your national park road trip takes about 2.5 hours. From Arches National Park backtrack north on Highway 191 to Interstate 70 east, then take Highway 50 east to Highway 92 in Delta, to the Black Canyon of the Gunnison National Park (www.nps.gov/blca/index.htm) entrance. There’s no shortage of scenic views on the seven-mile scenic drive along the south rim of the canyon. Even better — most of the viewpoints are wheelchair-accessible. And when it’s time to bed down for the night, there’s a comfy accessible yurt in Ridgeway State Park, which is about a half-hour away.
Black Canyon of the Gunnison National Park to Mesa Verde National Park
Mesa Verde National Park
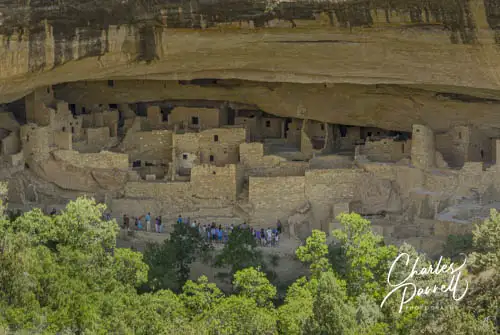
To continue your national park road trip, take Highway 50 east to Interstate 550 to Ridgeway. From there take Highway 60 to Highway 145 south to Cortez. To complete this four-hour journey follow Highway 160 to Mesa Verde National Park (www.nps.gov/meve/index.htm). Highlights at Mesa Verde include the scenic Mesa Top Loop Drive, Chapin Mesa Archeological Museum, and the ruins at the Far View Sites. And if you’d like to spend the night in the park, Far View Lodge has some nice accessible rooms with roll-in showers.
Mesa Verde National Park to Petrified Forest National Park
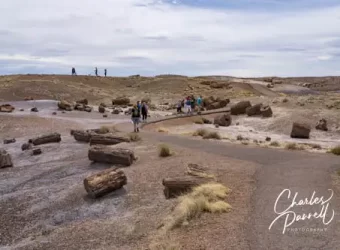
The Crystal Forest in Petrified Forest National Park
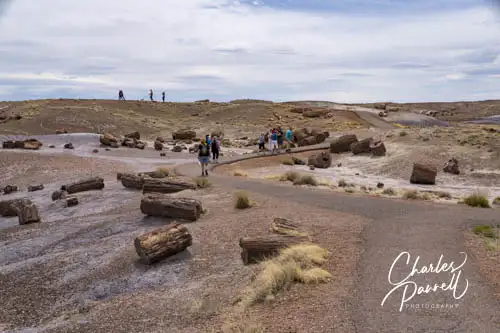
From Mesa Verde, backtrack on Highway 160 to Cortez, then head south on Highway 491 to Interstate 40. Go west on the interstate and take exit 311 to reach Petrified Forest National Park (www.nps.gov/pefo/index.htm). The Painted Desert is located near the north entrance, and it features expansive views and a former Harvey House (The Painted Desert Inn). The Crystal Forest is worth a stop near the central part of the park, and don’t miss the Rainbow Forest near the South Entrance. And when you’re done, just exit the south entrance and head north to rejoin Interstate 40.
Petrified Forest National Park to Grand Canyon South Rim
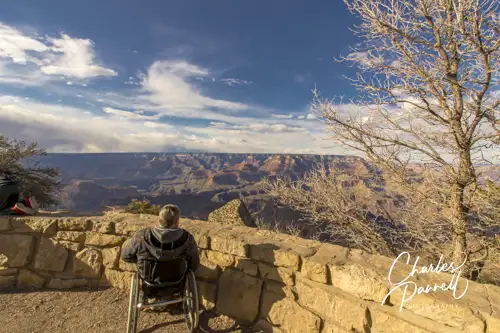
Grand Canyon National Park
After you rejoin Interstate 40, head west and take exit 165 in Williams, then follow Highway 64 to Grand Canyon National Park (emerginghorizons.com/grand-canyon-national-park). It’s a scenic three-hour drive. There’s no shortage of accessible things to do on the South Rim, but for a scenic overview of the whole park, take a wheelchair-accessible flightseeing tour on Grand Canyon Scenic Airlines (www.scenic.com). The 45-minute flight departs from Tusayan, and features ramp access and plenty of room to transfer to a seat. And with the large windows on the plane, you won’t miss a thing. For another great view, check-in to Thunderbird Lodge — the only property in the park that offers wheelchair-accessible rooms with canyon views.
Grand Canyon South Rim to Grand Canyon North Rim
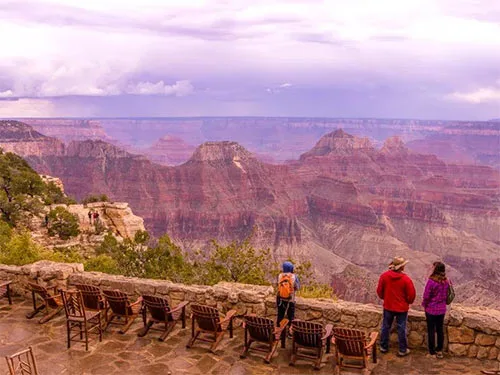
View from the North Rim Grand Canyon Lodge
The last stop on your national park road trip is just a four-hour drive away. From the Grand Canyon Visitor Center, follow the South Entrance Road to Desert View Drive and head east. In Cameron go north on Highway 89, and connect to Highway 89A in Jacob Lake, then just follow Highway 67 south to the Grand Canyon North Rim (www.nps.gov/grca/planyourvisit/north-rim.htm). The great thing about the North Rim is that it doesn’t attract as many visitors as the South Rim. And after the day visitors are gone, it’s just you and the other lodge guests. Grand Canyon Lodge North Rim has a variety of accessible cabins, many which are equipped with roll-in showers. So plan to spend a few days and enjoy the beauty of the North Rim.
Grand Canyon North Rim to Las Vegas
Fabulous Downtown Las Vegas
To complete your national park road trip, take Highway 67 back out to Highway 89A and head north. Next, travel west across the Kaibab Reservation on Highway 389, which turns into Highway 59 when you cross into Utah. Finally, take Highway 9 to Interstate 15 west and circle back to Las Vegas. It’s just a 4.5 hour drive, with lots of great scenery along the way.
Barrier-Free Travel
Utah National Parks for Wheelchair-users and Slow Walkers
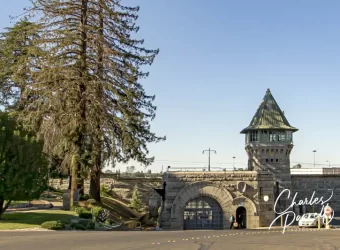
Driving along Prison Road the sight of the massive granite walls of Folsom State Prison are unmistakable, as you approach the nation’s first maximum-security prison. Interestingly enough, the granite for the walls was quarried by the prisoners, and the imposing structure was later built by inmates back in the early 1900s. That’s just one of the fun facts you’ll learn on a visit to the Folsom Prison Museum (www.bighouseprisonmuseum.org).
To be honest, visiting the museum is a tad bit intimidating, as it’s located just inside the prison grounds. That said, I timidly approached the guard after following the “museum” signs that led to the prison entrance, and hesitantly stammered, “I’m looking for the museum”. I heaved a giant sigh of relief when the guard cracked a smile and enthusiastically directed me to the museum entrance, located just beyond the checkpoint.
Accessible parking is located across the street from the checkpoint, and there’s a level pathway over to the ramped museum. Inside, quarters are a bit tight in the historic structure, however there’s still room enough to maneuver a wheelchair around the exhibits. The tiny restroom is not accessible — so plan ahead — and there’s about a half-inch step down to the Johnny Cash room, but again it’s all quite manageable.
The Folsom Prison Museum
Folsom Prison Museum
Operated by retired correctional officers, the museum features an impressive collection of weapons, shackles and confiscated items. Highlights include a hand-crank Gatling gun, a substantial number of inmate-crafted firearms, and even a homemade bomb. Add in some old gas masks, an operating table and Rick James’ guitar, and you have a very eclectic collection. There’s also a sizable display of things made from everyday items by the inmates, including a purse made from potato chip bags, a Ferris wheel crafted from a quarter-million toothpicks, a hangman’s noose made from toilet tissue and a number of creative soap bar carvings. A large collection of California license plates also adorn one wall in this room, just to remind folks where they are all manufactured today.
There’s also a room devoted to Johnny Cash, who visited the prison and recorded a live album there in 1968. There’s a load of photographs of Cash and his wife at the prison, along with his own “gag” mug shot and even some stationary from the Sacramento hotel where he stayed. It’s definitely a must-see for any Cash fan.
Granted this small museum doesn’t warrant a dedicated trip to Folsom; however if you’re heading to South Lake Tahoe on Highway 50, it’s definitely worth a stop. Just take the Folsom Boulevard exit, turn left and then make a right on Natoma Street. From there turn left on Prison Road which dead-ends in the visitor parking lot. And when you’re back on your way to Lake Tahoe, take note of the granite mileage markers along the road, as those were also crafted by Folsom Prison inmates.
Barrier-Free Travel Yosemite, Sequoia and Kings Canyon National Parks for Wheelers and Slow Walkers
At first glance it appears that Northern California’s coastal redwoods are out of reach for wheelchair-users and slow walkers. After all, these majestic giants are located in some pretty remote areas. Granted, many redwood groves present some formidable access barriers; however these three coastal stands offer a nice selection of accessible trails, picnic areas and even camping cabins. So check out these wheelchair-accessible coastal redwoods on your next California road trip
Redwood National Park
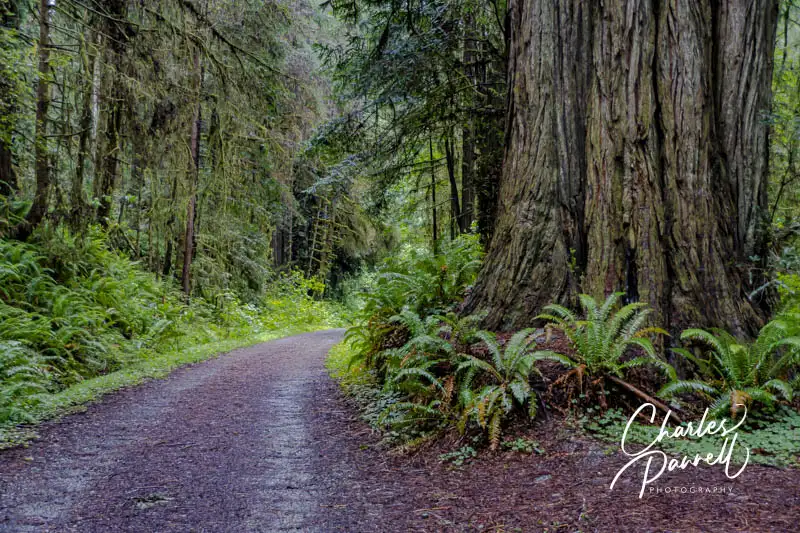
Lost Man Creek trail in Redwood National Park
Located about 320 miles north of San Francisco, Redwood National Park (emerginghorizons.com/redwood-national-and-state-parks/) tops the list of the Golden State’s wheelchair-accessible coastal redwoods. Although the drive through the park offers some stunning windshield views, the Lost Man Creek Trail is definitely worth a stop. The trail is easy to find — just follow Highway 101 north for about five miles from Orick, and turn on Lost Man Creek Road. The trailhead is about a mile down the road.
There’s accessible parking near the trailhead, next to an accessible vault toilet, with level access over to the trail. This former logging road is wide, level and free of obstacles for the first half-mile. After that the grade becomes steeper and there are rocks and other obstacles along the way, until the last bastions of access are obliterated at the ¾-mile point. Still, it makes a lovely out-and-back one-mile hike.
Additionally, there’s an accessible picnic table on a level dirt pad near the trailhead, so bring along a lunch and enjoy your repast in the shaded grove. It’s the ideal way to top off this very accessible hike.
Trees of Mystery
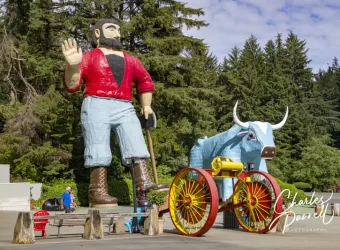
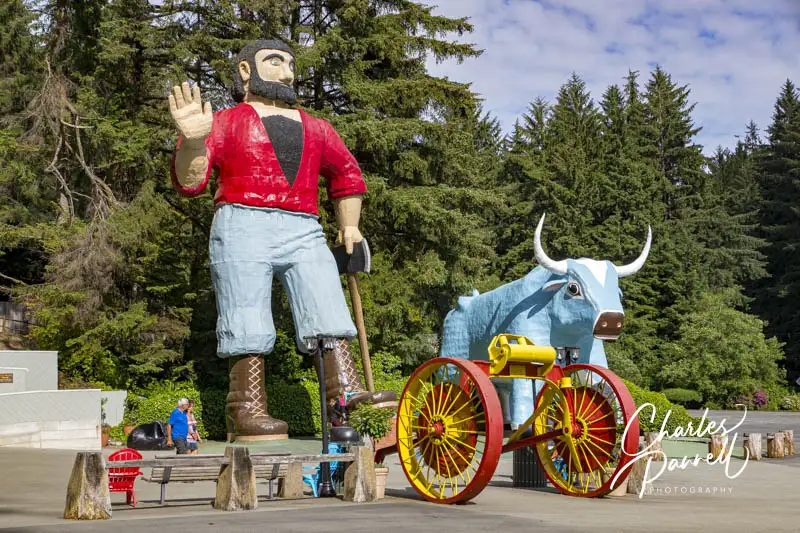
Paul Bunyan and Babe the Ox at the Trees of Mystery
The Trees of Mystery (www.treesofmystery.net) is another fun stop on Highway 101. It’s located about 25 miles north of the Lost Man Creek Trail, up in Klamath. You can’t miss it, as a giant statue of Paul Bunyan and Babe the Ox mark the site of the kitschy yet cool roadside attraction.
There’s plenty of accessible parking in the large lot, and barrier-free access over to the gift shop and ticket booth. The main attraction at this site is the Sky Trail, an aerial tramway which takes visitors on a scenic journey through the tree tops. There is a .8-mile trail that leads from the parking lot to the upper Sky Trail station; however it has a steep grade and a substantial cross slope in a few places, so it’s not a good option for wheelchair-users and slow walkers. Alternatively, accessible transportation in a lift-equipped vehicle to the upper Sky Trail station is available for anyone who can’t manage the trail.
There’s ramped access up to the upper Sky Trail station, with roll-on access and plenty of room for a wheelchair in the individual gondola cars. Be sure and stop for a view from the adjacent observation deck before you board though, as the bird’s eye view is magnificent. From the upper Sky Trail station, it’s a seven-minute 1570-foot descent back down to the lower station. And when you get there, treat yourself to some fudge or ice cream, and take time to browse through the gift shop. It’s a fun stop and definitely a unique way to experience the coastal redwoods.
Jedidiah Smith Redwoods State Park
The Simpson-Reed-Trail at Jedidiah Smith Redwoods State Park
Last but not least on the list of wheelchair-accessible coastal redwoods is Jedidiah Smith Redwoods State Park (www.parks.ca.gov/?page_id=413). This Northern California state park is located about 20 minutes north of Klamath along scenic Highway 199, near Crescent City.
One of the highlights of this park is the accessible Simpson-Reed Discovery Trail, which can be found near the end of Walker Road, off of the main highway. Accessible parking is located next to the accessible vault toilet, near the trailhead. This one-mile loop, passes a number of fallen giants as it weaves through the forest and along the Smith River. It’s a very pleasant — and accessible — stroll.
And if you’d like to spend the night in the park, there are four accessible camping cabins in the campground. Cabins 24, 26, 30 and 105 feature accessible parking with ramp access up to the front porch. They are each furnished with two bunk beds, with a single on top and a double on the bottom. Other cabin features include, electricity, lights, a heater, a raised grill and an accessible picnic table.
Guests need to bring their own bedding, and an air mattress or mattress pad is also recommended. There’s no water in the cabins, but an accessible showerhouse with a roll-in shower is located nearby. It’s a beautiful campground, and the perfect place to top off a visit to California’s wheelchair-accessible coastal redwoods.
Barrier-Free Travel California National Park Road Trips for Wheelchair-Users and Slow Walkers
Known as America’s Mountain, Pikes Peak is a don’t-miss while you’re in the Colorado Springs area. Of course you can certainly admire the mountain from afar; however there are also two accessible ways to get to the top. One way is take the Pikes Peak Cog Railway and leave the driving to someone else. And although the railway is also a must-do while you’re in the area, save some time to take the other accessible route to the top — drive the Pikes Peak Highway. Not only is it an equally scenic alternative, but you can take things at your own pace and spend as much time on top as you like.
The Basics
The Pikes Peak Highway is located about 15 miles west of Colorado Springs, just off Highway 24 in Cascade. The tollgate is a quarter-mile past the North Pole amusement park. In an effort to make sure there’s ample parking at the summit for all guests, a timed entry permit is required from late May to late September. The permits are good for a two-hour window, and one permit per car is required. In addition to the permit, everyone in the car must also purchase an admission ticket. Timed entry permits and admission tickets are available at https://coloradosprings.gov/pikes-peak-americas-mountain/page/tickets-and-reservations.
The road closes at night, and although it’s technically open year-round, the higher elevations are closed in the winter. Typically the road is only open to the 13-mile mark beginning in mid-October, or after the first snow storm. The round-trip drive itself usually takes two to three hours, but if you plan on stopping at every viewpoint, allow four or five hours. Best bet is to get an early start and have at least a half-tank of gas when you begin. Don’t be in a rush to get to the top, but remember to use the pullouts if you go slower than the traffic flow.
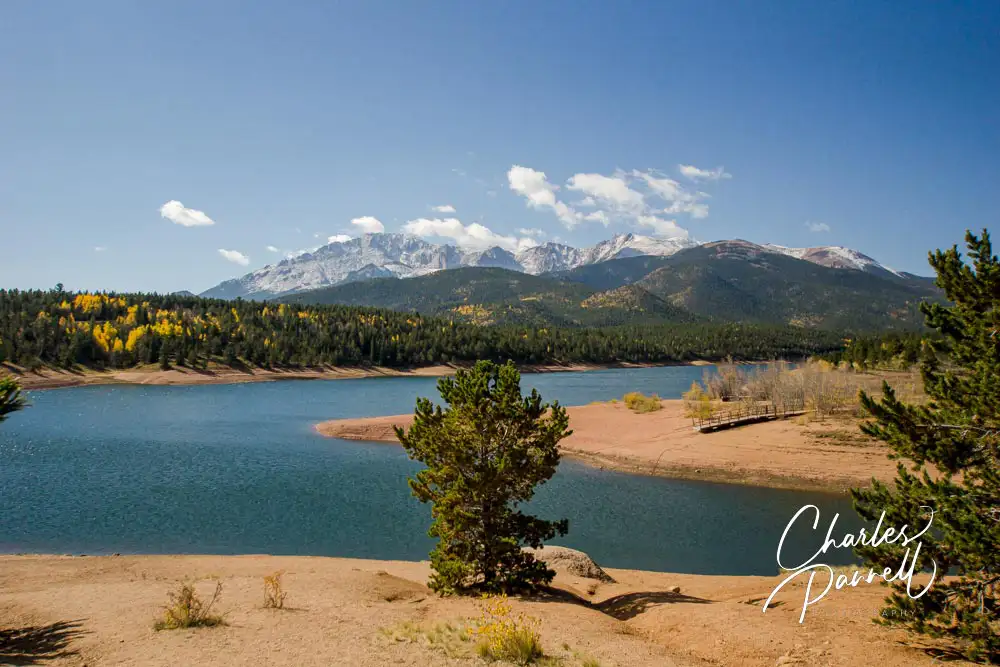
Crystal Reservoir
Crystal Reservoir
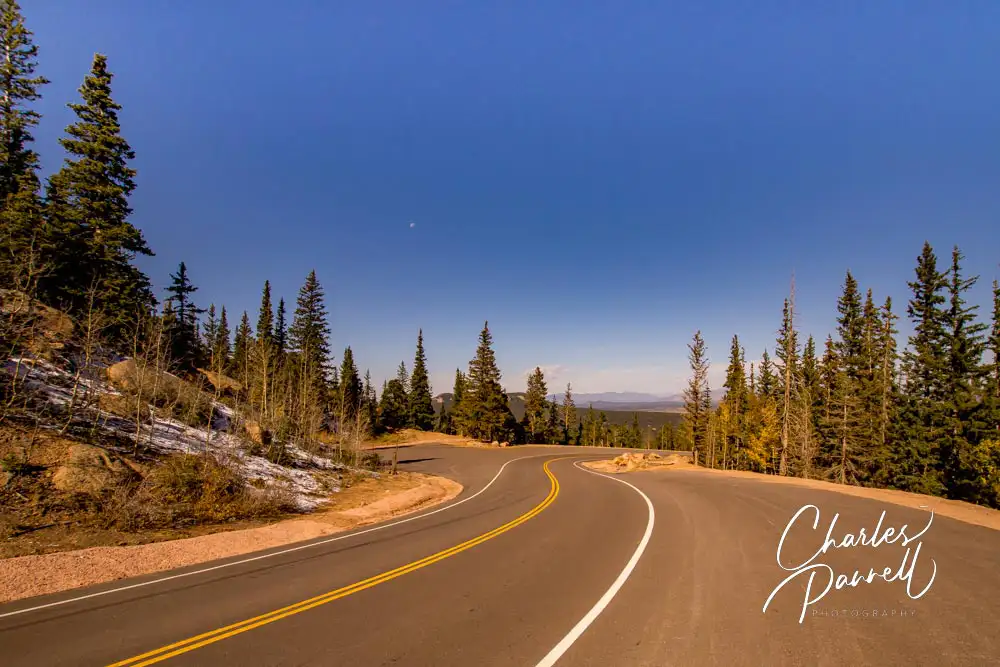
The 20-mile route starts at 7,800 feet and climbs to the 14,115-foot summit with lots of scenic overlooks along the way. Pikes Peak is first visible around the three-mile mark as the highway winds through Pike National Forest.
The Crystal Reservoir Visitor Center is located at the six-mile mark. Accessible parking is available on a level asphalt patch and there are accessible vault toilets in the parking lot. There’s level access to the visitor center and gift shop, and some nice accessible picnic tables on a cement slab next to the visitor center. And there’s also a short 200-yard paved pathway down to the boat ramp, which offers a nice view of the reservoir. The path to the right of the visitor center winds past some accessible restrooms and also dead ends in the reservoir. It’s about a .2-mile round trip hike.
The road begins to slowly climb up the hill past the Crystal Reservoir Visitor Center, and the Halfway Picnic Area is about four miles ahead on the right. At first glance this stop appears to be a no-go for wheelchair-users as there are no accessible parking spots or restrooms along the main road. That said, if you turn down the dirt road just before the parking area there’s a nice secluded accessible table next to an accessible vault toilet. And there’s a large level area to park near the facilities.
Glen Cove and Beyond
The Glen Cove Lodge
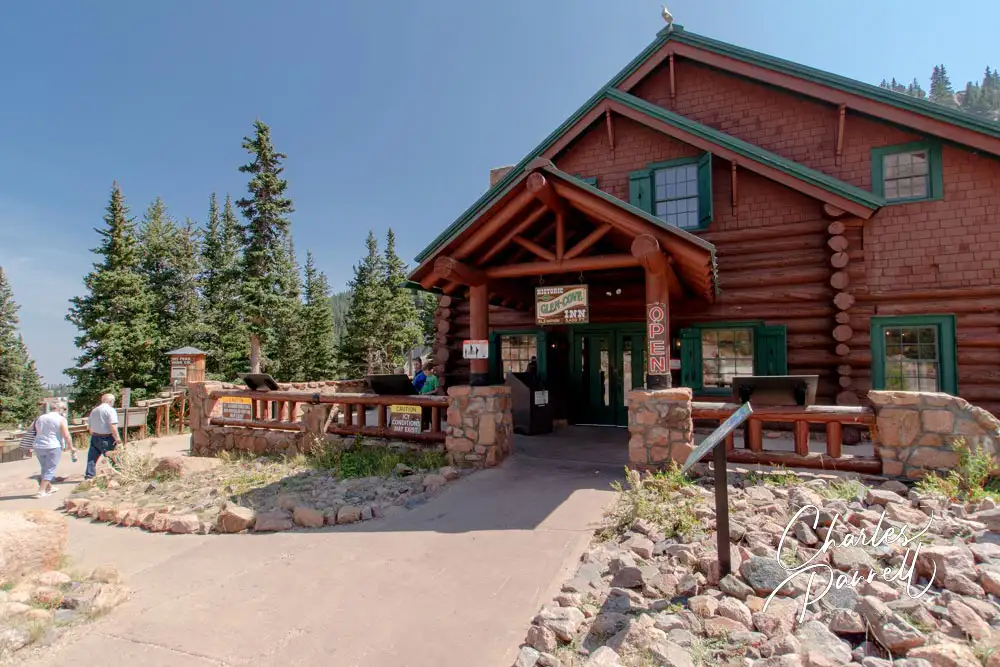
Glen Cove, which is located near mile 13, is also worth a stop. There’s accessible parking in front of the lodge, with ramp access to the front door. Inside there’s plenty or room to maneuver around the gift shop, and over to the small café which offers burgers, hot dogs and snacks. An accessible family restroom is also located inside. A small picnic area with accessible tables on a cement pad is located on the the right side of the building. Glen Cove is also the site of the mandatory brake check on the way back down the mountain.
As you climb up the mountain past Glen Cove you get a real sense of the the elevation gain. After mile 14 there’s a lot of exposure and precious few guardrails, so if you’re skittish about heights it’s best to turn around at Glen Cove. Alternatively you can take the shuttle bus from the mile 7 parking area. Advance tickets are required to take the shuttle, and a lift-equipped bus is available upon request. Shuttle tickets can be purchased at https://coloradosprings.gov/pikes-peak-americas-mountain/page/tickets-and-reservations.
Be sure and stop at the pullout near mile 16 for an impressive view of the switchbacks below, as well as Pikes Peak Reservoir and the Platte River Valley. And as you near the top, be on the lookout for big horn sheep
At the Summit
At the top there’s accessible parking and barrier-free access to the Summit House, which was constructed in 2021. Inside there’s level access to the visitor center, a gift shop, a cafeteria and accessible restrooms. The cafeteria serves up sandwiches, burgers and soup, but their homemade doughnuts are a must on any Pikes Peak adventure.
Save some time to browse through the interpretive exhibits which include information on the history, geology and climate of Pikes Peak, as well as an entertaining story about the first woman to summit the mountain — “the bloomer girl”. And don’t forget to take the elevator upstairs for more spectacular mountain views before you head back down the mountain. And when you head downhill, you’ll be treated to an entirely new set of windshield views!
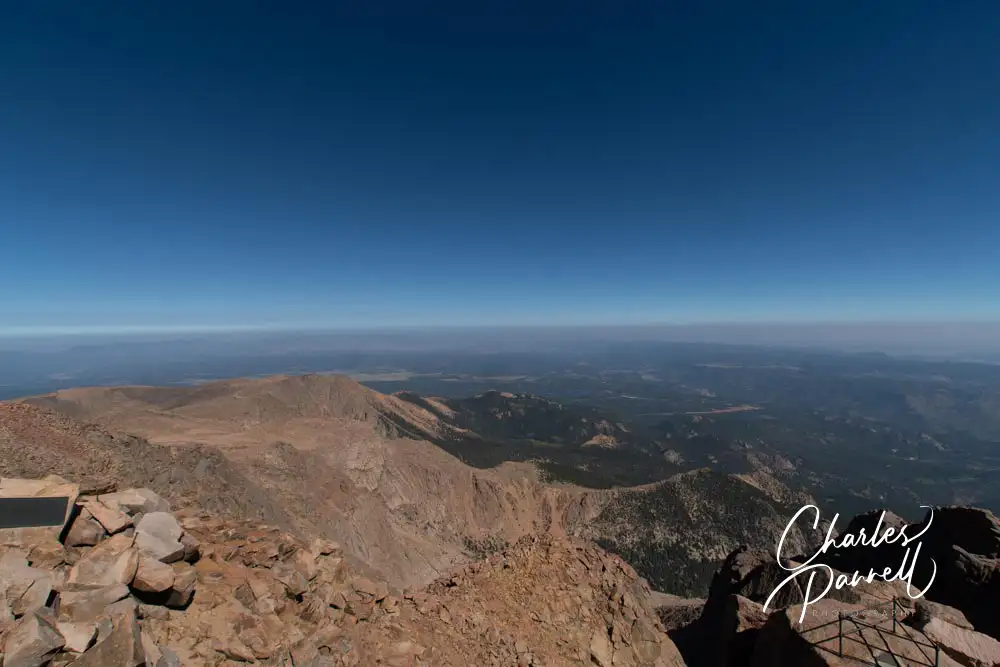
View from the summit of Pikes Peaks Highway
Barrier-Free Travel
Utah National Parks for Wheelchair-users and Slow Walkers
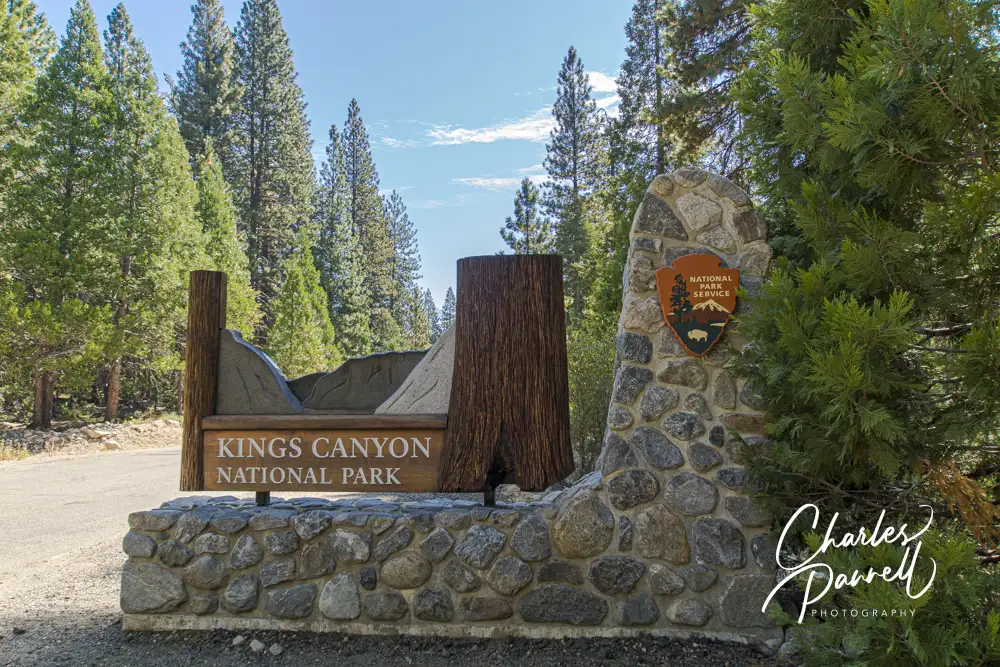
If a trip to the giant sequoias is on your spring travel agenda, then look no further than Kings Canyon National Park . Often overshadowed by the Giant Forest in nearby Sequoia National Park, the Kings Canyon section of the park offers an equally impressive stand of Giant Sequoias. And like its Sequoia National Park counterpart, the Kings Canyon grove boasts an accessible trail for wheelchair-users and slow walkers. So pack a picnic lunch, hit the road, and enjoy a visit to the Kings Canyon sequoias this spring.
Get Your Bearings
Known as the gateway to Kings Canyon National Park, Grant Grove is home to Giant Sequoia groves that were logged back in the 1800s, as well as stands of timber that were preserved for future generations. From Fresno, it’s just an hour drive on Highway 180 to the Big Stump Entrance of the park. From there it’s just a short drive to the Kings Canyon Visitor Center.
Accessible parking is located next to the Kings Canyon Visitor Center, with curb-cut access up to the sidewalk and level access over to the building. Inside, there’s plenty of room to maneuver a wheelchair around the ranger information desk, small book store and interpretive exhibits. There’s also level access to a small theater where a film about the park runs throughout the day.
From the visitor center, head over to Grant Grove Drive, which is located off Highway 180, across the street from the road to Crystal Springs Campground. This short but scenic route leads through a Giant Sequoia grove and terminates in the General Grant Tree parking lot. Even if you are unable to navigate any of the trails in the grove, this drive is a must-do, as it boasts several pullouts and offers some excellent windshield views of the grove. It’s a good way to get an up-close-and-personal look at the Giant Sequoias, even if you are unable to get out of your vehicle. The view from the General Grant Tree parking lot isn’t bad either.
Hike Around the Kings Canyon Sequoias
Trail to the General Grant Tree
One of the main attractions in this grove is the impressive General Grant Tree. This 1,700 year-old stately giant is 40 feet wide and towers 268 feet above the grove. And for a closer look, there’s a half-mile loop trail that leads out to the iconic tree.
The paved trail first passes a grove of young sequoias, then circles the gigantic Fallen Monarch sequoia, before it reaches the General Grant Tree midway along the route. Although the trail isn’t entirely level, it’s generally doable for most folks, with plenty of benches to sit and take a rest along the way. That said, the trail that leads around the back of the General Grant Tree is steep and not accessible, but you can still get a nice view from in front of the tree.
After the trail passes the General Grant Tree, it winds around the Gamlin Cabin, which was built in 1872 by a pair of brothers who grazed sheep in the area. The trail then edges by the Centennial Stump (a 16-foot section of this tree was displayed at the 1876 Centennial Exhibition in Philadelphia), and passes by the other end of the Fallen Monarch, before it returns to the parking area. As an added bonus, the grove is shaded, so it makes for a nice stroll even in the midday sun. And it’s the perfect way to top off a springtime visit to the Kings Canyon sequoias.
Barrier-Free Travel Yosemite, Sequoia and Kings Canyon National Parks for Wheelers and Slow Walkers